New to me 85' 24' Offshore (Project)

jbrinch88

Well-Known Member
Joined
Feb 28, 2014
Messages
351
Reaction score
17
Points
18
Location
Long Island, NY
shauncooper said:
Got any further on the project?

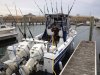
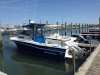
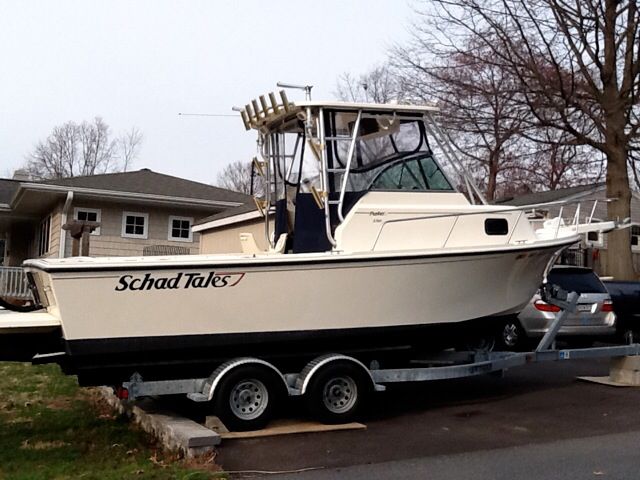
Got my new radar, autopilot and shore power installed today, so just about ready to get her wet for the first time this season.

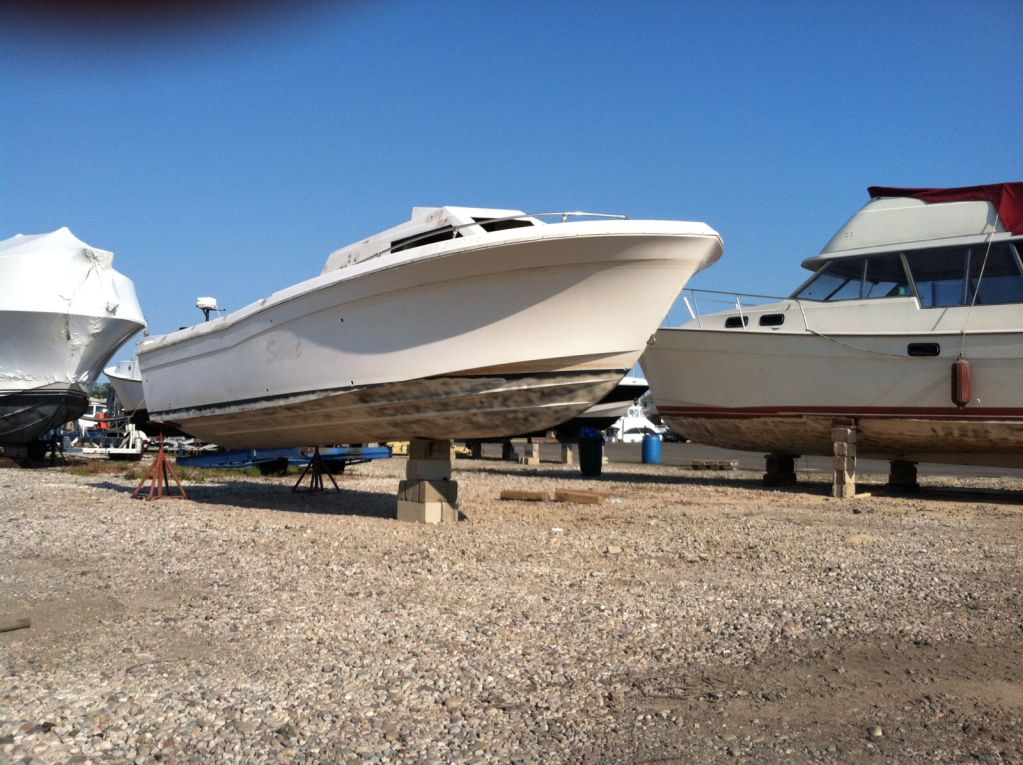
I haven't touched the boat in weeks unfortunately. I've been working 7 days a week, have to make the extra money when I can. I walk past the boat everyday though thinking about how I want it to come out.

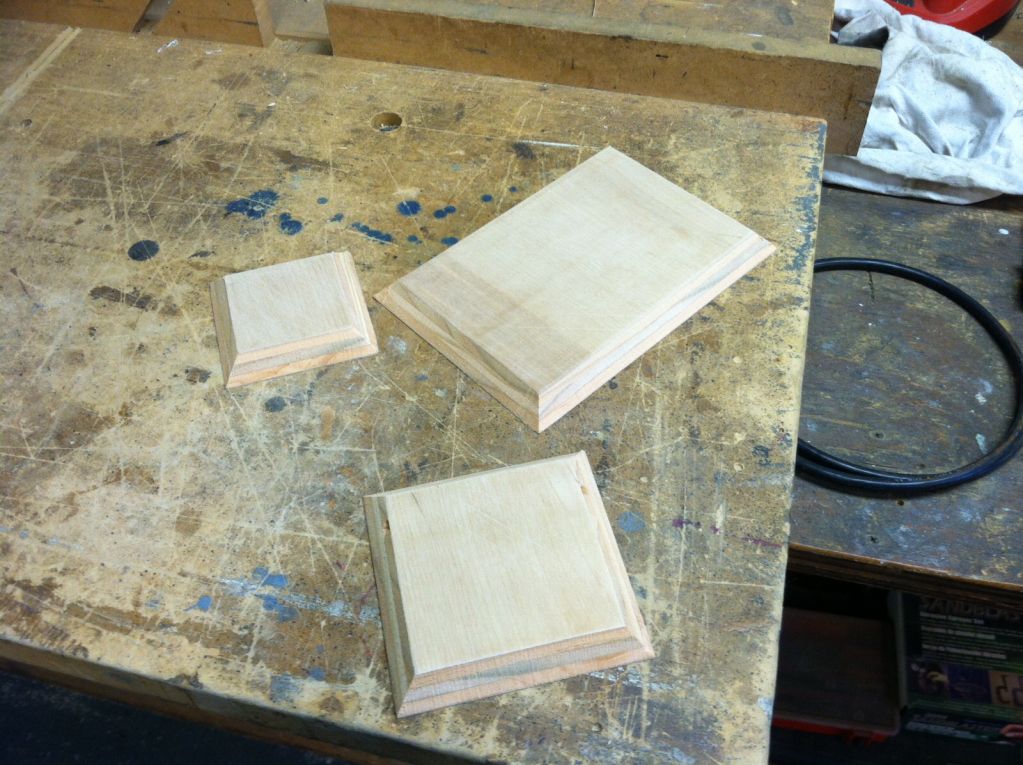
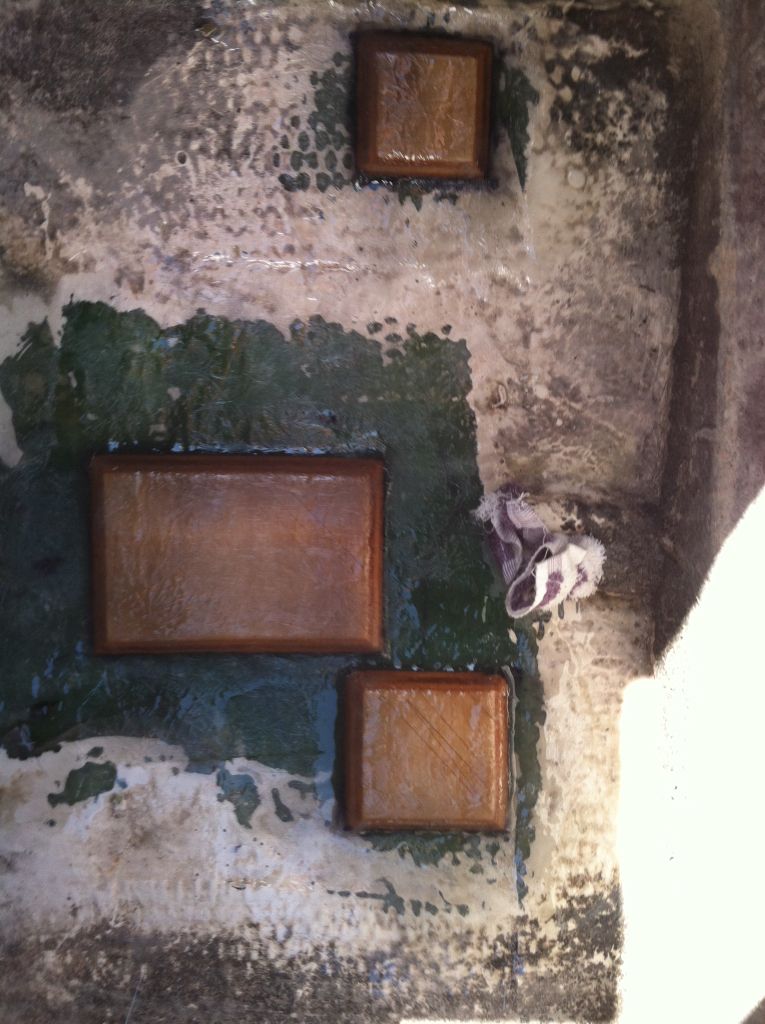
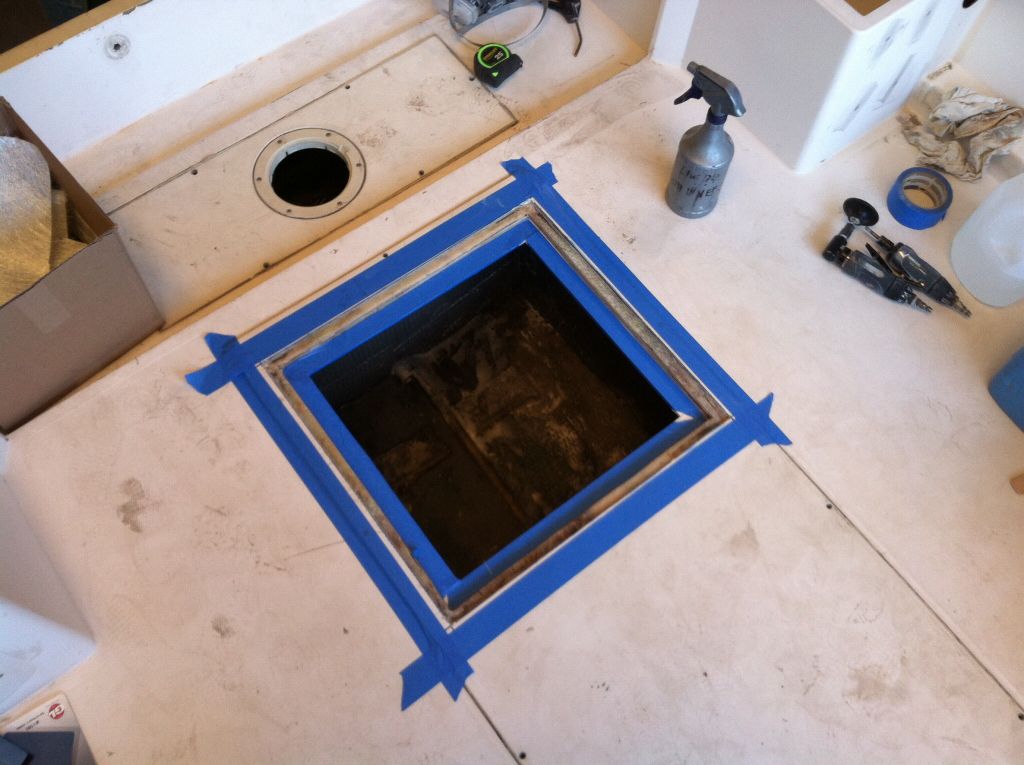
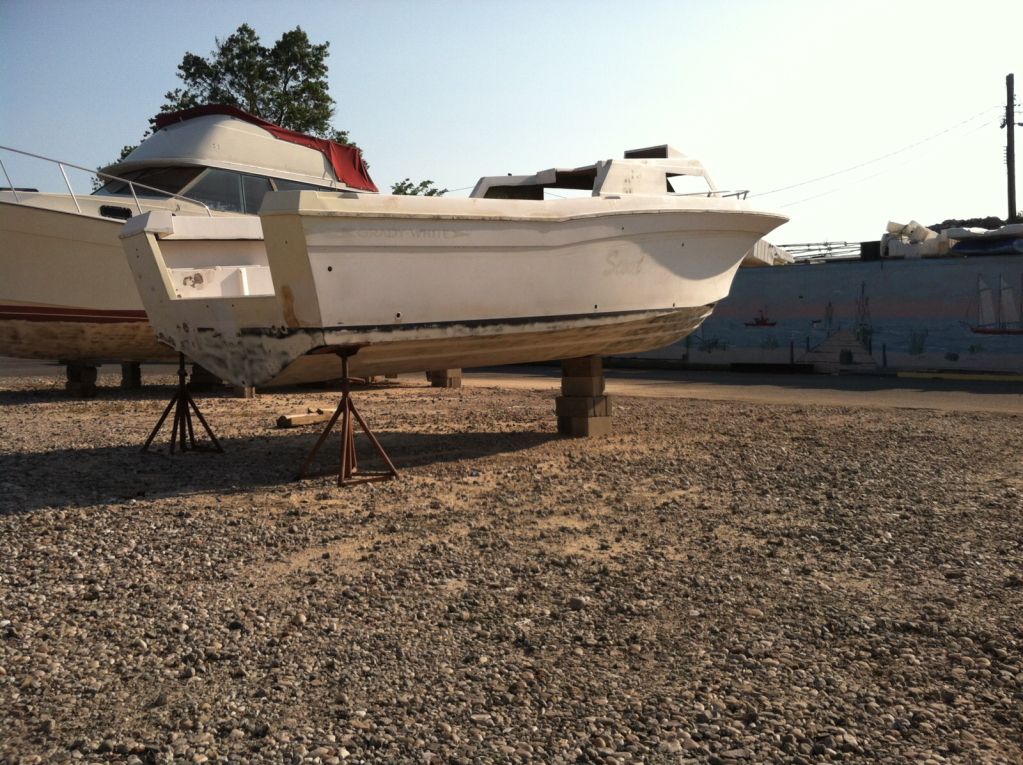
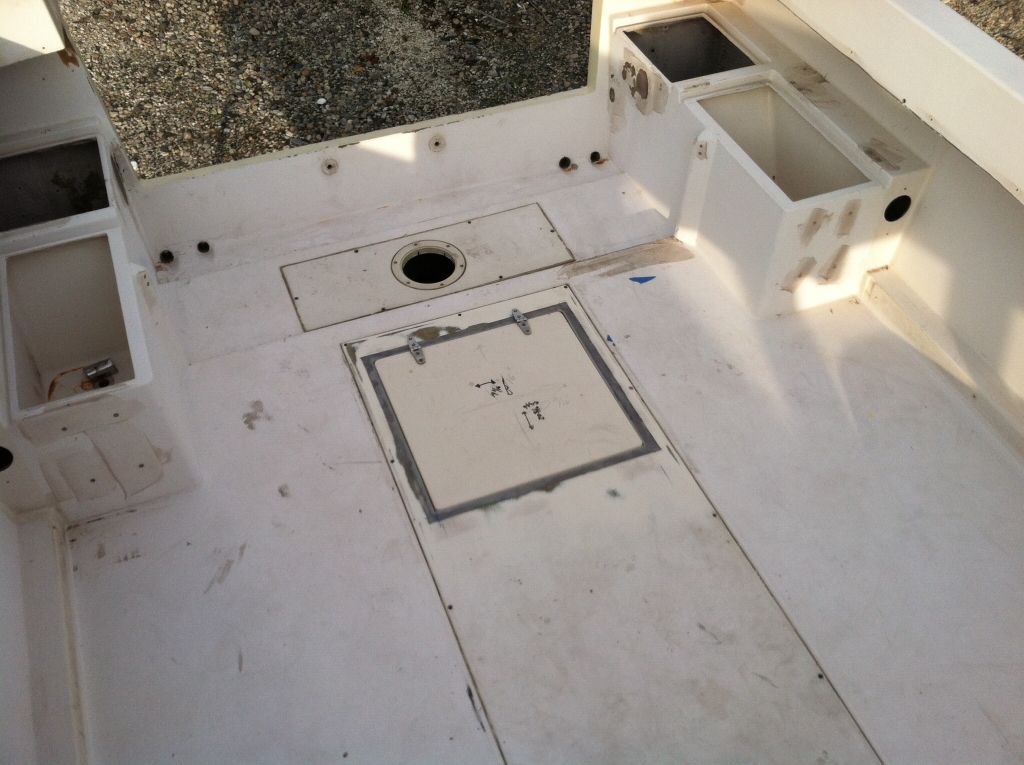
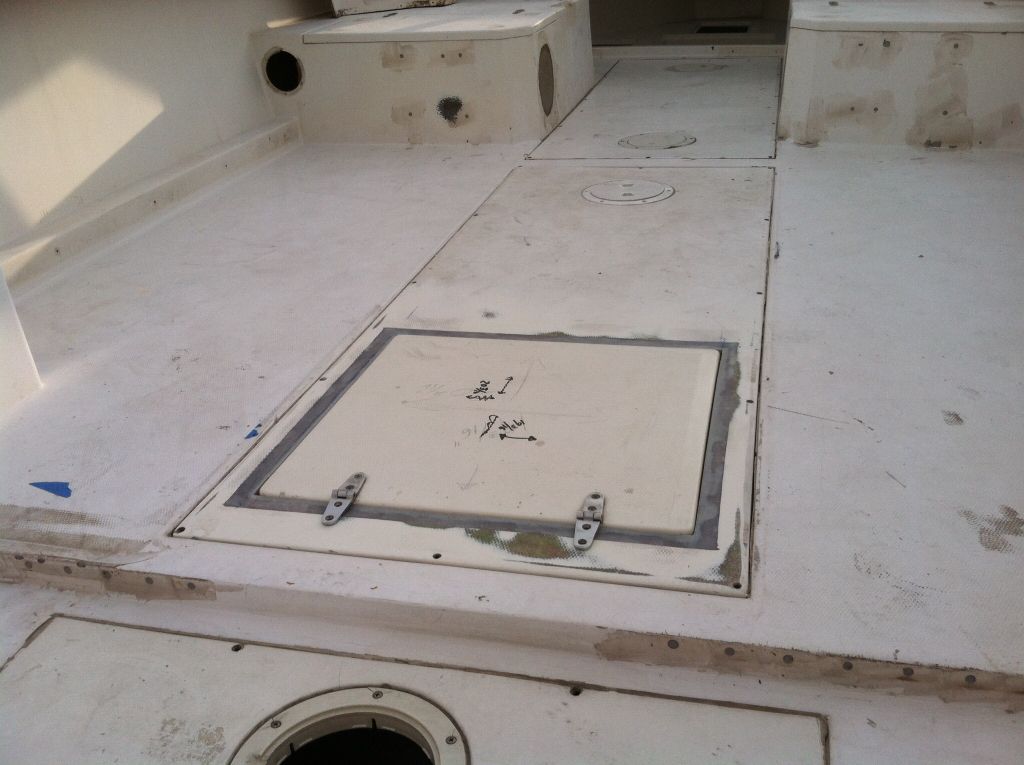
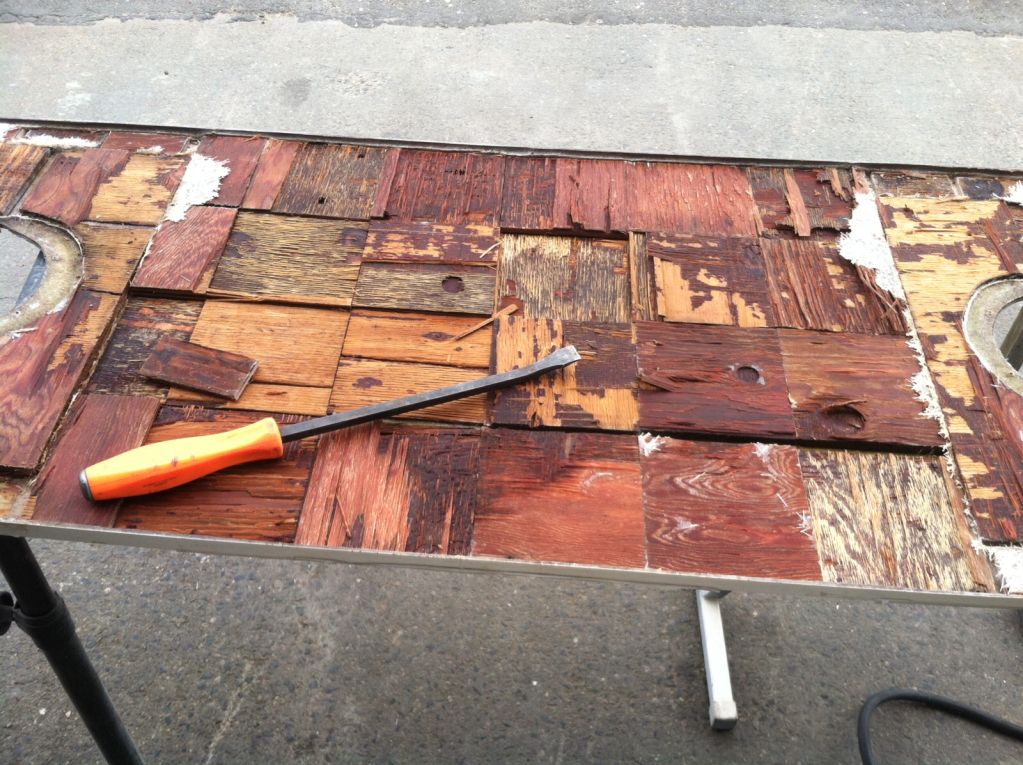
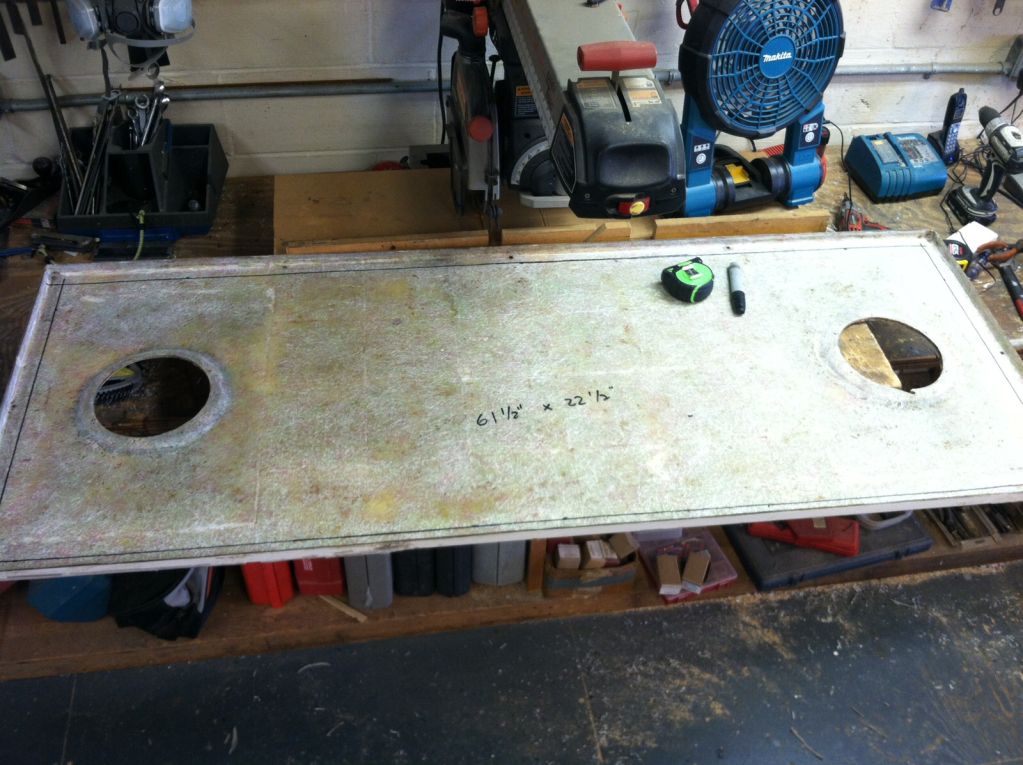
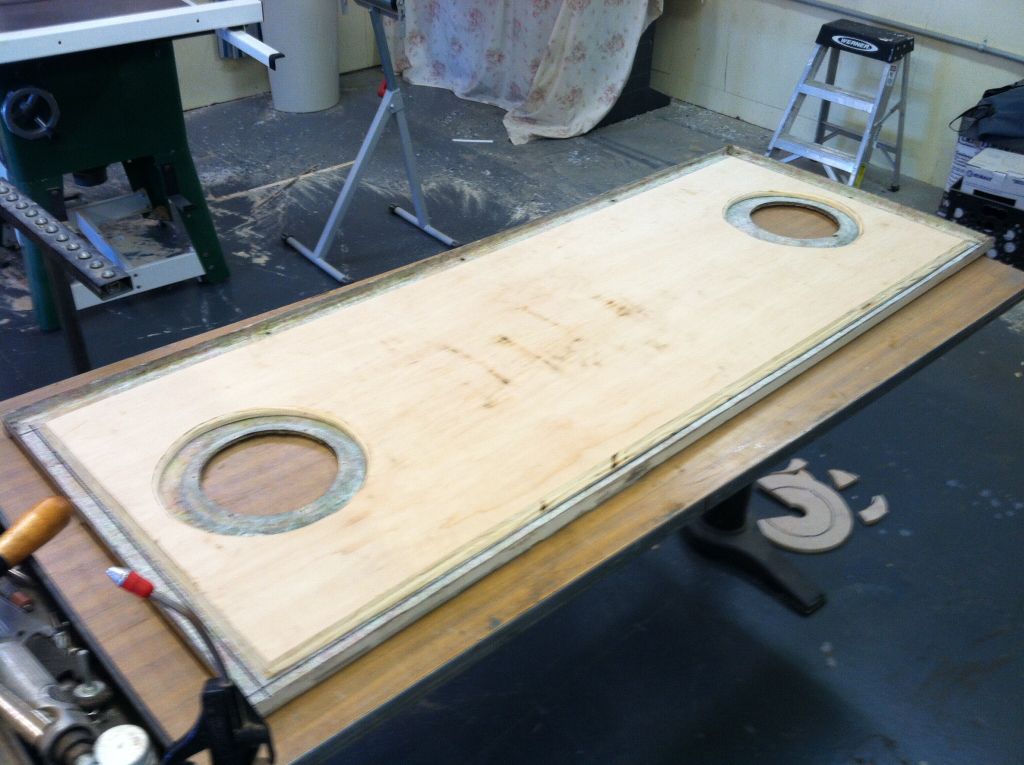
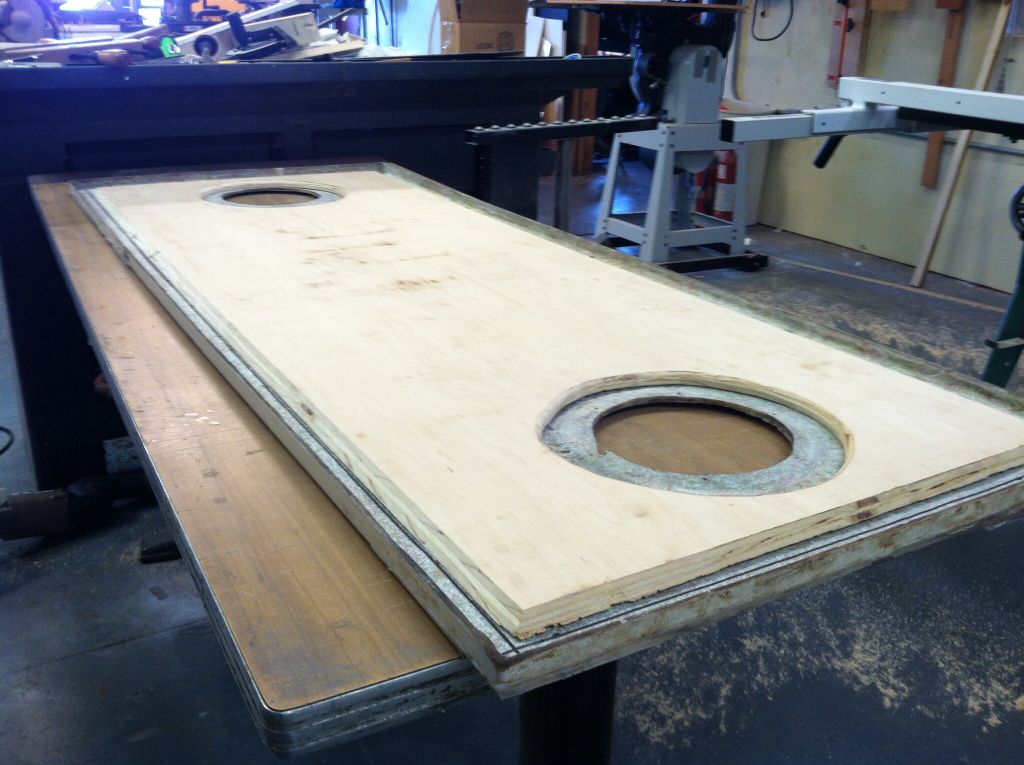
Sucks, but it'll slow down for me more towards summer and I'll get back on it. All the major holes are filled and sanded, just need to go over them again with filler.

We have like 7 or 8 Grady's in the yard, and the more I look at them the more I want to keep the original color.
 

shauncooper

Well-Known Member
Joined
Jul 14, 2012
Messages
66
Reaction score
0
Points
0
I hear you on keeping the original color, nothing wrong with original grady colors. Much less work and easier to maintain too!
 

shauncooper

Well-Known Member
Joined
Jul 14, 2012
Messages
66
Reaction score
0
Points
0
Some further inspiration for your project...finally got the boat in the season slip
 

Attachments

  • image.jpg
    image.jpg
    1 MB · Views: 4,430
  • image.jpg
    image.jpg
    925.6 KB · Views: 4,429

jbrinch88

Well-Known Member
Joined
Feb 28, 2014
Messages
351
Reaction score
17
Points
18
Location
Long Island, NY
Was able to squeeze in half a day today. Mostly grinding some previous glasswork. I made some backing blocks out of 1/2" birch for the bilge pump, thru-hull, and future transducer. Happy to at least put in a little time.

6e5f94dfdeadd9410645519184f7e291_zps80f63259.jpg

141465c6b434c057c494c41e2b60987e_zpsb806effc.jpg
 

jbrinch88

Well-Known Member
Joined
Feb 28, 2014
Messages
351
Reaction score
17
Points
18
Location
Long Island, NY
Had an idea tonight. Being that the electronic head I want to install probably won't fit under the factory step/hatch in the cuddy, I figured why not use it for the hatch I want to make in the rear fuel tank sump.

It will be much less work than making a cover out of the cutout piece, and is basically the exact size I was going to make it anyway. For the head step/hatch, I will come up with something made out of starboard. Either a piece that slides into a groove, or an actual hatch like the factory one, but able to clear the head.

Anyway here is a pic to show what I came up with:

dbea90a62523b3c2288576d01f8140fa_zps075943bf.jpg

d8791e30ba6a0345d6bc1c4c19f4baa3_zpsb986d5df.jpg
 

jbrinch88

Well-Known Member
Joined
Feb 28, 2014
Messages
351
Reaction score
17
Points
18
Location
Long Island, NY
'84Offshore said:
Just read your entire thread........great job.
I know it will look better than new when you're done.

Thanks, little by little it will come together. Im hoping for it to be fully painted by the end of the summer so I can shrink wrap it and start rigging it over the winter. Hopefully I can get my hands on a motor locally in my price range and then I'll be fishing by next summer. Thats the goal anyway.
 

jbrinch88

Well-Known Member
Joined
Feb 28, 2014
Messages
351
Reaction score
17
Points
18
Location
Long Island, NY
In between sanding/filling today, took some measurements and cut out a hole in the rear fuel tank cover for my hatch. Going to work on making the lip for it tomorrow in between more sanding/filling.

a22ec171f3fbe68e37eafb85d120a3d0_zps723e3342.jpg
 

jbrinch88

Well-Known Member
Joined
Feb 28, 2014
Messages
351
Reaction score
17
Points
18
Location
Long Island, NY
Worked on making the lip for the hatch today. First I ground down about 1" in around the entire hole and about 1/4" deep.

4ee4ae0a0859e930a8e1963f2fc73c59_zpscf6d7b1d.jpg


Then I "picture framed" the back of the hole with starboard leaving 1 1/4" sticking out for a lip, which I can cut and make it shorter when its all done.

12da647f8300fd19bbe910fa170f8814_zpsc08ce656.jpg

b550f1b2e477cd28fb48701cc8ec0387_zpse1e6e602.jpg

908785ee72939c70809a55074fd47c9b_zps592d5e83.jpg


Figured I'd do the work in the boat, it naturally made a good workspace where it was. What it "should" look like.

be578e8cf34d8c79bf9d21a639168413_zps3b4134e8.jpg


Taped it off just to make sure the glass won't stick to the starboard (I've always used aluminum and wax combo but didn't have any).

e601b3fafdc768b57ff809f15d7725b7_zps7365a14d.jpg


And laid down a bunch of glass. The lip needs to be 1/4" thick to make the hatch even with the floor, doubt I laid enough so after I grind it all down I'll lay some more down.

72e50faa865db7cbd55c18eaedb8a747_zps4ccfd0fa.jpg


Also decided to go with a cream/light tan color for the whole boat. Pretty much how the Parkers usually come. That and a dark navy blue top will look good I think.
 

'84Offshore

Well-Known Member
Joined
May 5, 2005
Messages
375
Reaction score
2
Points
0
Location
Long Island, NY
Very nice work!

So if I understand this........you're going to remove the starboard picture frame after you install the glass?
 

jbrinch88

Well-Known Member
Joined
Feb 28, 2014
Messages
351
Reaction score
17
Points
18
Location
Long Island, NY
'84Offshore said:
Very nice work!

So if I understand this........you're going to remove the starboard picture frame after you install the glass?

Exactly, the starboard is only to create a shape or ledge for the glass. Once it cures you remove it and you have your lip for the hatch. Once I grind it all down and remove the starboard I'm going to add more glass to the bottom of the lip and span it out a few inches all around pretty much where the starboard was. It'll make it a lot stronger.

Hardest part about this is getting a clean inside/outside edge on the 90* parts of the lip.

You can use this method to fill holes or create any shape you want really. Most people use aluminum with wax on it, tape, or plastic like I did, really depends on the size and what you're trying to do.

For most of the smaller holes on the boat I'm just using tape on the opposite side and filling it with resin and filler (fiberglass dust) combination.
 

jbrinch88

Well-Known Member
Joined
Feb 28, 2014
Messages
351
Reaction score
17
Points
18
Location
Long Island, NY
I have an opportunity to get my hands on a motor for cheap at my yard. It is a 1999 225 hp Johnson FICHT fuel injected outboard.

It's currently on an old beat 1979 22' aquasport that we have on craigslist. My boss is selling the boat/motor for 2500.00.

I took a look at the engine after work today. I know it needs a high pressure fuel pump (about 6-700 I think our cost). Did compression and all cylinders were between 110-125 (motor hasn't been ran in over a year). Lower unit oil is nice and creamy so I'd have to pull it and pressure check it and see which seal is bad. Flywheel is missing a tooth, skeg has a chip on the very end of it which I wouldn't mind just grinding down and reshaping, and the motor cover has one of the ribs broke off of it.

I would offer my boss 500.00 for the engine and obviously fix everything myself. Wondering if it is worth it or should I just dish out 3-5k on a well maintained running engine. I'd prefer an older carb'd outboard late 90's ish but I'm no where near ready for a motor yet anyhow. Just wondering if I should jump on this or not.

I do remember this engine running a few years back.
 

jbrinch88

Well-Known Member
Joined
Feb 28, 2014
Messages
351
Reaction score
17
Points
18
Location
Long Island, NY
Got the bottom stripped today. To my surprise very little blistering/pitting which means less work!

ee153415f50cd47066aca1e98bffed3a_zpsc9e681ce.jpg

e50111a7d9e5f964f65b6cefcb5ff4ee_zps99fc6f7f.jpg


Also did my old mans 32' Bayliner while I had everything setup.
82d66a98669294b259b8b34fdaeaf0f7_zps9fd47c36.jpg
 

jbrinch88

Well-Known Member
Joined
Feb 28, 2014
Messages
351
Reaction score
17
Points
18
Location
Long Island, NY
Hatch is almost done. Still have to lay down some filler on two of the sides to get a clean edge ( you can see in the picture if you look close). Then I have to do a lot more sanding, it's a pretty snug fit right now so once its primed and painted it probably wouldn't close.

I laid it all in the boat and jumped on it and didn't fall through so I'd say its pretty strong!

a2afb6839e897d84fe22bd07727e182e_zpsea80d247.jpg

a44eeae3e39615deba705f89dd50894f_zps5a859b37.jpg

2f52f0acb7391a1bff2b376842ca4182_zps1c75c4d5.jpg

344c9f81455e2f5f0b8b75bae4735ab7_zps7c5648ef.jpg

9fcea5e30c8228f2b54101f43ced4152_zps5674c428.jpg


You can see all the filling I've been doing on the boat in some of these pics. Years of people drilling holes all over the place.
 

jbrinch88

Well-Known Member
Joined
Feb 28, 2014
Messages
351
Reaction score
17
Points
18
Location
Long Island, NY
Haven't worked on the boat in almost a month. Busy with work, this that and the other thing. Started working on it this week again just doing more sanding/filling. I've gotten pretty good at it now and seem to be moving along nicely.

Also found a 1993 225 Evinrude Ocean Pro that I may potentially be buying. It's a runner too with decent compression numbers still. Guy seems to be giving me a pretty good deal on it including all the wiring/cables/gauges and shipping! I know these engines are reliable and cheap/easy to work on which is why I'm such a fan of them. Id go through the whole thing and replace most of the obvious stuff then run the crap out of it until it goes.
 

jbrinch88

Well-Known Member
Joined
Feb 28, 2014
Messages
351
Reaction score
17
Points
18
Location
Long Island, NY
Started the "re-core" on the front hatch today. Still have to do the rear hatch and the small cover that goes over the bilge pump area. I used a sheet of 1/2" maple for the material. The old glass came off pretty easily since it wasn't done right but the old wet wood took a little while to get off.

3c674a06e2f202fc23aa56a361bf20eb_zpsabeca88d.jpg

65794ba74961a67dd3f2257a975ed37f_zps79e3c444.jpg

f58b4a963f753db8ecc49786efc21b92_zpsab3309f0.jpg


After I got it down to bare glass, I made my measurements and cut out a sheet of 1/2" plywood. I left about 1 1/4" around the perimeter where the screws go so they wouldn't end up hitting the wood. I also did the same thing for where the inspection plates go. Once i had my sheet cut out, I routed the edges where the inspection plates go, and I put a 45* edge all around the perimeter to make it easier to lay the glass.

Once I had everything ready I laid down two sheets of glass, then loaded one side of the plywood with resin and laid it down with a bunch of blocks on it. Once it cures, I'm going to put down two more layers of glass over it while also adding more to the edges and lips around the perimeter and where the inspection plates go.

943c5e3060903ab775d77d54bbf75781_zpsd7f44a0f.jpg

7fd538b61b3c56941de32ca07261c99f_zpsf9d81d0b.jpg

8fa7e930ed94482f3817232c07ca869e_zps3b27caac.jpg

335985647e66fe156fdb5c7da2ab94e8_zpsb4f10cfc.jpg

7e774ce674a0e69338c803d47664ebbf_zps42401d2a.jpg
 

jbrinch88

Well-Known Member
Joined
Feb 28, 2014
Messages
351
Reaction score
17
Points
18
Location
Long Island, NY
Finished the bottom of the second hatch tonight. Laid 2 layers of glass down with the 1/2" plywood on top and let it set overnight. Today I laid two more layers of glass down. I will see how strong the cutout part is tomorrow with 4 layers of glass down and if its flimsy at all I will lay a couple more layers down.

7816d1359986ee9044764d69aba69040_zps88156ffd.jpg

ffc8de25f751b7fb6d72a84a9055539a_zps2831dfff.jpg

7120c1faff6ddc8eb4b69386a7fba5bc_zps404a8034.jpg

9f30c3527ae70f516c81ee8fa1774c9c_zpse990e011.jpg