New Enclosure

Fishtales

Well-Known Member
Joined
Jan 31, 2005
Messages
7,583
Reaction score
1,179
Points
113
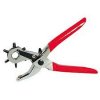
I received my new enclosure today. I need to punch the "lift the dot" and circular snap holes and install.
Wondering if anyone has done this. Rather than fit on the boat, I'd like to use the old enclosure as a template (what the canvas manufacturer did to cut and sew it) and pre-punch and install the dots and snaps.
I'm thinking it should be fine, looking for input before I start as once I start I'm pretty much committed.

Thanks
 

glacierbaze

Well-Known Member
Joined
Jul 6, 2012
Messages
2,344
Reaction score
599
Points
113
Age
75
Location
Chapel Hill and Pine Knoll Shores, NC
Model
Seafarer
I would attach around the top edge, and see how it hangs, and lines up. Easy to do if you have tracks at top edge. Use stickers, paper clips, etc., to mark where the snaps would be if you tried to copy the old enclosure.
Personally, I would attach the snaps on site.
 

Ky Grady

GreatGrady Captain
Staff member
Joined
Mar 1, 2006
Messages
2,918
Reaction score
1,272
Points
113
Location
Berea, KY/Cross, SC
Model
Seafarer
Yep, what glacier said. I put all mine in the upper tracks and zipped together and let hang down and matched the new snaps that I installed to the existing snaps. I used a old leather punch to punch the holes then a snap tool to install the snaps.

IMG_1923.JPGIMG_1924.JPG
 

wspitler

GreatGrady Captain
Joined
May 16, 2011
Messages
1,317
Reaction score
292
Points
83
Location
Inglis, FL
Model
Express 330
I did it in place on the boat and was told to stretch by hand and let them hang for a while first. Did that! Fits great, but I'd be hesitant to do it from the old ones.
 
  • Like
Reactions: Ozz043

seasick

Well-Known Member
Joined
Aug 19, 2008
Messages
9,133
Reaction score
1,308
Points
113
Location
NYC
You can use the old one to temporarily mark the snap locations. Then I would go to the boat and install a snap in the center and work from there. As mentioned, ambient temp is important especially for clear vinyl. The canvas and vinyl will shrink when cold and the clear parts may not lay flat if too cold. The chances that the new and old pieces line up exactly is slim.
I use a vice grip type of snap installer. It is a lot less expensive than the model shown and it works fine for non production work. The downside is that you have to prepunch the 1/8 inch pilot hole whereas the pro tool punches and crimps at the same time. It also does not have changeable jaws so some types of snaps wont work with it.
Here is an example of the snap tool I use.
https://www.amazon.com/Ironwood-Pac...ap+tool&qid=1547903459&sr=8-5&tag=googhydr-20

For the hole I use a material punch tool and not the die and bit type ( they work ok but are inconvenient since you have to hammer the pin with the die up against something firm like a block of wood.
 
  • Like
Reactions: Boatino2

Fishtales

Well-Known Member
Joined
Jan 31, 2005
Messages
7,583
Reaction score
1,179
Points
113
Thanks folks. Will do that in the spring.
 

Fishtales

Well-Known Member
Joined
Jan 31, 2005
Messages
7,583
Reaction score
1,179
Points
113
I've decided to match up the front two small pieces that are between the windshield and hard top. There are a series of lift the dot snaps on these two pieces only. The rest of the enclosure has standard barrel snaps. The lift the dot snaps require a special tool and take longer to install. I'd rather do this in my workshop than on the boat. I talked with A&J and they are going to provide the tool to install them. I think this will work out fine. The studs slide in the windshield frame, so I can make any small lateral adjustments. I believe I can line them up (the original pieces were used as templates to make the new enclosure, so I expect them to be identical in size. A&J is letting me borrow the tool for this job. Over $600 on Amazon to buy. In the spring I will install the barrel snaps on the boat after hanging. I have the spiral wheel to cut the holes as well as the snap tool. These will go fast and can be easily done on the boat.

As for the enclosure. A&J did a super job. Strataglass with the ivory (standard GW) color stamoid. They look great. Will order up the IMAR cleaner and polish as folks suggested. The zippers are really nice. I like the new straps that hold the rolled pieces up. These were made from strataglass in the past and I think over time scratched the glass a little in the strap area. The new straps have the stamoid material on one side and a soft fabric on the inside (where they interface with the rolled up strataglass). This is a nice touch and should stop any scratching. I'll take some pics in the spring.

Thanks to all for your input....
 
  • Like
Reactions: Ky Grady

Fishtales

Well-Known Member
Joined
Jan 31, 2005
Messages
7,583
Reaction score
1,179
Points
113
Well got to install the new enclosure in the tracks and zip up. AJ did a nice job, it fits nice. I'm going to start at the windshield and work backwards installing the snaps and lift the dots. If anyone has installed the a new enclosure, advice how to install would be appreciated. It was only in the high 40s here today but nice under the shrinkwrap. I'm thinking I will only do the lift the dots tomorrow (front two small pieces) unless it is warm under there. I want the enclosure to stretch a bit in the heat before I do the snaps.
 
Last edited:

ocnslr

GreatGrady Captain
Joined
Jan 31, 2005
Messages
1,907
Reaction score
43
Points
48
Location
Fort Myers Beach, FL
Model
Islander
We had a custom top installed in Oct 2002, and full enclosure. We stayed with regular snaps on the bottom of the back sections, but went with lift a dot on the sides and front. Much more secure, and much easier to get on and off. And little corrosion problem, which is common in the snap sickets.

Strongly recommend that you consider switching.
 

RussGW270

GreatGrady Captain
Joined
Mar 5, 2019
Messages
1,761
Reaction score
253
Points
63
Age
57
Model
Islander
Pictures or it never happened ;)
 

Fishtales

Well-Known Member
Joined
Jan 31, 2005
Messages
7,583
Reaction score
1,179
Points
113
We had a custom top installed in Oct 2002, and full enclosure. We stayed with regular snaps on the bottom of the back sections, but went with lift a dot on the sides and front. Much more secure, and much easier to get on and off. And little corrosion problem, which is common in the snap sickets.

Strongly recommend that you consider switching.

Thanks for the input. My original enclosure had the lift the dots on the two small pieces between the hardtop and windshield. I'm going to stay with these as I believe they have better holding power especially when water is coming over the bow. The side pieces and aft pieces all used snaps. The only ones I'd consider changing are the larger side piece that attach to the windshield tracks like the front two. I have a few issues with the lift the dot. While a much better snap, they are a PIA to snap as they get older. I was always wrestling with them each year to get them all locked down. Also a bit of a pain to unsnap when older. They also rust a bit as you state. I never had an issue with the round snaps on the side and I like them on the walk as there is no nub sticking out to catch clothing etc.
So I'm going to stay with the configuration I had. It worked for me for 13 years, so why change.
 

Fishtales

Well-Known Member
Joined
Jan 31, 2005
Messages
7,583
Reaction score
1,179
Points
113
Measured the pieces on the boat and installed the lift the dot pieces. They came out super and are ready to install. The rest are snaps. I have the hole tool and the snap tool. Should be able to do it all on the boat. I plan to install the two front pieces and then zip up and hang the enclosure. Will do the snaps once the weather warms. Thanks for all the help guys.
 

RussGW270

GreatGrady Captain
Joined
Mar 5, 2019
Messages
1,761
Reaction score
253
Points
63
Age
57
Model
Islander
I do not see pictures... so therefore.. you know how that goes... :p

R
 

Fishtales

Well-Known Member
Joined
Jan 31, 2005
Messages
7,583
Reaction score
1,179
Points
113
Here you go. Lift the dot females installed.
These are ready to be installed on the boat. The material is ivory stamoid (same as a new boat). The color didn't come through in the pic.
 

Attachments

  • enclosure1.JPG
    enclosure1.JPG
    51.2 KB · Views: 32
  • enclosure2.JPG
    enclosure2.JPG
    52.8 KB · Views: 31
  • enclosure3.JPG
    enclosure3.JPG
    57.2 KB · Views: 29

Motivator

Well-Known Member
Joined
Feb 28, 2005
Messages
169
Reaction score
6
Points
18
I should be receiving my new enclosure from A&J soon and will be doing the same. On a scale of 1 to 10 with 10 being the most difficult, how would you rate the ease of installation? Like you, I have both types of attachment methods.
Also, what about the time required to complete the job? I am giving myself a day (with a helper) to complete.
TIA
 

RussGW270

GreatGrady Captain
Joined
Mar 5, 2019
Messages
1,761
Reaction score
253
Points
63
Age
57
Model
Islander
You guys make it look easy heh. I just realized, I live in Texas.. an enclosure may be too hot for me. To keep my costs under control.. lol.. don't tell my wife I said that...I may drop the enclosure.. see how it is without it (the hard top) and get it in a few months, before it gets cold.

Than I can do like you all do and add it myself ;)

R
 

Fishtales

Well-Known Member
Joined
Jan 31, 2005
Messages
7,583
Reaction score
1,179
Points
113
Hi,
Thanks. Ask A&J for the lift the dot snap tool. I bought the circular snap cutting tool on amazon for short money. I already had the crimp tool for the circular snaps.
It really isn't too bad. The first thing is wait for it to be warm enough so the enclosure is pliable. Then hang the entire thing and zip up. Check all the locations where you need to install snaps. The windshield front and sides are pretty straight forward. You can adjust the clips in the track if needed so you are ok if you are off a bit. That being so, try to get it right. I found the aft corner sections have a snap on the outside (triangular piece) that ties to a snap in the fiberglass. For my boat, it was critical that the triangular piece lined up with these locations. I adjusted the enclosure until I was happy with the alignment. This set the location in the tracks in the hardtop. I marked the lift the dots bullets on the windshield on the enclosure with a vertical pencil line. This locates the line top to bottom.
I used the punch tool from A&J and wanted to get it back to them. There is a line on it that you line up with the sew line to locate where to punch. You can match this up to your old enclosure to be sure. I then took the two pieces home and punched the holes. I installed the lift the dot female ends on the enclosure pieces.
I'm ready to install these now. It isn't quite hot enough, we only had that one warm day; so I'm waiting for this weekend when it is warm again. I will then install the two front pieces and snap into place. I plan to do the same again - put all pieces in place, check the critical locations on the triangular piece and then mark the big side sections. I'll probably take them home and repeat. Once I install these (quite a few snaps and easier to do at home versus under the shrinkwrap), I'll do the balance on the boat.

It really isn't that tough. Like woodworking - measure twice and cut once. You only get one attempt so be sure.
 

Fishtales

Well-Known Member
Joined
Jan 31, 2005
Messages
7,583
Reaction score
1,179
Points
113
The saga continues. I put the two front pieces on. Has to adjust some studs in the window frame a bit but they went on well.
I then reinstalled the big side pieces and marked the snaps. These are in the same windshield track. Before I did this I made sure the aft corners pieces and aft 3 pieces still where they should be to ensure I can hit all the screw male snaps that are in the glass. The only two of concern are the rear corner pieces. The triangular edges matches up now. Hope it stays that way..... More pics to come.

My only complaint is I am doing this under the shrink wrap. Was 69 deg here today. It had to be 75+ under the wrap. it is a PIA to work the bow under the wrap, but it is coming along.