Gas Tank Hatch Recore

'84Offshore

Well-Known Member
Joined
May 5, 2005
Messages
375
Reaction score
2
Points
0
Location
Long Island, NY
Considering "recoring" the deck over the tank on my offshore......

Have seen threads on this but maybe someone can point me in the right direction.......maybe post a link.

And.....being that I'm on long Island, what is the powest temp you can fiberglass at?

Thanks in advance........
 

JeffN

Well-Known Member
Joined
Jan 16, 2007
Messages
584
Reaction score
7
Points
18
Location
Nantucket, Ma.
Re: Winter Project

Offshore - I did mine last spring. Removed the old coring and replaced with end grain balsa. A composite might be better but shipping is an issue here on the island. I cut the core back around the screw holes that secure the panel to the structure below and filled those areas with putty and resin then drilled new holes. I also drilled out the holes below and filled them with resin/filler and drilled new to again hopefully stop and intrusion of water into the stringers. From the factory the screws were drilled right through the ply core leading to water intrusion. This should not be a problem anymore for me. As to resin I used West System and you can work that at a lower temp. maybe down to 40 but I can't remember for sure. I did mine in the spring so temp was not an issue. West was nice to work with as it does not smell much but it was pricey to do the job. It should make for a stronger bond than polyester but if I were to do it again I think I might just use polyester.
 

'84Offshore

Well-Known Member
Joined
May 5, 2005
Messages
375
Reaction score
2
Points
0
Location
Long Island, NY
Re: Winter Project

Not bad for Thanksgiving Morning.........
IMAG0192.jpg


IMAG0193.jpg


IMAG0194.jpg
 

JeffN

Well-Known Member
Joined
Jan 16, 2007
Messages
584
Reaction score
7
Points
18
Location
Nantucket, Ma.
Ah offshore you are bringing back simply delightful memories. When I removed my deck I could barely carry the darn thing it was so wet. No rot which I found surprising but a lot of wet. Looks good a little more time on the grinder you will be ready to go. The ply in yours and in pictures I have seen on other threads is very regular shaped. Mine for the most part were all square or rectangles but I don't think more than three were the same size. They put every piece of scrap in the building in mine I guess.
 

'84Offshore

Well-Known Member
Joined
May 5, 2005
Messages
375
Reaction score
2
Points
0
Location
Long Island, NY
I love Gradys but kinda surprised how they did this...........

Might need some advice on where to go after i clean it up...........

Do I lay fibeglass down before the plywood?
 

JeffN

Well-Known Member
Joined
Jan 16, 2007
Messages
584
Reaction score
7
Points
18
Location
Nantucket, Ma.
Granted we both got a lot of years out of ply but you might look into a core material of some type. As I mentioned I used the balsa. At any rate while I am no expert I then laid down a layer of mat and wetted it out. Next I mixed up a batch of epoxy laid it on and then put the core material down.There is a good thread somewhere here with pictures that someone did that might be helpful. As it turns out quite a number of us did this project last spring. I did mine on a work table but in the thread there was a picture of the panel inverted on the floor with a ply core covered with cement blocks to hold it until it set up. After the core was down I filled the screw areas where I had held the core back with a resin/filler. Next I laid on two layers of stitch mat. Sanded the edges and was done. I replaced the inspection ports while I was at it too.
 

'84Offshore

Well-Known Member
Joined
May 5, 2005
Messages
375
Reaction score
2
Points
0
Location
Long Island, NY
I'm not too familiar with glass work.....so should I lay a layer of mat, wet it, install the core (plywood) and the cover it with another layer of glass after it dries?
 

JeffN

Well-Known Member
Joined
Jan 16, 2007
Messages
584
Reaction score
7
Points
18
Location
Nantucket, Ma.
You are moving right along on this, nice. You probably have the ply installed by now. On mine I thought the hatch was kind of floppy and I wanted a layer of glass against the underside of the hatch so IIRC I used a layer of 10 oz. mat wetted it out and let it set up. Then I put the core in, followed but two layers of stitch mat as my hatch is wider than yours and I needed the extra strength. The guy at mailorder place I boought the materials from was very helpful. He suggested the stitch mat. It soaked up a lot of epoxy but was very strong when finished. I would suggest that you remove the ply where the screws that fasten the cover down pass through the core, you will get water intrusion there.
 

'84Offshore

Well-Known Member
Joined
May 5, 2005
Messages
375
Reaction score
2
Points
0
Location
Long Island, NY
Haven't installed the ply yet, ran out of time yesterday.

So my plan is to wet the hatch, put down a layer of mat, wet the ply and weigh it down on a flat surface for it to cure.
After that cures I plan on putting 2 layers of mat on top of the ply.

Sound like a plan?
 

JeffN

Well-Known Member
Joined
Jan 16, 2007
Messages
584
Reaction score
7
Points
18
Location
Nantucket, Ma.
I'm not a glass guy and until I did my hatch my glassing experience was repairing my surfboards. I know on a board you don't want too much resin kicking at once due to the heat produced. So I did my hatch a layer at a time, I let the layer kick and then proceeded with the next layer. With poly resin it should not take long before you can put in the next layer. Watch your time too as you are limted to working time with the resin as it will begin to kick. Don't work too large an area at one time. As I said I am not a glass guy so take this with a grain of salt.
 

gw204

Well-Known Member
Joined
Jan 31, 2005
Messages
2,481
Reaction score
22
Points
38
Location
St. Leonard, MD
Here's how I do mine. Note that not all the photos were from the same hatch. I had to dig through my collection to see what I had to illustrate the various steps.

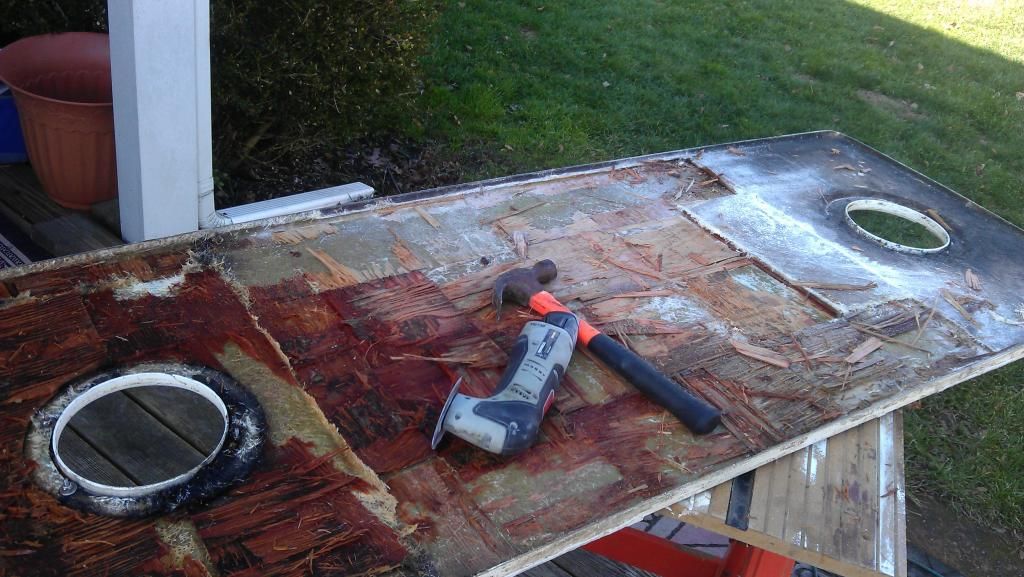
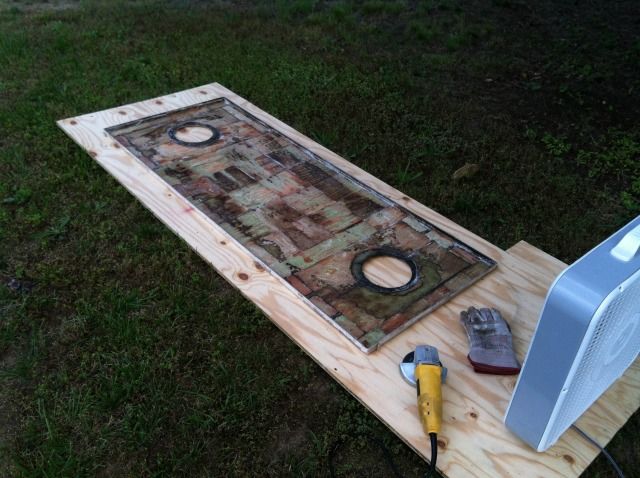
1. Top skin and core removed. Ready for grinding. Note the fan set up to try and blow away the dust created. Didn't work as well as I had hoped. I really needed a better fan.

photo48.jpg


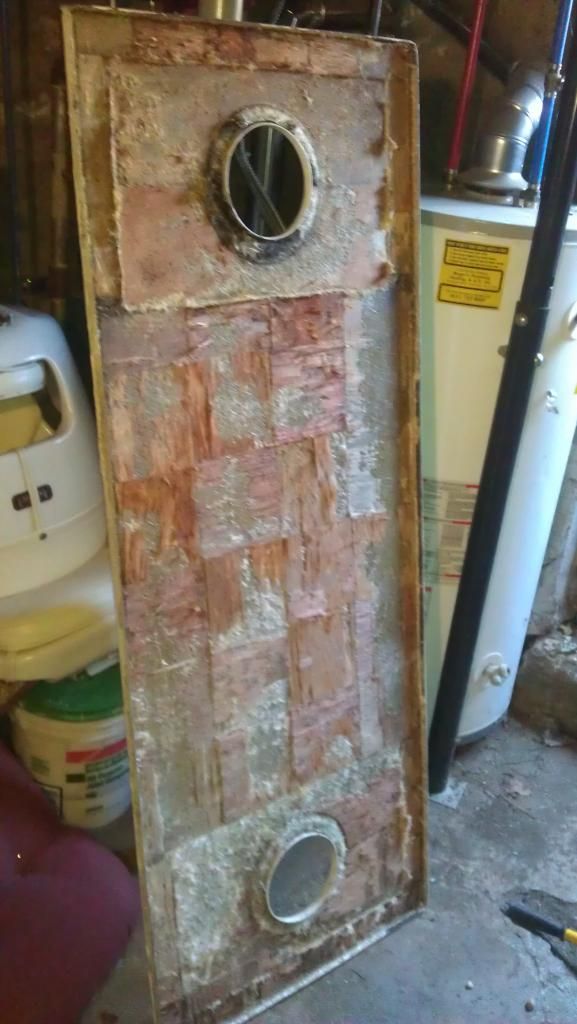
2. Grinding w/ a 24 or 36 grit disk almost done. I later went back with a Dremel and 80 grind sanding drum and cleaned up the edges and corners.

IMG_7553.jpg


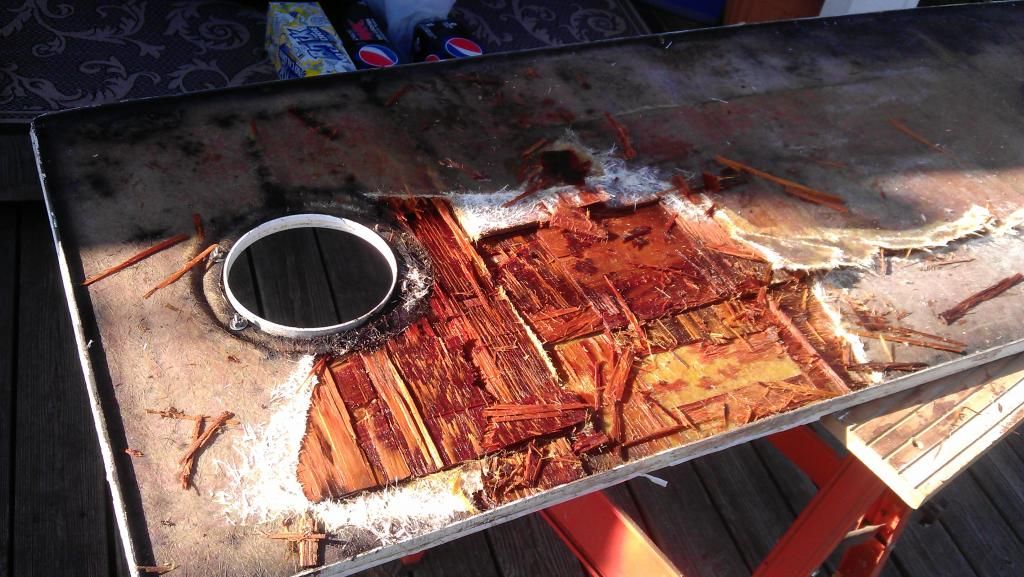
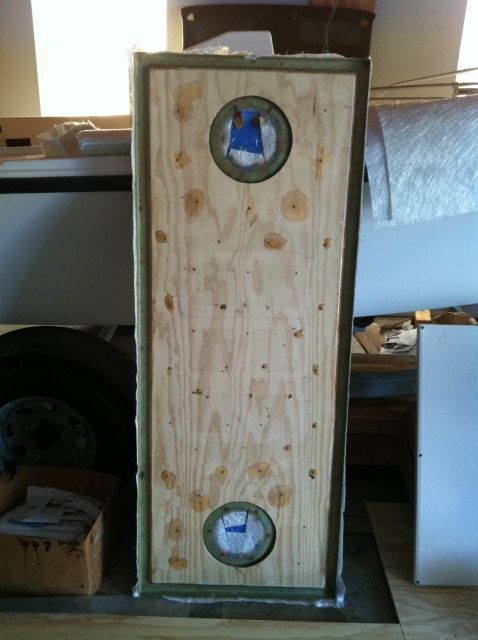
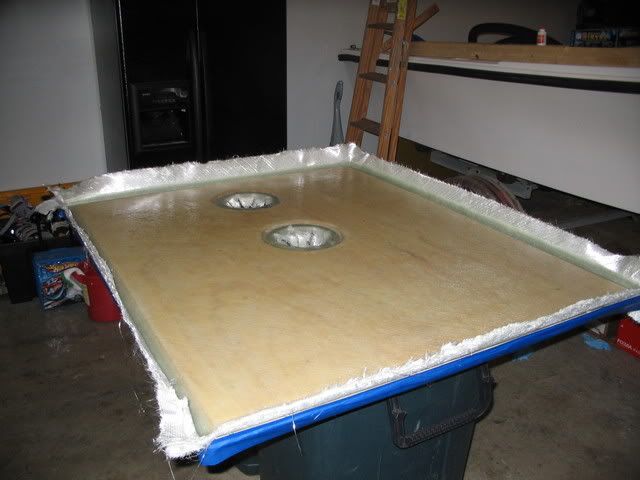
3. Core installed. I first washed the panels w/ soap and water, let them dry thoroughly and gave them a wipe down with acetone. On these particular panels, things seemed thin after grinding so I laid down a single layer of 1.5 oz. mat prior to bedding the core. One another panel, I only went with paint on a thin coat of unthickened resin. The core received a coating of unthickened resin followed by a coat of resin thickened with wood flour and applied with a notched trowel. After being set in position, I weighed it down with several cinder blocks.

The holes you see were drilled to allow excess resin and air pockets to escape. You will also notice that the core DOES NOT fully extend to the edges of the panel. It is cut to leave approximately a 1" gap and is beveled at 45 degrees to allow the glass to more easily conform.

photo49.jpg


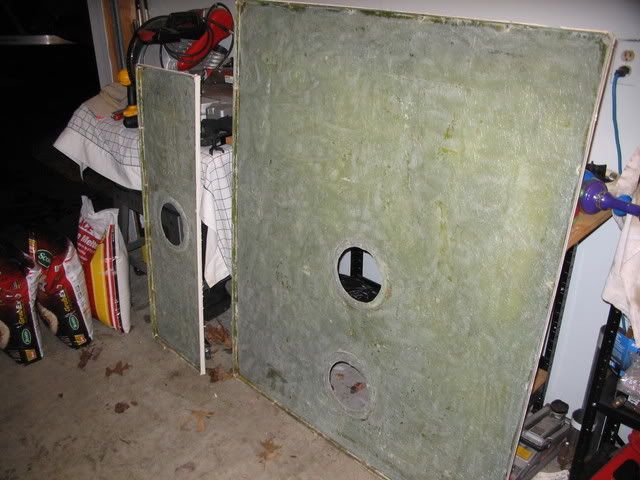
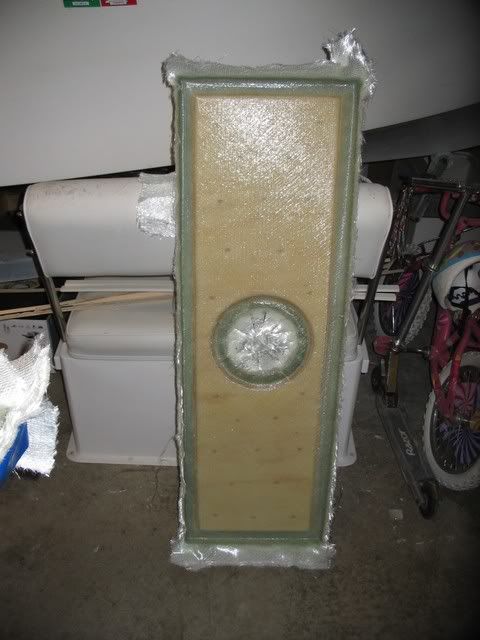
4. Glassed over. I start by brushing on a thin coat of unthickened resin in the channels around the edges and then lay a fillet of thickened resin to get rid of the hard corners. Then I put down some skinny strips of 1708 in the channels around the edges followed by a layer of 1708 over the entire think, then some more strips of 1708 in the channels, then another full layer of 1708. You end up with over 1/4" solid glass in those channels.

IMG_7674.jpg


IMG_7676.jpg


IMG_7678.jpg


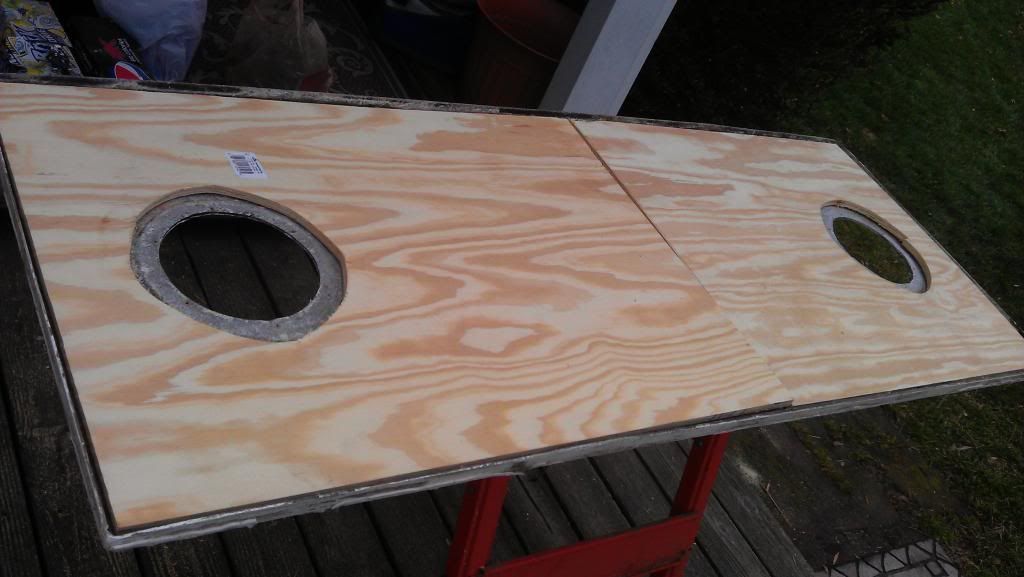
5. Once cure, trim the excess.


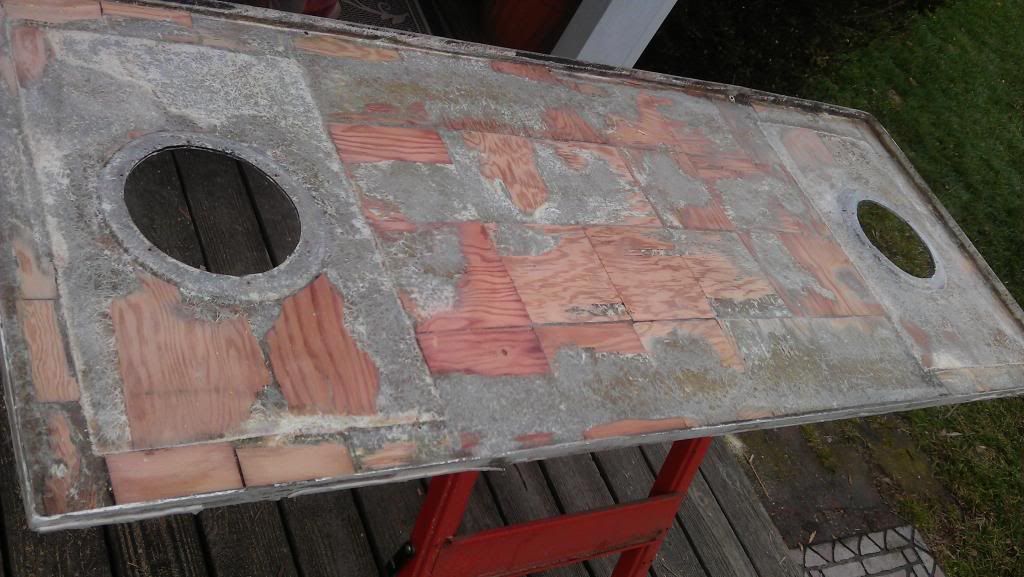
You can either use full sheets of core material, or do the squares thing. The thinking behind the squares is that such a layout is more resistant to warping. All the panels I have done have been with 1/2" A/C (I think) plywood from the home store. Not composite, not even marine ply. One stayed straight, another developed a bow. That one I'm not done with yet, so I have to figure a way to straighten it out.


Hope this helps.
 

'84Offshore

Well-Known Member
Joined
May 5, 2005
Messages
375
Reaction score
2
Points
0
Location
Long Island, NY
Thanks Brian, that's what I was looking for. What do you think of my 2 pc core?
Probably going to wait till spring unless we get a real heat wave this winter.....
 

JeffN

Well-Known Member
Joined
Jan 16, 2007
Messages
584
Reaction score
7
Points
18
Location
Nantucket, Ma.
The two piece core should be OK. Think of all the joints or seams you had before with the squares. My balsa was two piece and granted I only have one season on it but it is still unbowed and very rigid.
 

ROBERTH

GreatGrady Captain
Joined
Jun 10, 2006
Messages
1,304
Reaction score
120
Points
63
Location
Raleigh, NC
Model
Sailfish
Offshore, I found the Dremel multitool does a great job in trimming the edges of glass and then use the dual action sander to flush up to original edge.
I am re-coring my swim platform and will update some pics in other post I had started. What you are doing looks great so far. I used the balsa core to keep weight down. I really like the look of the 1708 glass and it looks pretty easy to manipulate compared to the chopped strand which I used.

Forgot, but started my post over on THT. Here is the link: http://www.thehulltruth.com/boating-how ... edure.html
 

BobP

GreatGrady Captain
Joined
Apr 27, 2005
Messages
4,746
Reaction score
6
Points
38
Location
Long Island, NY
Model
Sailfish
Grind out the rest of the wood, be careful with grinder not to go right through what's left in glass.

You can add glass as well as silica thickened resin with a notched trowel. 1/8 inch, after wetting glass with unthickened resin. The gaps around the edges and corners will be filled with the thickened resin.

I'd suggest a flat smooth surface like floor in garage be sure smooth to the hand, lay down plastic sheet then can weight down core with concrete blocks or sand bags. Once cured add inner skin. It should not warp since set flat. Tape over the holes. Overlay some more glass onto the existing around the deck plate cutouts, adds to thickness to hold screws. Holes should be cored or like Brian - solid, so core is sealed. I countered bored the core then filled them.

The wood gets double coats with foam roller and triple at end grains, be sure to fill gap between boards with thickened resin, no gap is to remain, if you can butt fit tight fine, I use the thickened resin to be sure. If you use a brush for resin on wood tends to lay on too much resin for bonding needs.

If you add more thickness to inner skin than Grady did, deck will tend to be stiffer (and heavier though!)
I think Grady used one ayer of heavy glass mat.
 

richie rich

Well-Known Member
Joined
May 20, 2009
Messages
1,183
Reaction score
1
Points
0
Location
south windsor, CT
And if you use wood, definitely go with epoxy....use slow hardener for extra working time and no amine blush.....any good name brand will work..West, Mas, System 3 etc.....check around for pricing...I like Defender Marine industries for pricing....some guys use Marine epoxy from boat builder central, some use Raka....all work fine.....I like the one layer of 1708 with matt on the inside to take up any irregularities from the grinding....and regular 1700 without matt on the bottom side against the new wood...it gives you strength without the added weight...but both will work perfectly fine...

Synthetic core like COOSA 20 or 26 is lighter and will never rot but its 150 or 200 per sheet from Merritt supply....same for Corecell or Divinycell....but the foam cores cant hold a screw well at all....trade offs I guess....as mentioned already, drill, fill with epoxy and redrill for all screws/holes to minimize water intrusion and good anchorage...always do a solvent wipe before wetting out to eliminate any contamination..
 

BobP

GreatGrady Captain
Joined
Apr 27, 2005
Messages
4,746
Reaction score
6
Points
38
Location
Long Island, NY
Model
Sailfish
Real wood pro balsa is very easy to work with and light, but twice the cost as marine ply. I find costs double, triple, etc.
If the core is sealed against any moisture ever touching it, it will last forever. If more expensive non rotting core is penerated it will not rot, but delaminates from sustrate when freezing hits.

Ironically my gas tank cover stiifened up when below freezing in off season storage - since the checkerboard ply was saturated! Live and learn.

Forthe hatches, depot project plywood is fine, it's untreated. Make sure real dimension are 1/2 inch, not the fake dimensions of sheeting, or like 2x4s.

I used marine ply at the time, no voids in ply, more plys per thickness, the best glue, untreated, douglas fir. About 100 bucks a 4 x 8. hAve to drive about 50 miles to get it, but ply goes a long way.

I like Raka and Larry giving advise over phone, 1708 is my all purpose cloth, can't even find the stuff in local stores. Buy it by the foot in wide roll from Raka. You order the real way, with someone at the other end of phone who knows what's he talking about and more than I do, remember those days ? Ships same day. Doesn't try to sell more product or quantity than one needs, another loss today. I think it was Dunk's recommendion for Raka I went with.

Anyway, mat hairballs up, always a mess, and gets springy like a diving board with epoxies. I use only 3/4 oz. mat at a time, when I have to, usually when bonding ply together. But do use plenty of silica thickened resin for same purpose.

When you get hatch learned and done, can do a whole boat next ! Wait till the admiral finds out your new hobby!
 

Lt.Mike

Well-Known Member
Joined
Oct 18, 2013
Messages
879
Reaction score
165
Points
43
Age
63
Location
Farmingdale NJ
Model
Overnighter
:nicethread :goodjob
This thread is certainly valuable.Thank you!
I have to ask one question though and that is how much resin was needed to complete this project?
I'm going to take on recoring the gas tank hatch on my 204c Overnighter while I am waiting for the new tank to be welded up.
Its doubtful that I will have another glass project in the near future so I don't want to end up with an excessive amount of extra material.