Overnighter gas tank removal, anyone know the trick?

Lt.Mike

Well-Known Member
Joined
Oct 18, 2013
Messages
879
Reaction score
165
Points
43
Age
63
Location
Farmingdale NJ
Model
Overnighter
In earlier posts I showed how wasted the fuel lines were in my new to me '87 Overnighter 20.
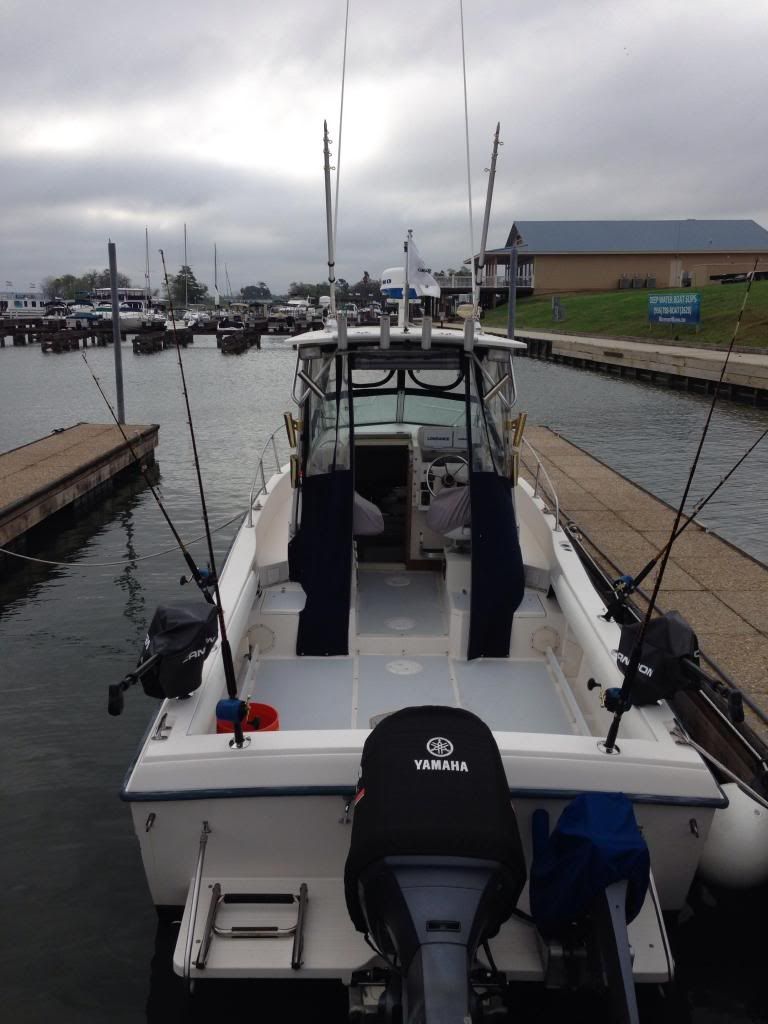
I covered the boat for the winter and have been waiting for the weather to break since. This week figuring that we'd seen the last of the snow I pulled the cover off and went to work. The plan was to replace all the fuel lines and get a good look at the tank to make sure I could be confident it wouldn't leak.
Heres a familiar shot of the fill and sender lines. They didn't come out easily as it is impossibly tight where they connect.
DSCN6775_zpsc5eaf429.jpg


Below is the vent hose which is doubled back on itself showing how swollen part of the hose that lay on the tank had become.
DSCN6776_zps07bcba8c.jpg


Nothing came easy on this project and I was very tempted to forgo removing the boards securing the tank and just replace the hoses with new. After all I had no sign of gas in the bilge. :roll:
I've had a tank leak on another boat I've owned and I had about 20 gallons of gas in the bilge, not good.
So I pressed on. First board removed and I had my answer...
DSCN6770_zps17a0f695.jpg


A close up...
DSCN6771_zps97e8535b.jpg


Removing the other boards produced two more holes. I didn't bother scraping the crud away, whats the point right?
There's no getting around it, I'll be replacing the tank.
All the bracing boards are out now and I've measured the tank. :uhm Ok, the tank is one inch longer and wider than the opening above it.
Like I said I had to fight to get to the point I'm at right now and though I knew that I might have had to replace the tank, having become a reality I'm not real happy so I've packed it in for the day. I'm not in a good frame of mind to tackle this puzzle right now.
Oh and ya, the hatch cover is going to need re-coring as its wet inside. :bang
Ok back to the tank problem. Its pretty snug in there. I'm assuming, ...no I'm hoping that its one of those tilt it and lift out by one end while knocking three times and waving a dead cat over it things. (ya sorry, I'm a little over tired right now)
Has anyone here that has removed one of these tanks have any tricks to share.
This thing is like a 65 gallon Rubick's cube to me right now and I'd really appreciate a little help.
Thanks, Mike.
 

gw204

Well-Known Member
Joined
Jan 31, 2005
Messages
2,481
Reaction score
22
Points
38
Location
St. Leonard, MD
I had to trim about a 1/4" from the lip that the cover sits on to make clearance for the tank to come out. There was no room to tilt it so I just ran a heavy rope between the fill port and one of the pickups (I think) and left enough slack to shimmy under it in a squat position while straddling the cavity. From there I just stood up and out it came. Super easy.
 

khaynes

New Member
Joined
Nov 18, 2013
Messages
2
Reaction score
0
Points
1
I have a 1988 gulfstream. I removed my rear tank last night. I had to do the same. I cut about 3/8" off the left side. I wanted to go to the left because the fuel fill hose is on the right side. My tank was also 1 1/2" longer than the hole in the floor. I had to cut the top strap out between the fuel tank compartment and the rear storage
compartment. I guess its a storage compartment. Don't know what it was for. I used 1" tie down straps on both
ends because their flat. Theirs still not much room after you cut out 3/8 inch. tank is light and easy to lift out once you have the room. Good luck.
 

onoahimahi

GreatGrady Captain
Joined
Dec 9, 2012
Messages
483
Reaction score
1
Points
18
Location
Boston MA
Wow - that corrosion is nasty looking. How does it get so bad? Was saltwater dripping down on the tank? Does the bottom of the tank look as bad? I've got the panel of my 1994 at the moment and, although the tanks look filthy, I don't see any of that white corrosion. When I cleaned a bit with a rag, it is just a gray painted surface.

Good luck with it...
 

plecofish

Member
Joined
Mar 9, 2014
Messages
14
Reaction score
0
Points
0
Same here with a 1987 Overnighter. To remove main tank, shaving down was required.

Had a new tank fabricated, installing next week. New hoses, wiring, guage, etc.

Any advice on mounting new tank? Wood shims with rubber and 5200 like old or a better way in 2014?
 

derx2

Well-Known Member
Joined
Apr 21, 2009
Messages
53
Reaction score
1
Points
0
Location
Portland Oregon, USA
I am doing this project right now on my 1989 Overnighter.

my boat has the 80 gallon gas tank and after all the wood bracing and shims were removed it came out pretty easily out the main floor hatch. My tank was in good physical shape so I removed it and dropped it off at a tank/Radiator repair place that I have used before. They inspected it and pressure tested it and cleaned it for $85.
Now I know there are people that say that " The tank is over 25 years old. Throw it away and have a new one built for $1250" Well I am confident in the condition of my tank so I am re-using it.

As far as reinstall. There are a couple different ways.
--Marine surveyor D. Pascoe says strips glued to the bottom of the bare tank then place in hull, dont paint the tank and dont foam it in.
---the Bertram31 site says "Coat tar epoxy is a must"
---A couple of YT videos show strips glued to the bottom and sides and then use 5-7lb density foam to hold in place.

Here is what I did:
using 3m 5200 sealant, glue 2" wide strips of 3/8" thick neoprene to the bottom of my tank where it would sit on the stringers. This is not wetsuit neoprene like a wetsuit. It is a product that I got at a rubber/hose products supply store. Had a 60Durometer irrc.

Recreated the 2x4 braces with treated wood and the plywood pieces with 3/4 MDO. I glued 2" wide strips of neoprene to the center of wood.
Treated the ends and the plywood pieces with epoxy.

Reinstalled everything.
 

plecofish

Member
Joined
Mar 9, 2014
Messages
14
Reaction score
0
Points
0
OOps, I apologize, previous post should read 1987 Offshore.
 

plecofish

Member
Joined
Mar 9, 2014
Messages
14
Reaction score
0
Points
0
Derex2,

I have heard some say to use "starboard" rather then wood. You hear any pros/cons on that end out on west coast

Plecofish
Long Island, NY
 

Lt.Mike

Well-Known Member
Joined
Oct 18, 2013
Messages
879
Reaction score
165
Points
43
Age
63
Location
Farmingdale NJ
Model
Overnighter
Thanks guys. I had to walk away from it for a couple of days. Opening day of trout fishing helped clear my head.
I have a trout stream in my backyard that can't be ignored. :wink: ...but its time to get back to the boat.

The bulk of the tank was in really good condition. It was under the three 2x4 supports and the rubber straps where it was really corroded.
I've been calling around getting prices and information. Patriot Marine said that when reinstalled I should omit the wood that holds water using plastic l-brackets and the rubber straps should be applied with adhesive to eliminate water intrusion between strap and tank. About the best price I've found is $665 with a sender installed. That would be as it was from the factory. I can add another $240 to have the shop remove and replace the tank if I throw in the towel. All that doesn't include the 3 fuel lines.
I intend to try to remove the tank myself though so that I may clean and correct any issues in the bilge area.
The turn around on it is about two weeks for Patriot which is ok with me as I intend to re-core the hatch in that time.
If I get really ambitious I also am planning to paint the deck. The deck is worn, not horribly but it could look better. I want to mask off and paint sections with off-white or light gray non-skid deck paint to give it a commercial feel.
You can see how the gel coat is worn off in this shot. I might have tried my hand a gel coat but the diamond cut in the deck is to the point where painting it is an easier choice and that I know I can do.
DSCN2421_zpsefb6be06.jpg
 

The_Chain

GreatGrady Captain
Joined
Apr 23, 2012
Messages
166
Reaction score
4
Points
0
Lt.Mike said:
Thanks guys. I had to walk away from it for a couple of days. Opening day of trout fishing helped clear my head.
I have a trout stream in my backyard that can't be ignored. :wink: ...but its time to get back to the boat.

The bulk of the tank was in really good condition. It was under the three 2x4 supports and the rubber straps where it was really corroded.
I've been calling around getting prices and information. Patriot Marine said that when reinstalled I should omit the wood that holds water using plastic l-brackets and the rubber straps should be applied with adhesive to eliminate water intrusion between strap and tank. About the best price I've found is $665 with a sender installed. That would be as it was from the factory. I can add another $240 to have the shop remove and replace the tank if I throw in the towel. All that doesn't include the 3 fuel lines.
I intend to try to remove the tank myself though so that I may clean and correct any issues in the bilge area.
The turn around on it is about two weeks for Patriot which is ok with me as I intend to re-core the hatch in that time.
If I get really ambitious I also am planning to paint the deck. The deck is worn, not horribly but it could look better. I want to mask off and paint sections with off-white or light gray non-skid deck paint to give it a commercial feel.
You can see how the gel coat is worn off in this shot. I might have tried my hand a gel coat but the diamond cut in the deck is to the point where painting it is an easier choice and that I know I can do.
DSCN2421_zpsefb6be06.jpg


I opted for the non-skid deck paint, looked hard at alot of different products but ended up with Kiwi-Grip...I posted pictures in the link below...let me know if you have any questions..

viewtopic.php?f=2&t=21481
 

Lt.Mike

Well-Known Member
Joined
Oct 18, 2013
Messages
879
Reaction score
165
Points
43
Age
63
Location
Farmingdale NJ
Model
Overnighter
T_C thank you! That is exactly what I had envisioned. It looks great!
Now I know for sure thats what I'll be doing. I looked into kiwi-grip and it looks easier than others to lay down.
I went out before dinner this evening to siphon the remaining gas from the tank using a shake siphon.
The tank sits so low in the boat and it has such high sides even over the transom I can't get the siphon to work.
Sometimes the simplest things become the biggest pain in the butt.
It's bugging me too because I'm usually pretty good at doing jobs like this.
image-39.jpg
 
  • Like
Reactions: Chutch

The_Chain

GreatGrady Captain
Joined
Apr 23, 2012
Messages
166
Reaction score
4
Points
0
Yup I was also looking for a more commercial or workboat look. It's as easy to put down as the videos on youtube described. I kept the lines of the non-skid rather then painting everything, I at least figured that it would help with "channels" between the new textured grip and the fiberglass deck to wash junk aft. Either way I love the new cleaner looking deck, that actually grips..It adds a lot of character I think
 

DennisG01

GreatGrady Captain
Joined
Sep 1, 2013
Messages
6,846
Reaction score
1,216
Points
113
Location
Allentown, PA & Friendship, ME
Model
Offshore
If your boat is in the water, you won't be able to gravity siphon. If it's on the trailer, then you need to fill the tube more before letting the siphon start. Find the point in the hose (the overboard portion) that is level with the BOTTOM of the tank (preferably lower) and make a mark - this would be when the hose is hanging over the side. Rough idea - make a mark equal to the keel and that should do it. Now bring the hose back in the boat with you and, holding that mark/point up in the air, fill the hose until fuel gets to the mark - put your hand over the open end and get out of the boat (may help to have a partner). DO NOT take your hand off the open end until your hand is below the keel - once it is, remove your hand and the siphon should work.
 

mboyatt

Well-Known Member
Joined
Dec 24, 2012
Messages
337
Reaction score
2
Points
0
Just a thought. What about starting the siphon, then running it straight out the back of the boat through a scupper. Actually have the hose run through the scupper, then into a bucket on the ground. Avoid going up and over. May need someone to help get it going, but it might be worth a shot. By the way, I have never done it. I am just pondering about a potential solution. :)
 

Lt.Mike

Well-Known Member
Joined
Oct 18, 2013
Messages
879
Reaction score
165
Points
43
Age
63
Location
Farmingdale NJ
Model
Overnighter
Update! This saved me a headache so I had to share.
I went on the net during free time today at work and found the Arnold siphon pump at Home Depot and at about $12 it was worth a look.
Heres a link...
http://www.homedepot.com/p/Arnold-Sipho ... /203051321
I read the reviews and some were really bad, but the beef was with the hose being all kinked up. So what! At $12.00 I just bought two 10' lengths of 1/2" clear vinyl hose for another $10.00. $22.00 total, still dirt cheap in my book.

I cut off a 3' length of hose and tie-wrapped it to a car antenna keeping it from curling up and making it easy to hold the hose end at the bottom of the tank.
In fact it stayed without having to hold it.
The 10' outlet hose went over the transom and into the can.
First pump and the gas flew through the hose, two more and it was going on its own.
Perfect! The job was done in no time at all. :)

Heres a couple pics and a video so that you guys can see how well this works for so little cash laid out.

DSCN6779_zps94192185.jpg


DSCN6778_zpsd726f8dc.jpg


DSCN6780_zpsb5e37ef7.jpg


Click this link for the video. I couldn't make it work here, sorry.
https://www.youtube.com/watch?v=Ze3LFGkEZlI


.
 

Lt.Mike

Well-Known Member
Joined
Oct 18, 2013
Messages
879
Reaction score
165
Points
43
Age
63
Location
Farmingdale NJ
Model
Overnighter
Just wanted to add that the gas I removed, though the sender read over 1/4 on the gauge it was only about 8 gals. I had put Stabil in the tank last fall with about 4 gals of fresh gas right after out test run. This same gas I dumped into my pickup which is now running like cr*p. :roll: OK, There's a good and bad side to this, I have to wonder if the OB ran as good as it did on that sour fuel how will it run with fresh? :wink:
The tank is now extremely light and I've found that like some have said, I will have to trim 1/4" from one end of the opening to lift out the tank.
I'm actually looking forward to getting the bilge area all cleaned out.

Another point to note is as the hatch cover sits on its side drying out (a steady trickle of water flowing from it) the underside of the glass over plywood is detaching.
This removes any question in my mind that I will have to re-core it. I'm good with it though as I'd rather find out now in this way than to break through it in use.

I'd also like to say that I very much appreciate everyone's posts on re-coring as they are very helpful and it gives me the confidence to take on the job myself.
I'll let you know how it goes.
Mike.
 

DennisG01

GreatGrady Captain
Joined
Sep 1, 2013
Messages
6,846
Reaction score
1,216
Points
113
Location
Allentown, PA & Friendship, ME
Model
Offshore
I have one of those red pumps, too... along with a shaker, and numerous other "devices" that I've collected over the years (which can be read as "$$$")... :)

Was the tank level when you read the gauge at 1/4? That's a good thing to know and I'm glad you posted it - assuming it was level, that's not the "error" I want to see in my tank! I'd rather it be the other way.
 

Lt.Mike

Well-Known Member
Joined
Oct 18, 2013
Messages
879
Reaction score
165
Points
43
Age
63
Location
Farmingdale NJ
Model
Overnighter
DennisG01 said:
I have one of those red pumps, too... along with a shaker, and numerous other "devices" that I've collected over the years (which can be read as "$$$")... :)
Ya me too on that. I also just dropped $114 on a Bosch multi tool as I figured it'd help when re-coring the hatch. Could always use another tool right? :roll:
Was the tank level when you read the gauge at 1/4?
No, no it wasn't. :oops: Should have been obvious to me I guess.
We used to call that owner brain fog.
Back in the day my buddies and I were always pretty good when working on other peoples cars but when it came to working on our personal daily driver which had to get done quick because you needed it to get to work you had to have someone else with a clear head to step in on the project.
Without the input from an emotionally detached friend the more stressed you got and the more dumb mistakes or obvious problems/solutions you'd miss.
Sometimes that would include a special project as is the case here.
 

DennisG01

GreatGrady Captain
Joined
Sep 1, 2013
Messages
6,846
Reaction score
1,216
Points
113
Location
Allentown, PA & Friendship, ME
Model
Offshore
I don't know if this is a good thing or a bad thing, but I know exactly what you mean about "brain fog"... or at least I think I do... not sure - everything's a bit fuzzy.... :lol:

The multi tools are fantastic. I used one, too. A rotary will make faster work of it, but the oscillating puts virtually no dust in the air. I did find, though, that the blades dull faster than I expected.

EDIT: Oh, I also used the "scraper" tool that came with the oscillating tool to help remove the remaining chunks of plywood from the hatch. I didn't worry about trying to re-use the skin - it's not worth the time to save it.