Advice for restoring a "Gil" bracket

REEL NAUTI

Active Member
Joined
Feb 16, 2012
Messages
33
Reaction score
1
Points
8
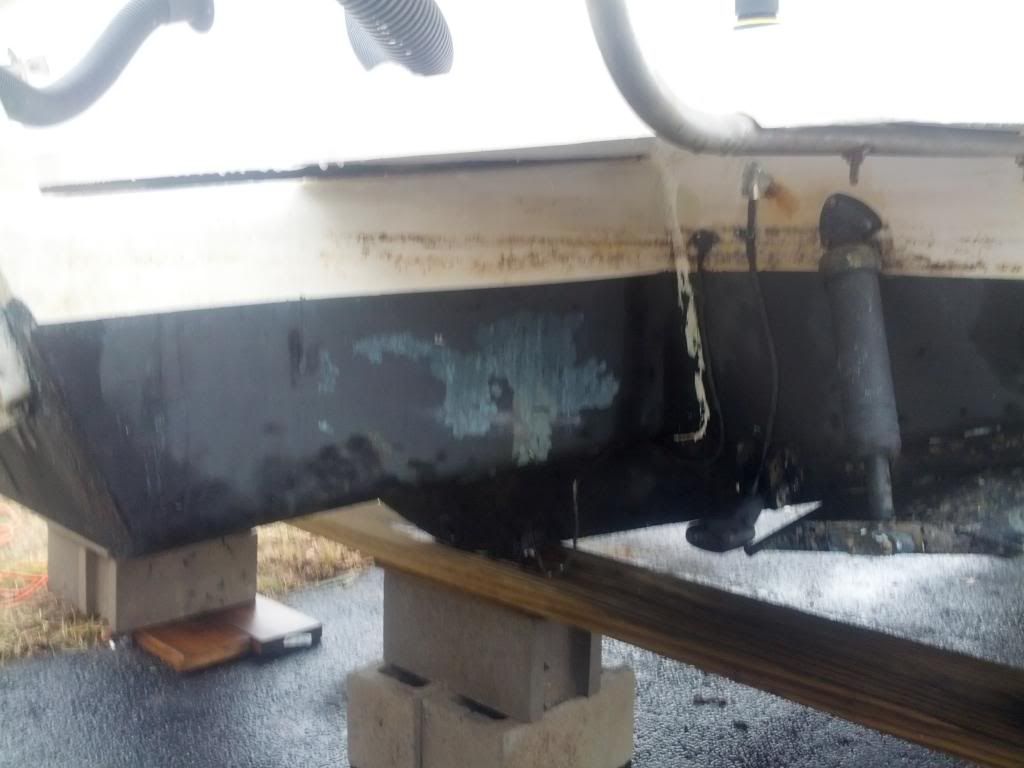
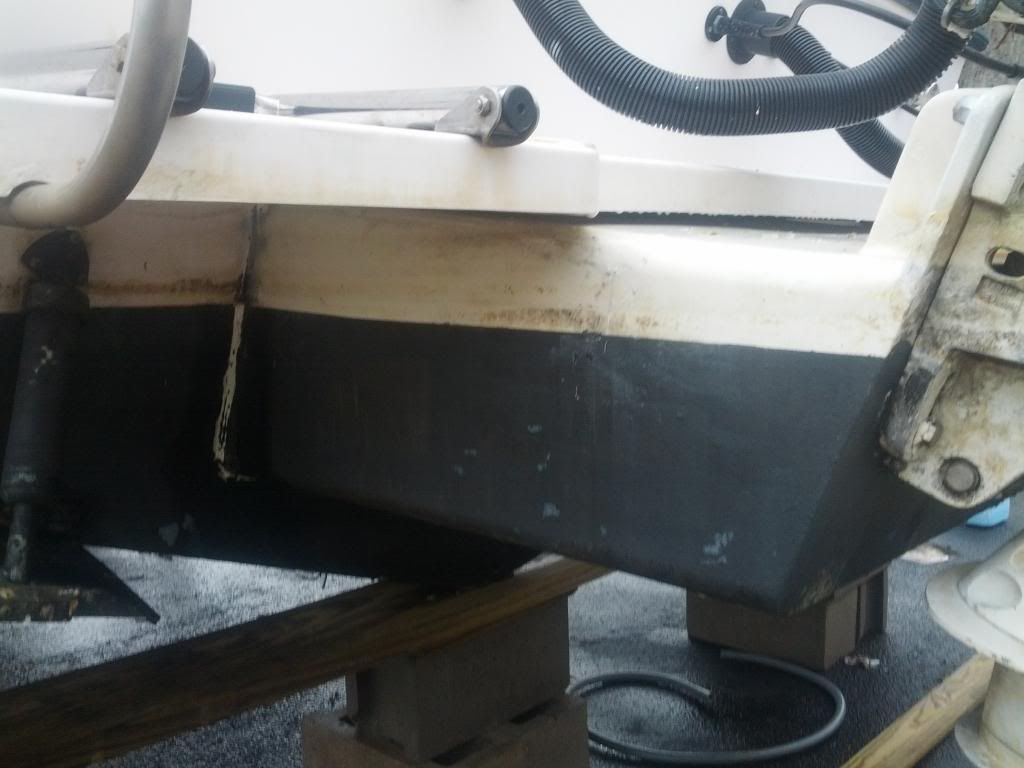
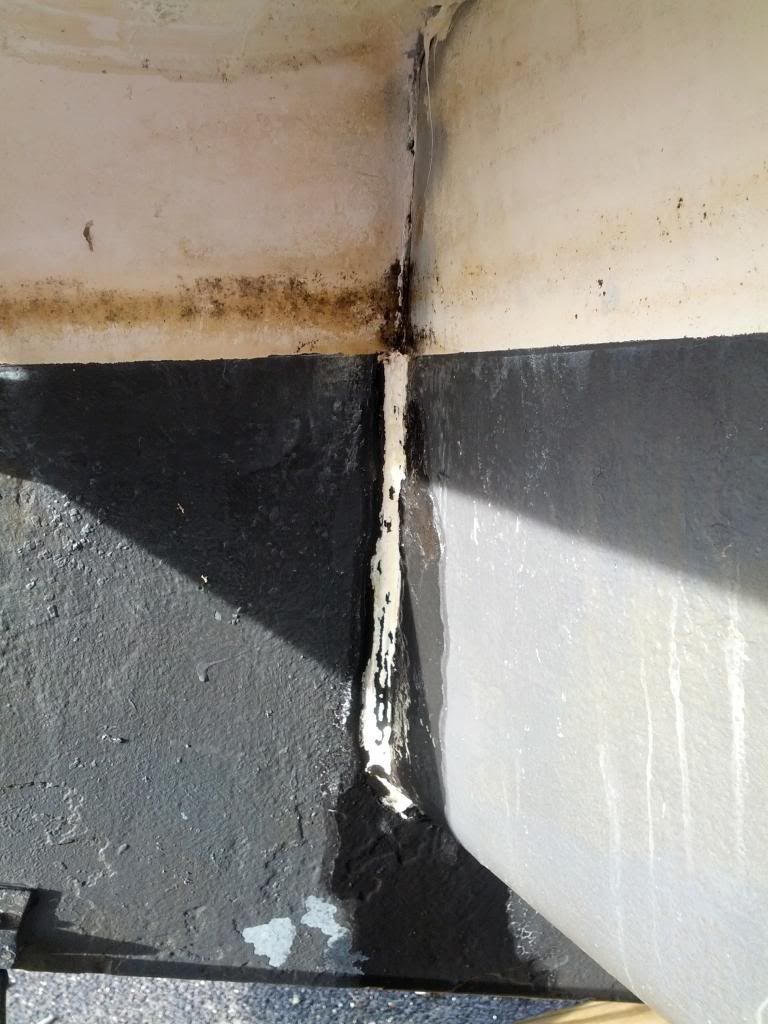
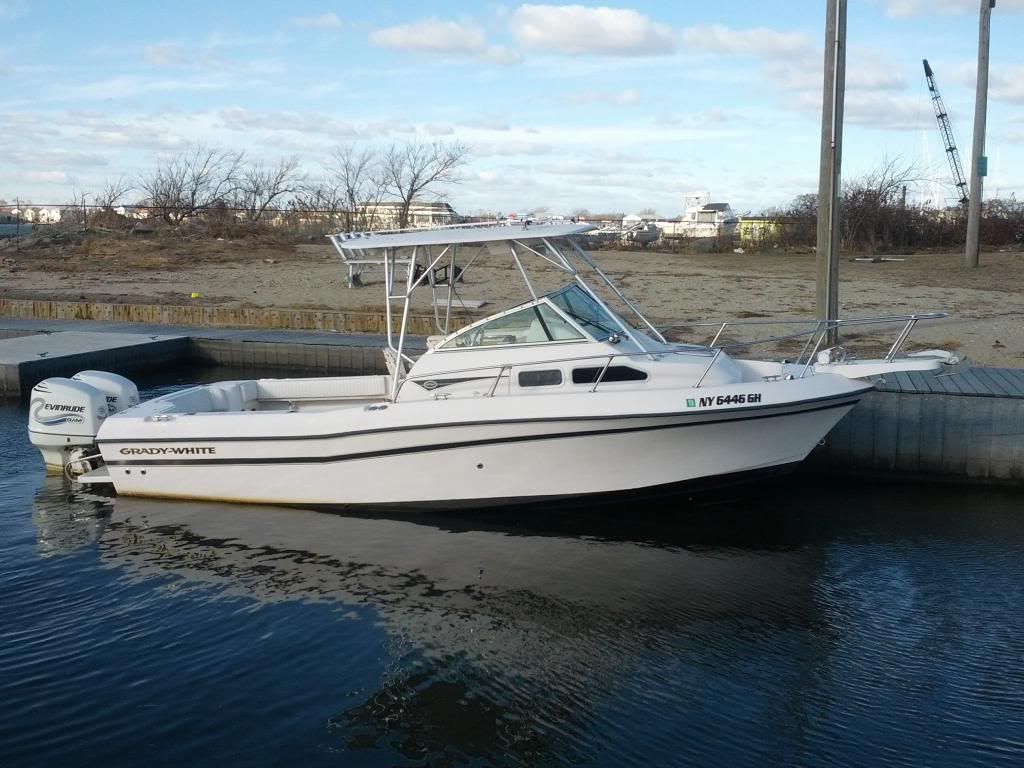
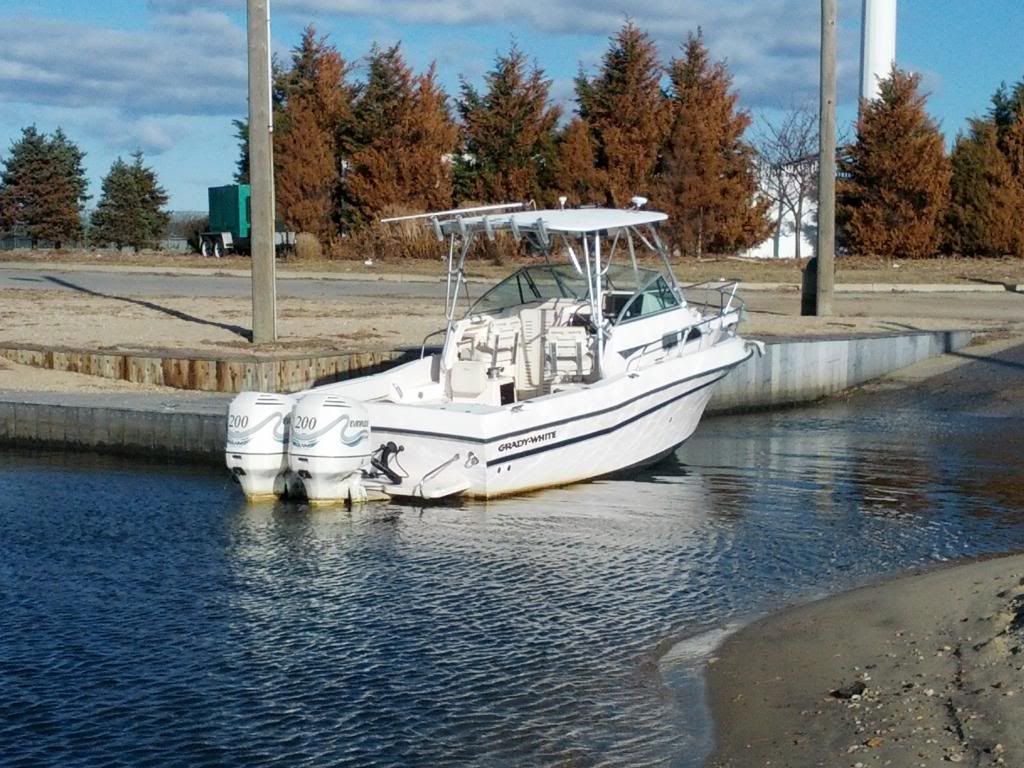
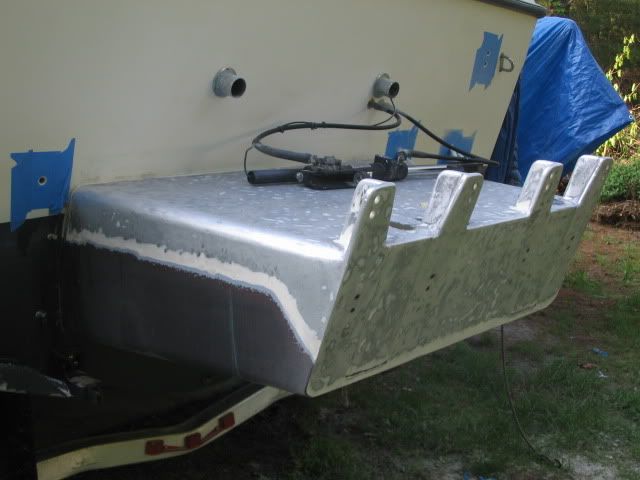
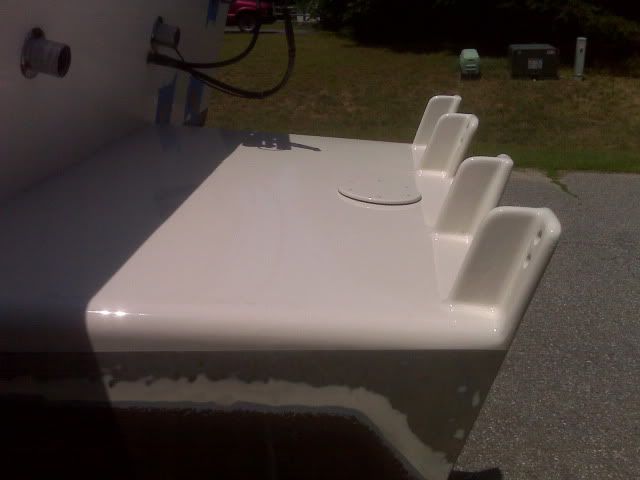
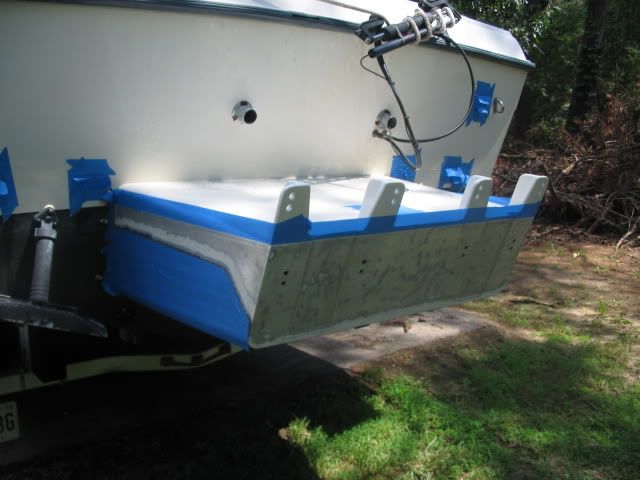
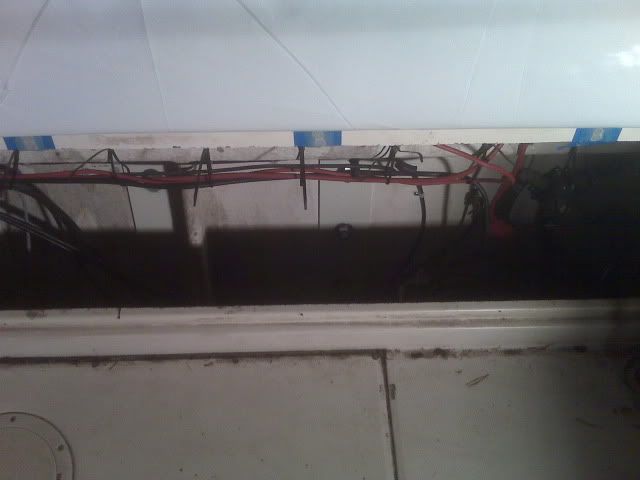
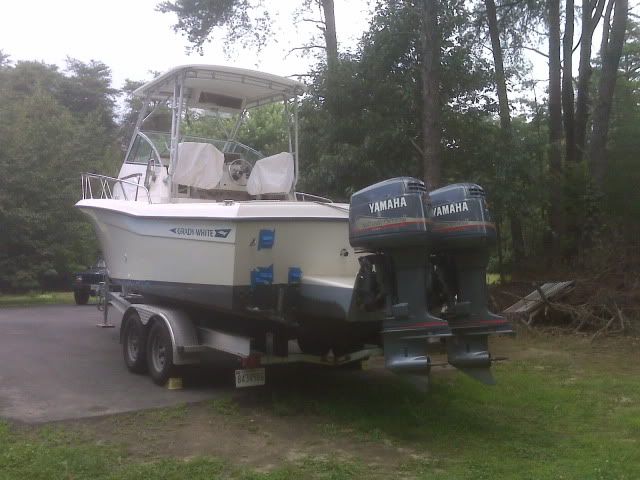
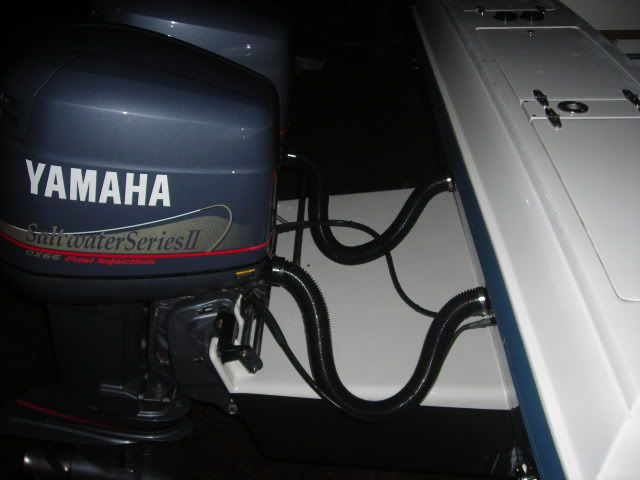
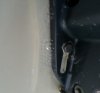
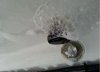
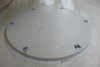
Hey guys...Boat is finally out of the water..Thank God it Survived Hurricane Sandy. When I was waiting at the ramp for the hauler I Noticed again that the boat was sitting really low at the stern and when I got it back to the house the engine bracket was topped off with water...I was wondering if anyone has had the same problem. Any things I should check?? reseal??? I was looking to have it removed and refinished because the powder coat is chipping in some spots. The Drain plug was sealed good but the access plate didn't look so good. Anyone ever had their bracket removed and refinished...if so how much would something like that cost???? I spoke the Armstrong and they are now the suppliers of brackets to Grady White. He said $3800 for the Gulfstream...Bracket and intergrated swim platform..Any Advice??

grady12.jpg


grady11-1.jpg


grady9.jpg


grady8.jpg


grady7.jpg
 

richie rich

Well-Known Member
Joined
May 20, 2009
Messages
1,183
Reaction score
1
Points
0
Location
south windsor, CT
Lots of choices, including a new bracket.....but if 3800 is too much, you can strip and repaint which is cheapest, or powdercoat...but not sure how well the bottom half sitting in water will hold up with powdercoat. To bond right in either case, you have to get down to bare metal.....sand blasting would be best, but you can also zip strip and sand by yourself but that will be a lot of rubbing and scraping....immediately after getting down to bare metal, you need to etch the aluminum with diluted acid like West System aluminum prep...or use one manufacturers system like Interlux.....blast, etch prime with Vinylux, second prime/barrier coat with Interprotect 2000, then paint the bottom half that sits in the water with Trilux 33 anti-foul that is made for metal applications, and use Perfection 2 part PU paint for the top half out of the water......this will be your least expensive but most labor intensive way....

Some people now get their boats/parts sprayed with Line-X, and it looks great, but not sure of the cost or longevity.....I saw a website called Sarasota Line-X that does this....give them a call.....it may end up being the cheapest way to go in the end after buying all those other supplies....

water can come in that bracket in many ways....bottom drain screws, the sealed edge facing the transom, pie hole covers, engine bolts etc....also check for weld cracks or gaps after blasting and seal them. And when bolting it back up, see if you can separate the SS bolts and washers from the aluminum by using a plastic shim or washer between the two metals to prevent corrosion/reaction between the metal while in salt water. And lots of sealant like Boatlife or Sikaflex thats ok to use in direct sunlight/UV
 

ROBERTH

GreatGrady Captain
Joined
Jun 10, 2006
Messages
1,304
Reaction score
119
Points
63
Location
Raleigh, NC
Model
Sailfish
Reel Nauti, Richie has excellent points. I was getting a lot of water also and just a few weeks ago pulled the swim platform off and am in finishing stages of recoring balsa and gel coat finish.

Reason to pull in first place was I did an air pressure test and could hear air escaping under the swim platform. So figured it was the seal against transom and/or pie plate on top under platform.

I have since sealed the pie plates, all 3 with 4200 and resealed around bracket. Have not yet done air pressure leak test as waiting for 4200 to cure well so I don't blow any out.

I made up a 1/2" PVC drain plug and installed a air valve and used that to put air into the bracket. It worked pretty well, but don't need to put a lot of pressure of course. The only place I did hear the air was as mentioned, under the platform.

Hoping now, that it is sealed.

I did have some areas on bracket that bubbled under the surface, so I peeled it off and sanded the alum. surface, then used the Interprotect 2000 as Richie mentioned. It is excellent product. If you are interested, I can dig out the information that the factory sent to me about what products to use on the aluminum as some of their former products were changed.

Would love to do the entire bracket as the shine is outstanding where I repaired it. Be aware, the original finish is extremely tough to work with.

Also was thinking down the road, if I start to get water in, as others have had this issue and were not able to get the leaks stopped, maybe fill the interior with some plastic ping pong balls or maybe even the poly peanuts. This would replace all that air space and not allow too much water weight, and will still allow drainage. However, this is only good if you trailer as I do.

There is already a couple of huge starfoam blocks inside that help displace water volume. I sliced off a few inches of both sides and the are clean and dry inside, so seems water was not penetrating the starfoam, so left it in place.

I am fairly confident that the leaks were from the top and I have it sealed. If not, then I should have been getting water draining out when I pulled from water and never got any to show signs of leakage from within and there was a lot of water that drained out when I pulled the plugs.
 

BobP

GreatGrady Captain
Joined
Apr 27, 2005
Messages
4,746
Reaction score
6
Points
38
Location
Long Island, NY
Model
Sailfish
As an alternative to costly engine removal, removing bracket, recoating, reversing back, and aluminum is a precious metal these days, be it costly in time and/or $$:

After you find out where it leaks, you can also fill it with water to the brim and see where it leaks out if not the plates on top, lower engine bolts, drain plugs, or anode bolt threading

Powercoat is very hard and thick, but when it looses adhesion it does it spot by spot and taking a putty knife especially upside down on bottom is a like attempting to hold the tide back in the Hudson River. Sandpaper against it is another one challenged against the mighty powdercoat.

I have discovered the angle grinder works incredibly well against the powdercoat - an even match ! Just be sure to wear goggles and cover all skin. Keep others away projectiles will fly. Nastly smell as well. Gouging is easy, no need to lean into it. I'd suggest you get it all off in one shot, otherwise every year you will be repeating the process until it is all gone, or perhaps one year do half, the next year remainder.

Once you get the aluminum clear, follow instructions on cans for metal coastings. Below water line I use primer covered by bottompaint, above I use epoxycoat and the like.

If you find galvanic damage has eaten through the metal or turned it into swiss cheese (the same) - replace bracket. Failure to maintain anodes is the cause perhaps accelerated by bottom paint use not for metals (NO COPPER ON ALUMIMUN).

For seam against hull all around, you can use lifecaulk with a wide spoon to form an outer seal over original seal, make sure gap is cleaned out and surfaces properly prepared first.

i have to admit bottom paints for metals (NO COPPER) are noticably not as good as the ones I use on fiberglass so I stil get marine growth unlike rest of hull.

Not to forget, no dissimilar metal drain plugs either. Open drain plugs every year, if a little water comes out, so what, just monitor it year to year for increasing amounts. My foam blocked OEM Springfield bracket holds approx. 12 gallons of water when filled to brim. Might get out a pint or so annually.
 

REEL NAUTI

Active Member
Joined
Feb 16, 2012
Messages
33
Reaction score
1
Points
8
Thanks for the advice guys...I'm gonna have to tackle this job in the spring. I know the drain plug is sealed good. I think I'm going to get a Armstrong deck plate that doesn't use screws to hold down the access plate then fill it with 10lbs of air and see where my leak is and take it from there...I have a good fiberglass guy close by I was just wondering how much he would charge to remove everything and refinish and put it back.

Seems like something I can handle but dont think I'll have the time to do it.
 

ROBERTH

GreatGrady Captain
Joined
Jun 10, 2006
Messages
1,304
Reaction score
119
Points
63
Location
Raleigh, NC
Model
Sailfish
Reel, I dug out the procedure for how to refinish properly with Interlux products. They used to have a vinyl wash type primer, but got away from it, even though it is really good stuff.


1. Degrease the aluminum with 2333N or 2316N
2. Sand the aluminum with 80 grit paper to achieve a bright and rough metal profile
3. Remove all sanding residue with a brush/vacuum/clean air line
4. Immediately (within 2 hours of sanding) apply 1 coat of InterProtect 2000E which had been thinned 15% by volume with 2333N (brush/roller) or 2316N (spray)
5. Apply 2 coats of Epoxy Primekote
a. Thin each coat 20-25% by volume with either 2333N (brush/roller) or 2316N (spray)
b. Sand between coats with 220
c. Remove all sanding residue with 2333N or 2316N
6. Apply 2 coats of Perfection
a. Thin each coat up to 10% if needed with either 2333N (brush/roller) or 2316N (spray)
b. Sand between coats with 320 if imperfections are present or the maximum overcoating time had been passed
c. Remove all sanding residue with 2333N or 2316N

All the best,

Jay Smida
Interlux Yacht Finishes

If I was to refinish the bracket, I would use this process as the results I had on the small repair section so far was really nice and finish is tough!

Also, I was going to get the Armstrong deck plates, but they don't make them small enough for the hole in the Grady Drive bracket, and I did not want to make it bigger just for the plate, I did redrill/retap to next larger size for the screws that hold the pie plate and made sure the screw holes were sealed with the 4200. I pulled a few screws out after seal and found the 4200 really pulls into the threads, so seal should be excellent.
 

gw204

Well-Known Member
Joined
Jan 31, 2005
Messages
2,481
Reaction score
22
Points
38
Location
St. Leonard, MD
When I repowered my old Sailfish, I had took the chance to address some issues with the bracket as well. There were several spots where the Gil-coat as they call it had lost it's bond to the underlying aluminum. Admittedly, I cut some corners, but I was still happy with the end result. Here's what I did...

I had every intention of taking the bracket entirely off the boat and having it sand blasted, but after fighting with it and it not budging even a little bit, I had to change plans. With the motors off, I ground all the Gil-coat off of the top of the bracket, the engine mounting surface and little down past the water line. This got all the areas where the coating had broken free. There were a few very small areas of corrosion, so I filled those with the gray MarineTex and sanded them flush.

IMG_8090.jpg


Then I had the top, sides, and access plate primed and sprayed with matching Awlgrip. I can't say whether or not the aluminum was etched prior to being shot.

IMG00076.jpg


Next I taped off the painted areas and treated the bare aluminum with West System's aluminum etching kit.

IMG_8122.jpg


The etched aluminum was then coated with several layers of Interprotect 2000E (it was alrady on the rest of the hull and bracket too).

IMG_8124.jpg


Washers under the mounting bolts were replaced w/ 1/4" aluminum plate painted to match the gelcoat.

IMG00081.jpg


Got new sleeves for the top engine mounting holes from Gil. Motors went on and were rigged.

IMG00085.jpg


Bottom paint was touched up.

DSCN0536.jpg


Somewhere in there I recaulked the top edge and access plate. I left the swim platform off so the old bolt holes were filled in and gelcoated. Turned out great and it was nice to see it from this angle again! :D

1107091542.jpg
 

richie rich

Well-Known Member
Joined
May 20, 2009
Messages
1,183
Reaction score
1
Points
0
Location
south windsor, CT
ROBERTH said:
Reel, I dug out the procedure for how to refinish properly with Interlux products. They used to have a vinyl wash type primer, but got away from it, even though it is really good stuff.


1. Degrease the aluminum with 2333N or 2316N
2. Sand the aluminum with 80 grit paper to achieve a bright and rough metal profile
3. Remove all sanding residue with a brush/vacuum/clean air line
4. Immediately (within 2 hours of sanding) apply 1 coat of InterProtect 2000E which had been thinned 15% by volume with 2333N (brush/roller) or 2316N (spray)
5. Apply 2 coats of Epoxy Primekote
a. Thin each coat 20-25% by volume with either 2333N (brush/roller) or 2316N (spray)
b. Sand between coats with 220
c. Remove all sanding residue with 2333N or 2316N
6. Apply 2 coats of Perfection
a. Thin each coat up to 10% if needed with either 2333N (brush/roller) or 2316N (spray)
b. Sand between coats with 320 if imperfections are present or the maximum overcoating time had been passed
c. Remove all sanding residue with 2333N or 2316N

All the best,

Jay Smida
Interlux Yacht Finishes

If I was to refinish the bracket, I would use this process as the results I had on the small repair section so far was really nice and finish is tough!

Also, I was going to get the Armstrong deck plates, but they don't make them small enough for the hole in the Grady Drive bracket, and I did not want to make it bigger just for the plate, I did redrill/retap to next larger size for the screws that hold the pie plate and made sure the screw holes were sealed with the 4200. I pulled a few screws out after seal and found the 4200 really pulls into the threads, so seal should be excellent.


Something doesn't sound right with going straight to IP2000 after sanding....you need to etch the aluminum....if they don't sell or use the vinylux etching primer anymore, I would still prep right after sanding/blasting with West's aluma-prep before putting down IP2000.......also, not sure why they recommend epoxy prime coat on top of the IP2000 as that is an epoxy primer and should be ready to accept the paint...the Epoxy Primecoat is normally used under traditional paint projects say for example over fiberglass.....since you already put down the IP2000, I don't think its necessary....also, don't use Perfection or any other topside paint below the waterline...it will blister if you're moored or docked in the water...trailering is another story.......I would do like Brian did, top half paint, bottom half, non-copper based Trilux 33 bottom paint.
 

ROBERTH

GreatGrady Captain
Joined
Jun 10, 2006
Messages
1,304
Reaction score
119
Points
63
Location
Raleigh, NC
Model
Sailfish
They have reformulated to support application to aluminum it appears or at least that is what they led me to believe. Note the timing sensitve statement....they must know something.....at least it sounds scientific to me.... lol.

I would have thought the plan would be to use the paint, but if in water, must overcoat it with barrier coat and maybe an ablative copper free bottom paint to prevent blister/peeling, but dunno as I did not do any research on that. Maybe there was another type of topcoat, but seems it was hard to find the old system where we used vinyl wash which I miss for sure as the acid does an excellent job of etching to the aluminum or plastics.
 

gw204

Well-Known Member
Joined
Jan 31, 2005
Messages
2,481
Reaction score
22
Points
38
Location
St. Leonard, MD
From what I have read, you have about a 20 minute window to get aluminum coated before the aluminum starts oxidizing. The chemical etching just delays that process and give you an extra hour or two in which to get your primer on.

There are self-etching primers out there. The only one I have ever used is Tempo/Moeller's zinc chromate outboard primer. I thought about rattle canning the bracket with spray bomb outboard paint, but chose to go Awlgrip for durability.
 

ROBERTH

GreatGrady Captain
Joined
Jun 10, 2006
Messages
1,304
Reaction score
119
Points
63
Location
Raleigh, NC
Model
Sailfish
Yeah, one has to be careful using mixed products as sometimes can run in to compatibility issues. That is why I tried to stay with a single company system so would not have any issues of peeling or other type long term problems.
I used to paint professionally on automotive and industrial and trust me....there are lots of products that don't like each other.

It is amazing though, how quickly aluminum will oxidize when exposed to the air.
 

Grog

GreatGrady Captain
Joined
Sep 27, 2006
Messages
2,008
Reaction score
1
Points
38
For $3800 you can get a fiberglass bracket with floatation. The paint/coating on the aluminum is going to chip and be a genaral PIA. With the fiberglass you don't have to use special paint (copper free) and it'll raise the stern.
 

ROBERTH

GreatGrady Captain
Joined
Jun 10, 2006
Messages
1,304
Reaction score
119
Points
63
Location
Raleigh, NC
Model
Sailfish
Before re-installing by swim platform this weekend, the pie plates and reseal arount transom with 4200 had time to cure so I put a air pressure leak test on.
I was very surprised with soap spray solution to find 2 leaks around lower motor mount bolts on starboard engine. Dang, wish I had performed this test before sealing pie plates. So unseal one plate and man, that 4200 does a great job holding on to the starboard pie plate! That for sure is the right sealer for these plates to seal off and prevent leaks. Anyhow, pulled bolts and resealed.

I never did see any water ever leak out on those two bolts, so seems it had to have some pressure to force water in, but maybe not enough to leak out. Now, I can not find any leaks, so installed the drain plugs with sealer on them as well, so hoping now, will be leak free and no more water weight. Will see this summer.

The little PVC drain plug with a air valve installed makes quick work out of testing with air pressure. I put in about 15psi and leaks were revealed. Sealed Pie Plate and transom seal had no leaks.
 

Attachments

  • Starboard Motor lower bolts leak test.jpg
    Starboard Motor lower bolts leak test.jpg
    21.8 KB · Views: 6,427
  • Leak Test Drain Plug.jpg
    Leak Test Drain Plug.jpg
    29.8 KB · Views: 6,428
  • Pie Plate Leak Test with 4200.jpg
    Pie Plate Leak Test with 4200.jpg
    35.7 KB · Views: 6,429

MrD

Active Member
Joined
Nov 25, 2020
Messages
28
Reaction score
5
Points
3
Age
46
Location
Brick, NJ
Model
Offshore
Before re-installing by swim platform this weekend, the pie plates and reseal arount transom with 4200 had time to cure so I put a air pressure leak test on.
I was very surprised with soap spray solution to find 2 leaks around lower motor mount bolts on starboard engine. Dang, wish I had performed this test before sealing pie plates. So unseal one plate and man, that 4200 does a great job holding on to the starboard pie plate! That for sure is the right sealer for these plates to seal off and prevent leaks. Anyhow, pulled bolts and resealed.

I never did see any water ever leak out on those two bolts, so seems it had to have some pressure to force water in, but maybe not enough to leak out. Now, I can not find any leaks, so installed the drain plugs with sealer on them as well, so hoping now, will be leak free and no more water weight. Will see this summer.

The little PVC drain plug with a air valve installed makes quick work out of testing with air pressure. I put in about 15psi and leaks were revealed. Sealed Pie Plate and transom seal had no leaks.
Hi Robert, I would like to also pressure test my bracket for leaks, can't figure out how to plug the drain and also fill with air. Can you please explain your 1/2" PVC drain plug with air valve attached. Do you have any pics of it? I know this is an old posting but anymore explanation of this part would be very helpful.
Thanks a million in advance for any help.
 

Pacill

New Member
Joined
Jul 22, 2018
Messages
1
Reaction score
0
Points
1
For $3800 you can get a fiberglass bracket with floatation. The paint/coating on the aluminum is going to chip and be a genaral PIA. With the fiberglass you don't have to use special paint (copper free) and it'll raise the stern.
Where ?
 

Ted R

Well-Known Member
Joined
Jan 14, 2008
Messages
107
Reaction score
26
Points
28
Location
Michigan
Model
Gulfstream
My GIL bracket leaked from the top and I replaced it with a compression plate from Armstrong who Grady uses on their new boats. Armstrong will make you a new bracket, check out their website, very nice products.