1981 FORMULA F233 RESTORATION

NOTHING ELSE MATTERS

GreatGrady Captain
Joined
Jun 26, 2006
Messages
1,993
Reaction score
5
Points
38
Age
59
Location
LONG ISLAND NEW YORK
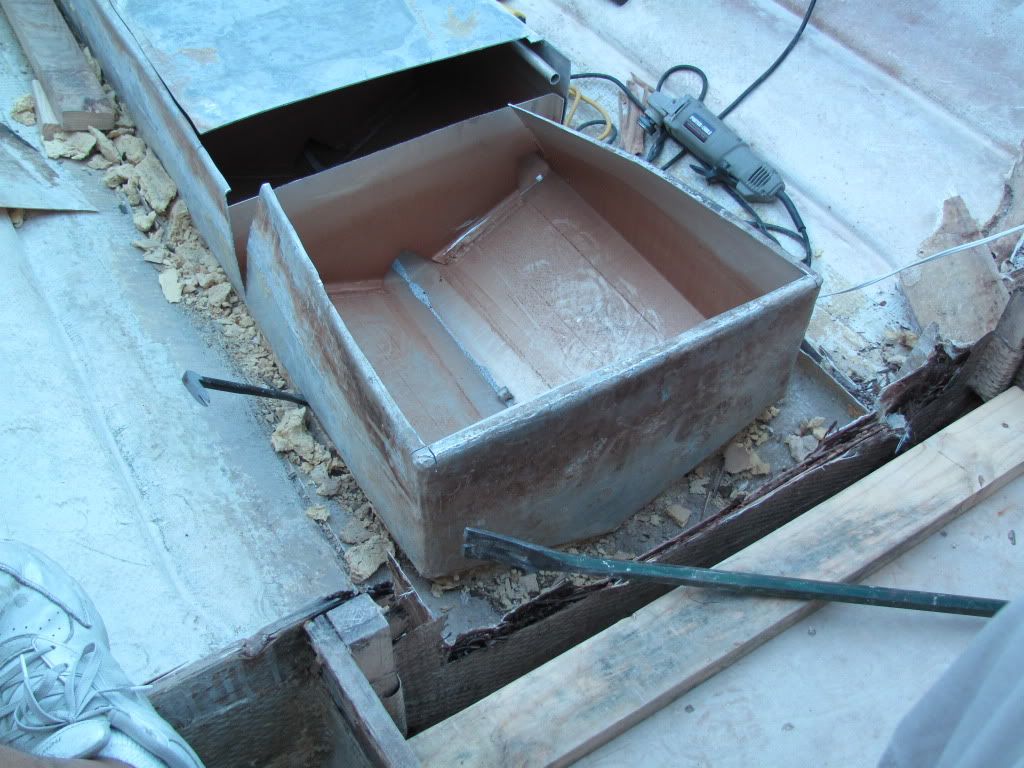
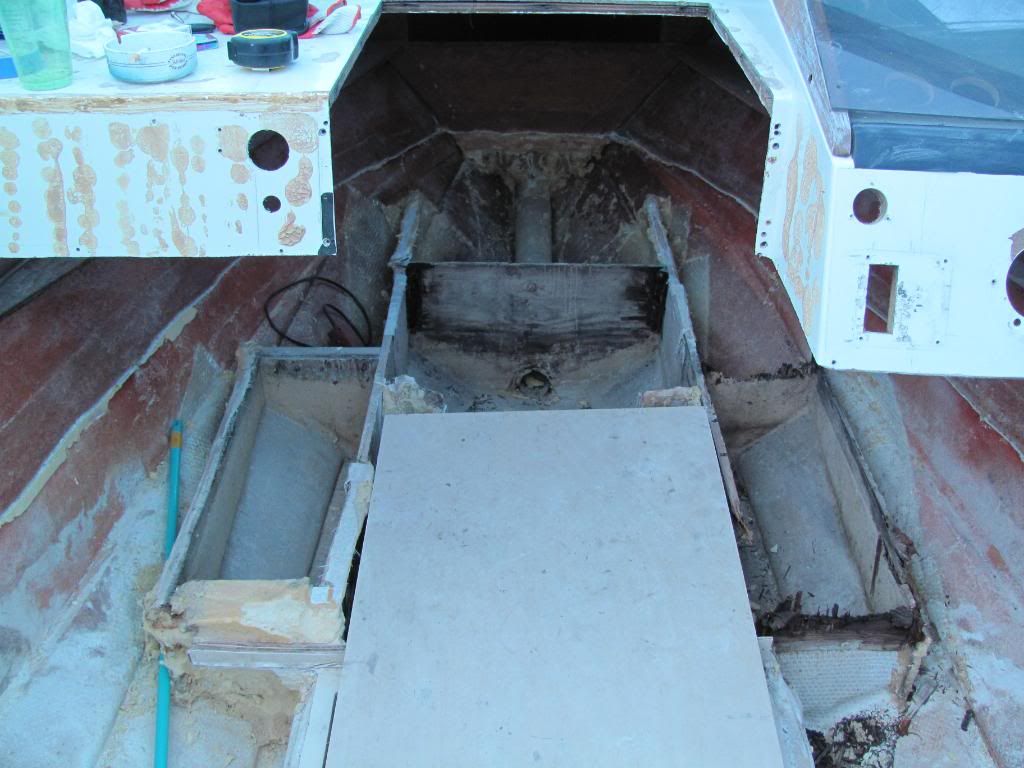
A few months ago i bought(for next to nothing) a 1981 Formula F233 Fisherman, is the one with the bigger cockpit. Boat was .................. well, just the boat, no motor, no outdrive, no gimbal, just the steering wheel, gauges, a morse control and about 60-80 gallons of fuel. The boat was sitting for 12 years collecting a LOT of rain water. So I bought a new aluminum trailer with disc brakes on both axles and went to Virginia to pick her up knowing what i'm going to see and what i'm gonna face in the future, but that's what i wanted, i wanted to restore this old girl back to new making her much much better than what she was. As soon as i got the boat start to rip everything apart. I started ripping the floor and remove at least 16 garbage bags of "closed cell" foam, which BTW was saturated(the bottom 2") with water and GAS in the gas compartment. Well everything went well with the ripping apart business BUT the fuel tank. I had empty the tank way before i start ripping apart, so my next thing to do was to remove the tank. For about 2-3 weeks the tank refuses to come out. I'm embarrassed to say that i CAN NOT remove it. Is been sitting in a bed of foam covering everything, bottom, sides and top. I removed all the foam except from the bottom and still can't remove it. I removed the port side stringer to try and pry from the side, but does not budge. My next choice is to start cutting it in pieces with a grinder. My concern is sparks though. Even though the tank is empty and does not smell gas at all, is it going to be safe to start cutting it? I've restored a few boats in the past and never EVER had a problem like this.
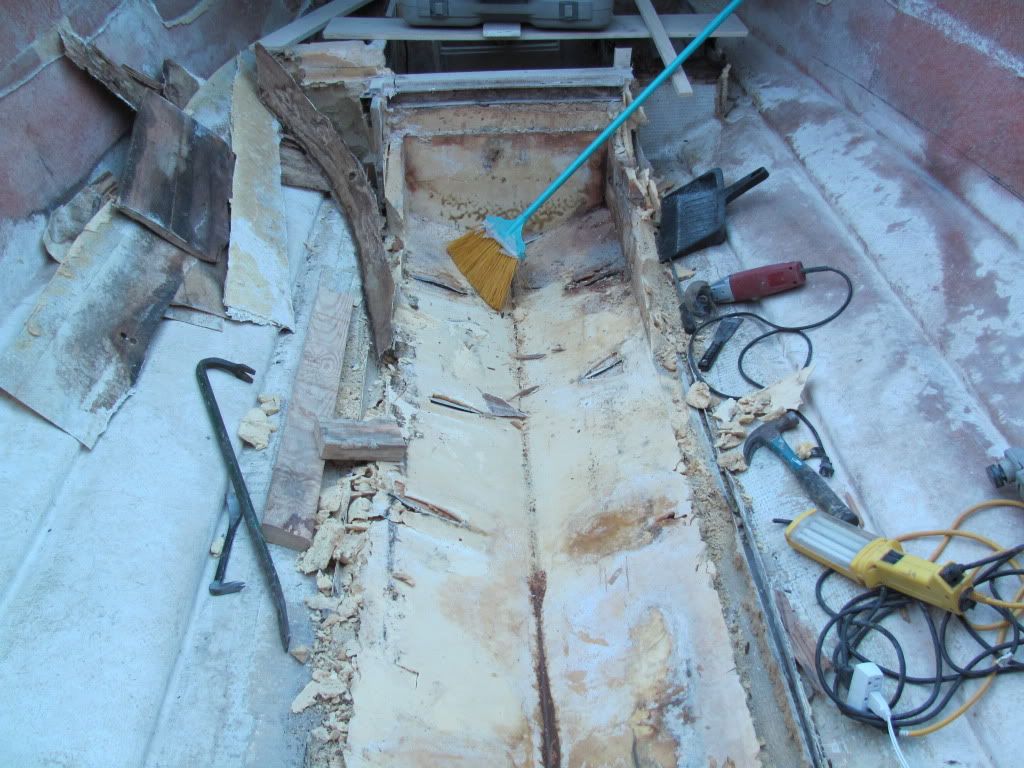
Any way here are some pictures from day one to today.
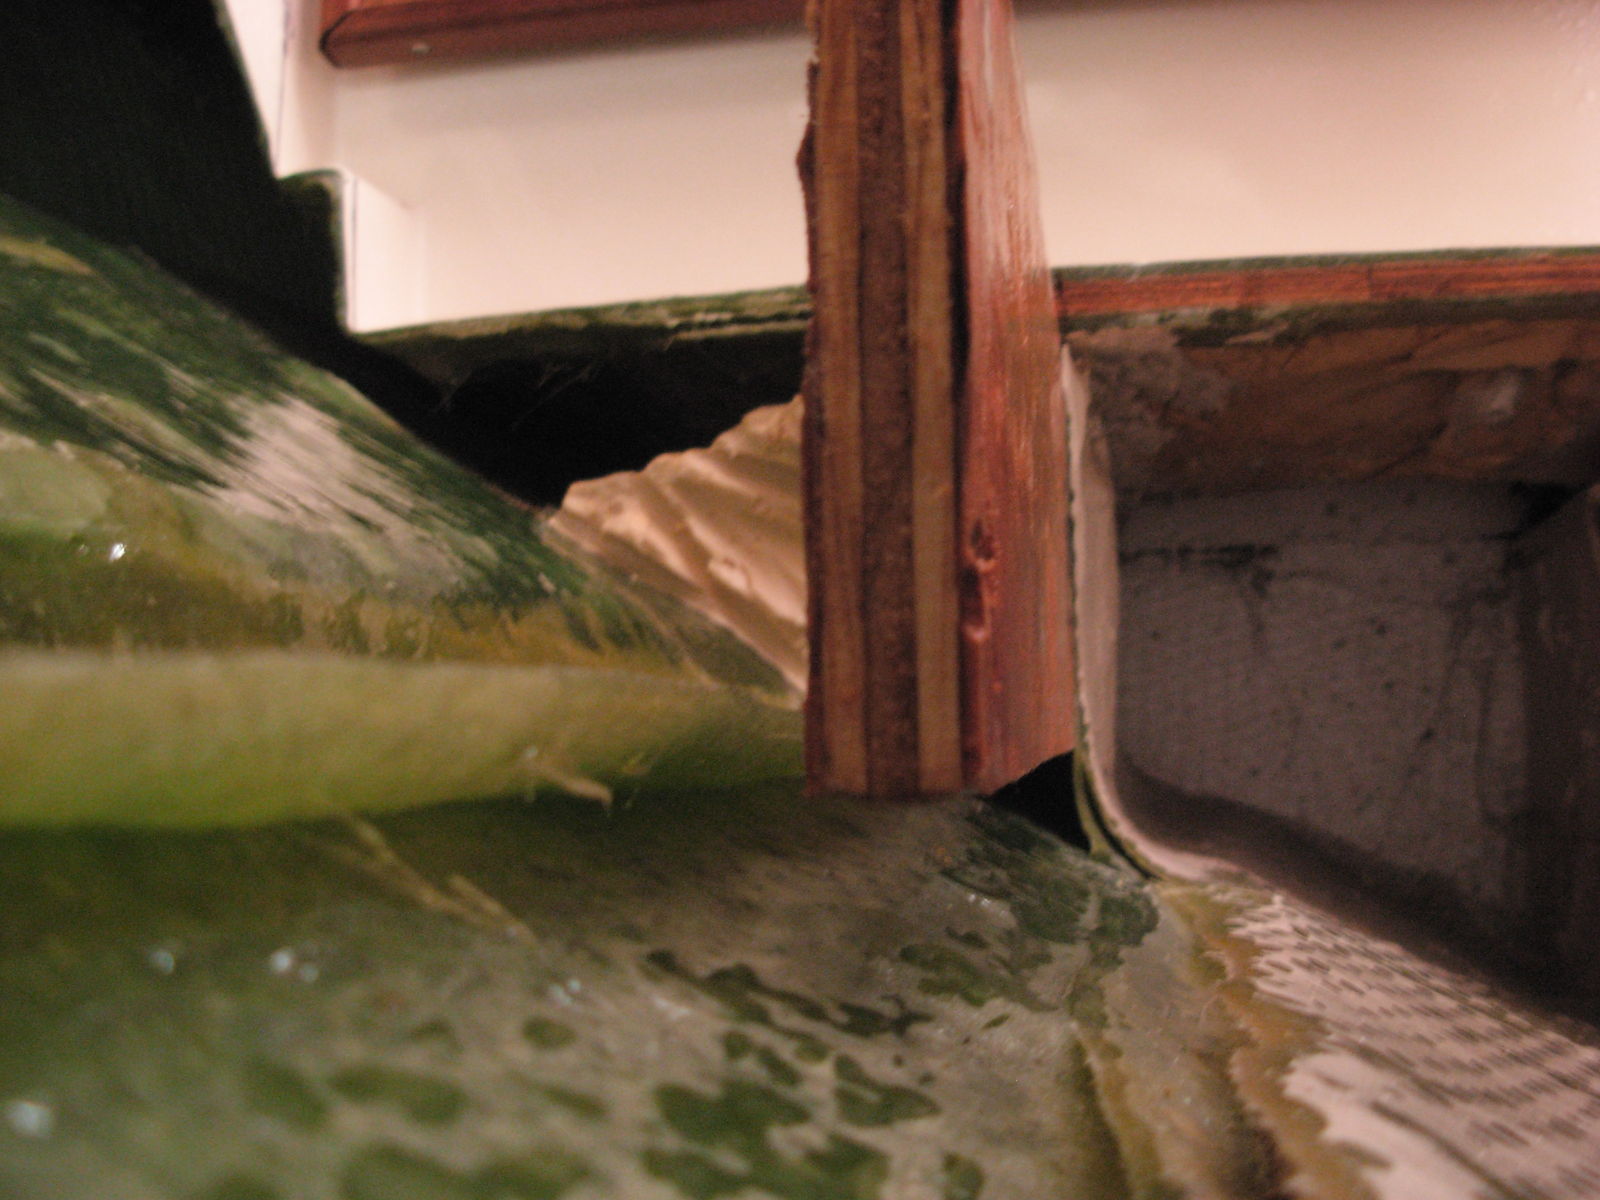
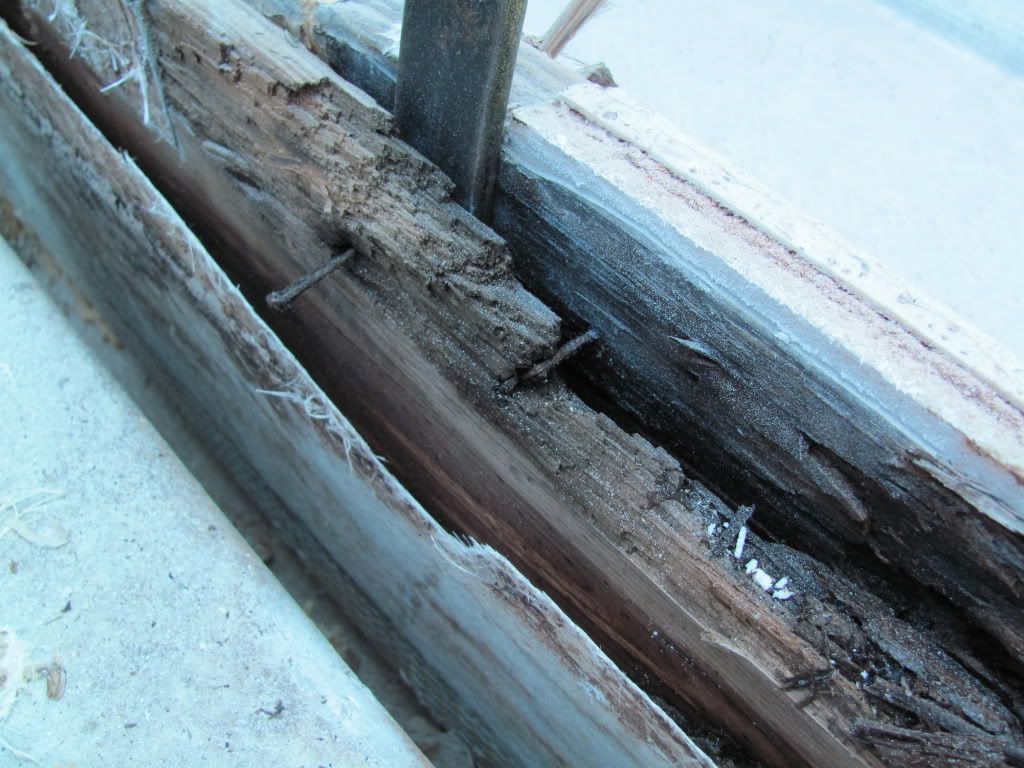
Oh, BTW, when i removed the stringer i noticed that it was a space of 1 inch under the stringer, yes, the stringer was "floating", never saw that before. Also the stringer was made by using 2 pieces of 3/4 lumber stocked on top of each over to make the height and was STAPLED together.
IMG_0094.jpg

IMG_0100.jpg

IMG_0104.jpg

IMG_0127.jpg

IMG_0132.jpg

IMG_0152.jpg

IMG_0177.jpg

IMG_0236.jpg

IMG_0238.jpg

IMG_0239.jpg

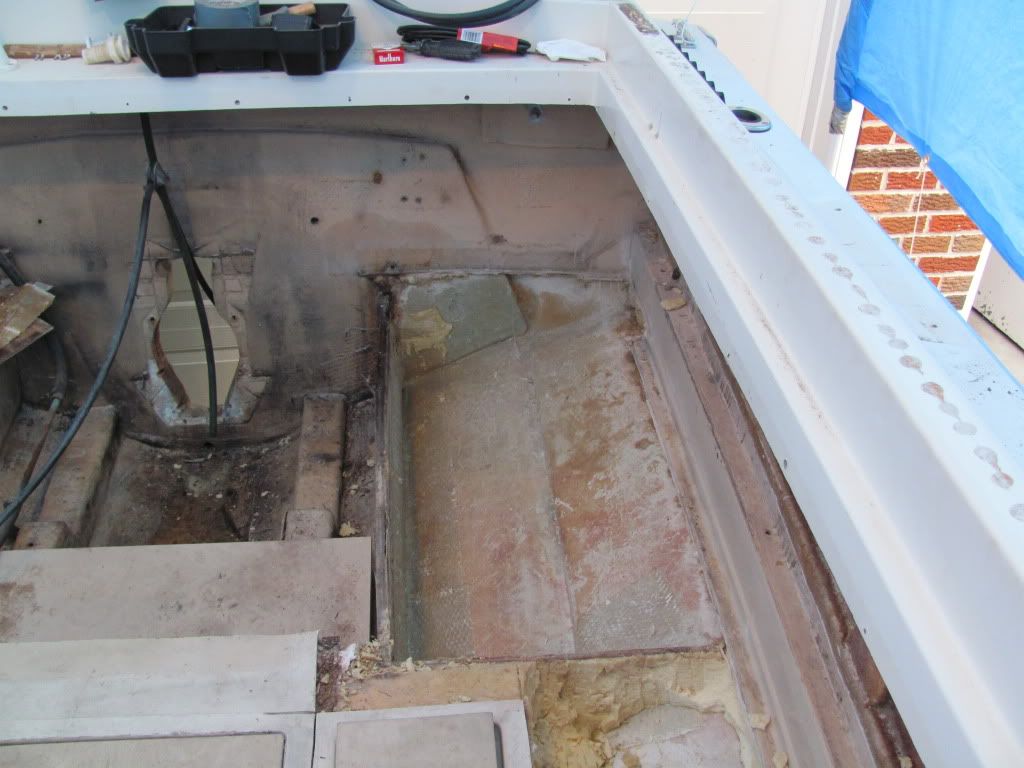
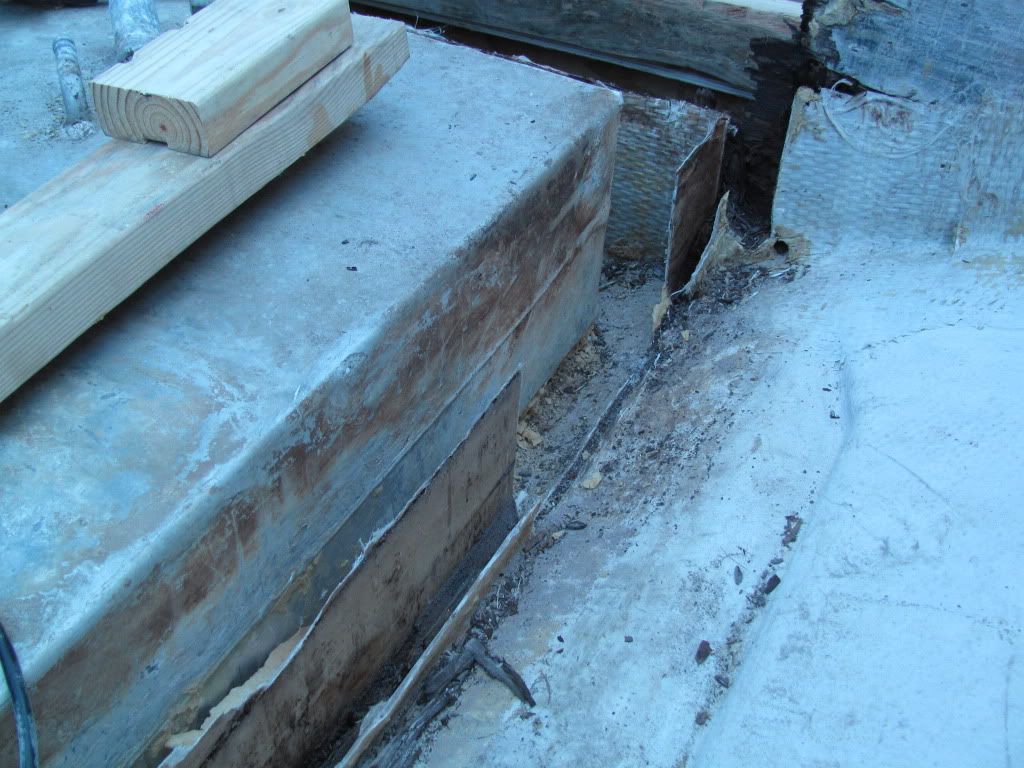
Also this is my "accident" during the resto process.
IMG_0151.jpg
 

gw204

Well-Known Member
Joined
Jan 31, 2005
Messages
2,481
Reaction score
22
Points
38
Location
St. Leonard, MD
Re: 1981 FORMULA RESTORATION

What the h3ll did you do to your thumb???? :jaw


Looks like you're off to a good start. Another thing you mighy try with the tank is to get a piece of heavy braid or wire and use it to saw through the foam beneath the tank.

I emptied out the tank in mine yesterday. Going to start digging the foam from around the sides today...
 

richie rich

Well-Known Member
Joined
May 20, 2009
Messages
1,183
Reaction score
1
Points
0
Location
south windsor, CT
Re: 1981 FORMULA RESTORATION

If its been washed out and has no gas smell, you"re OK...I just washed mine out with simple green and cut it up with a metal sawzall blade.

I still can't believe it won't come out after all that.

PS....you have the same floating stringers in a Grady...
 

NOTHING ELSE MATTERS

GreatGrady Captain
Joined
Jun 26, 2006
Messages
1,993
Reaction score
5
Points
38
Age
59
Location
LONG ISLAND NEW YORK
Re: 1981 FORMULA RESTORATION

gw204 said:
What the h3ll did you do to your thumb???? :jaw


Looks like you're off to a good start. Another thing you mighy try with the tank is to get a piece of heavy braid or wire and use it to saw through the foam beneath the tank.

I emptied out the tank in mine yesterday. Going to start digging the foam from around the sides today...

Cut it in the middle with a fine blade with the grinder. That was in the beginning of the project, is all better now.
 

NOTHING ELSE MATTERS

GreatGrady Captain
Joined
Jun 26, 2006
Messages
1,993
Reaction score
5
Points
38
Age
59
Location
LONG ISLAND NEW YORK
Re: 1981 FORMULA RESTORATION

richie rich said:
If its been washed out and has no gas smell, you"re OK...I just washed mine out with simple green and cut it up with a metal sawzall blade.

I still can't believe it won't come out after all that.

PS....you have the same floating stringers in a Grady...

I did an old Grady years back and the stringers were not like that.
 

richie rich

Well-Known Member
Joined
May 20, 2009
Messages
1,183
Reaction score
1
Points
0
Location
south windsor, CT
Re: 1981 FORMULA RESTORATION

yeah...the glass carries most of the load and is allowed to flex.....if you bottom them out, you will get a hard spot and can cause a stress fracture....need wide fillets to ease the landing area...


they are closer in the aft end....maybe 1/4 to 1/2....but going forward they are much higher off the hull......I will be making new ones by gluing the plywood stringer to a trapezoidal base made from Divinycell, so it has a softer contact area and nice sweeping fillets.
 

NOTHING ELSE MATTERS

GreatGrady Captain
Joined
Jun 26, 2006
Messages
1,993
Reaction score
5
Points
38
Age
59
Location
LONG ISLAND NEW YORK
Re: 1981 FORMULA RESTORATION

richie rich said:
I will be making new ones by gluing the plywood stringer to a trapezoidal base made from Divinycell, so it has a softer contact area and nice sweeping fillets.

Can you elaborate on that? A picture or drawing would be great.
 

richie rich

Well-Known Member
Joined
May 20, 2009
Messages
1,183
Reaction score
1
Points
0
Location
south windsor, CT
Re: 1981 FORMULA RESTORATION

The plywood beam is 3/4 inch wide......cut the bottom at the deadrise angle, in my case 20 degrees, so that it matches the hull bottom.....then I'm taking 5/8th inch DVC80 that I have, and cutting strips with a 45 degree angle on the sides and 1 inch width on top.....with a 1 inch top width and cut on the angles, the bottom will be around 2 inches wide....that will be epoxied to the hull and the stringer will be epoxied to the top of the DVC....you will now have a shape that looks like the Eiffel Tower...then just finish the fillet with some thickened epoxy and later glass it in with 12oz biax tape (DB1200) (2 layers) and a final glass layer with 1708 all the way to the top of the wood or over everything if you're using wide width fabric, making sure you overlap the 12oz tabs by 2 inches and the final layer by at least a good 3 inches....since I ground away the original 24oz roving until smooth and flat, I'm covering the entire hull surface between the stringers to return it to its original thickness...so basically, they (all the stringers, bulkheads and hull) will all be interconnected....you can use DB1700 instead of 1708 but use 2 layers of 1700 as it has no matt and needs 2 layers to make up the original skin thickness....if the 1708 becomes a pain in the butt to wet out due to limited pot life of the epoxy in this hot weather, I will use the 1700 instead because it wets out much easier. The DVC will also save a lot of time and quantity of mixing thickened epoxy.........most guys just bed the stringers in epoxy and make nice sweeping fillets......but since I'm splicing into some remaining stringers that are left in the hull (forward berth area) I don't want the hull to see much of a difference between the old and the new as far as flex is concerned....and I have no way of suspending the beam off the hull like the factory, so I came up with this alternative.
 

NOTHING ELSE MATTERS

GreatGrady Captain
Joined
Jun 26, 2006
Messages
1,993
Reaction score
5
Points
38
Age
59
Location
LONG ISLAND NEW YORK
Thanks for the explanation. Where can i get small quantity of the DVC?
I will also lay a layer or two of 1708 on the floor to make up for the woven, before i start installing the stringers.
 

richie rich

Well-Known Member
Joined
May 20, 2009
Messages
1,183
Reaction score
1
Points
0
Location
south windsor, CT
You can get DVC from BBC...it will cost about $130 for a 4x8 sheet...130+25 for shipping...they will cut it in half to ship UPS.....you can probably use 1/2 inch or lesser density like H45 which will save a few bucks.............you can also buy from Jamestown Dist in RI or Defender Industries in Waterford CT...but I think they sell Corecell product....both are 5lb density...not sure how competitive the pricing will be with shipping so double check...may be cheaper locally??

2 layers of 1708 before bedding stringers....that will be a battleship when you're done.....buy lots of epoxy! :wink:
 

Grog

GreatGrady Captain
Joined
Sep 27, 2006
Messages
2,008
Reaction score
1
Points
38
RR, how are you going to connect the new stringer to the old?
 

richie rich

Well-Known Member
Joined
May 20, 2009
Messages
1,183
Reaction score
1
Points
0
Location
south windsor, CT
Grog, just like the Formula, Grady simply butted the ends of a plywood beam together, placed a piece of scrap ply over one side of the joint and stapled it...no resin in the joint or under the splice...it sounds wrong, it looks wrong, but it lasted over 20 years so I can't argue.....That being said, I will take it a step further by epoxying the joint ends and I will cover both sides of the joint with epoxy and ply and clamp it together...no fasteners....it will be like a plywood sandwich....after glassing it in, I think it will outlast the rest of the boat. I think you can see in my pic that I peeled back the original glass to give myself a good gluing surface...

NEM, just a thought....if you're laying new glass on the entire hull before adding structure, you may want to use a 0/90 glass like 1810 instead of 1708 which is 45/45.....I confirmed with GW engineering that thats what they used on the hull panels....
 

NOTHING ELSE MATTERS

GreatGrady Captain
Joined
Jun 26, 2006
Messages
1,993
Reaction score
5
Points
38
Age
59
Location
LONG ISLAND NEW YORK
richie rich said:
NEM, just a thought....if you're laying new glass on the entire hull before adding structure, you may want to use a 0/90 glass like 1810 instead of 1708 which is 45/45.....I confirmed with GW engineering that thats what they used on the hull panels....

That is a good idea, this way i can only lay only one layer? I'm doing this more for bonding purposes than structure. Hull is very thick down there.
 

richie rich

Well-Known Member
Joined
May 20, 2009
Messages
1,183
Reaction score
1
Points
0
Location
south windsor, CT
If your just doing it for bonding purposes and making it all nice a flat, one layer should be plenty......if you find or make any big divots because you ground away an original air pocket or something, I would just add a patch over the divot to bring it closer to level and then continue with the full layer of 1810...better to have glass in the hole than just a blob of resin.