1988 Overnighter dash rebuild and bulkhead replacement

jrgrady

Active Member
Joined
Jan 8, 2008
Messages
38
Reaction score
0
Points
0
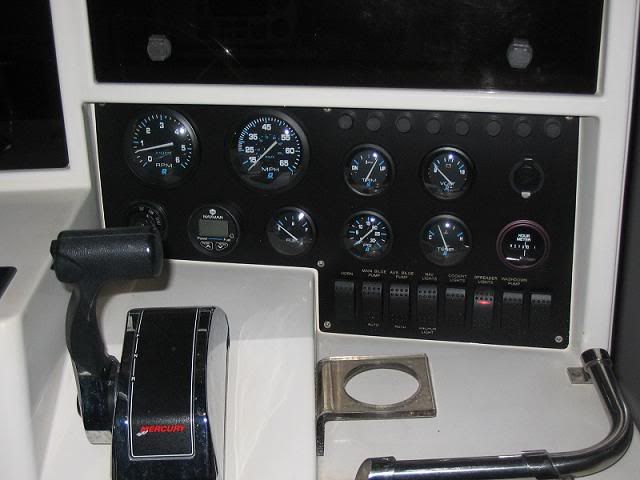
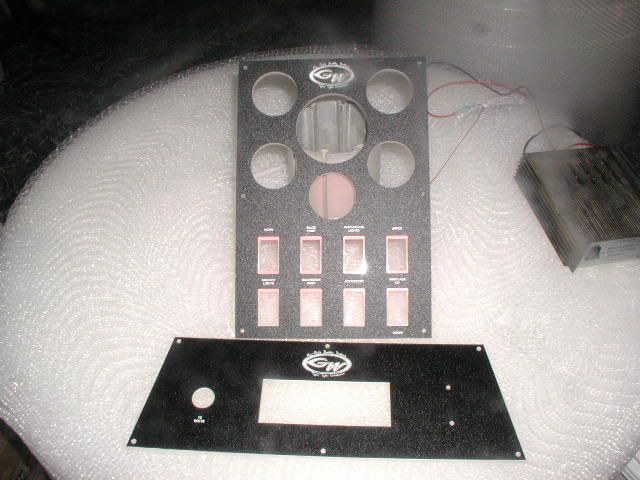
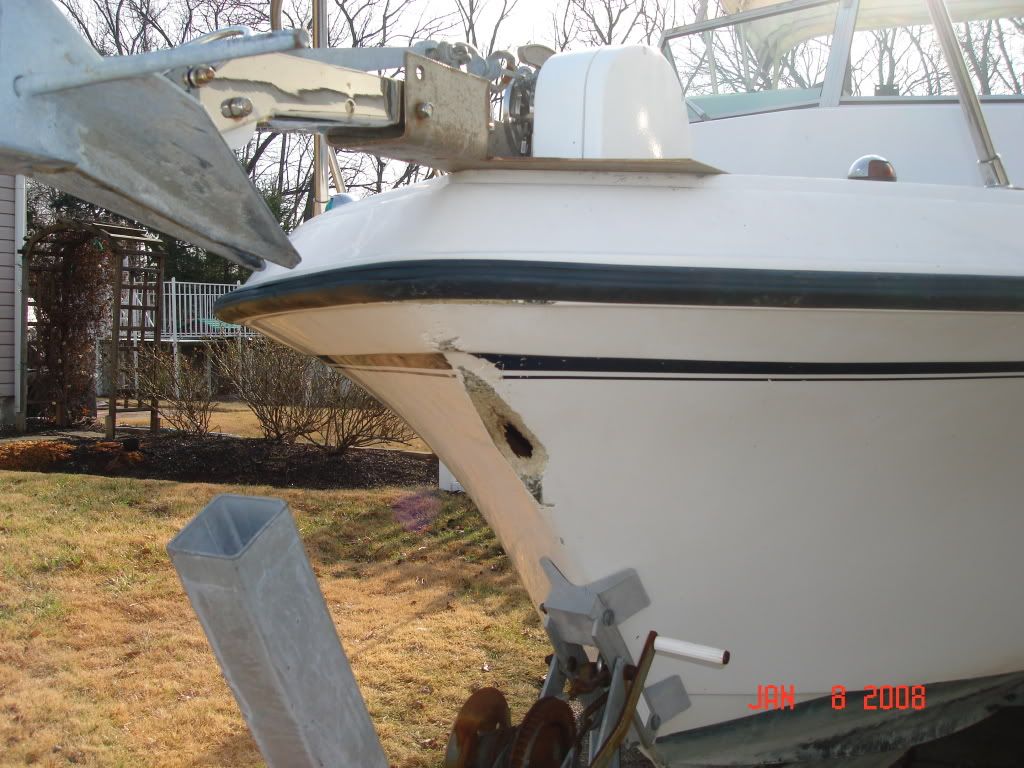
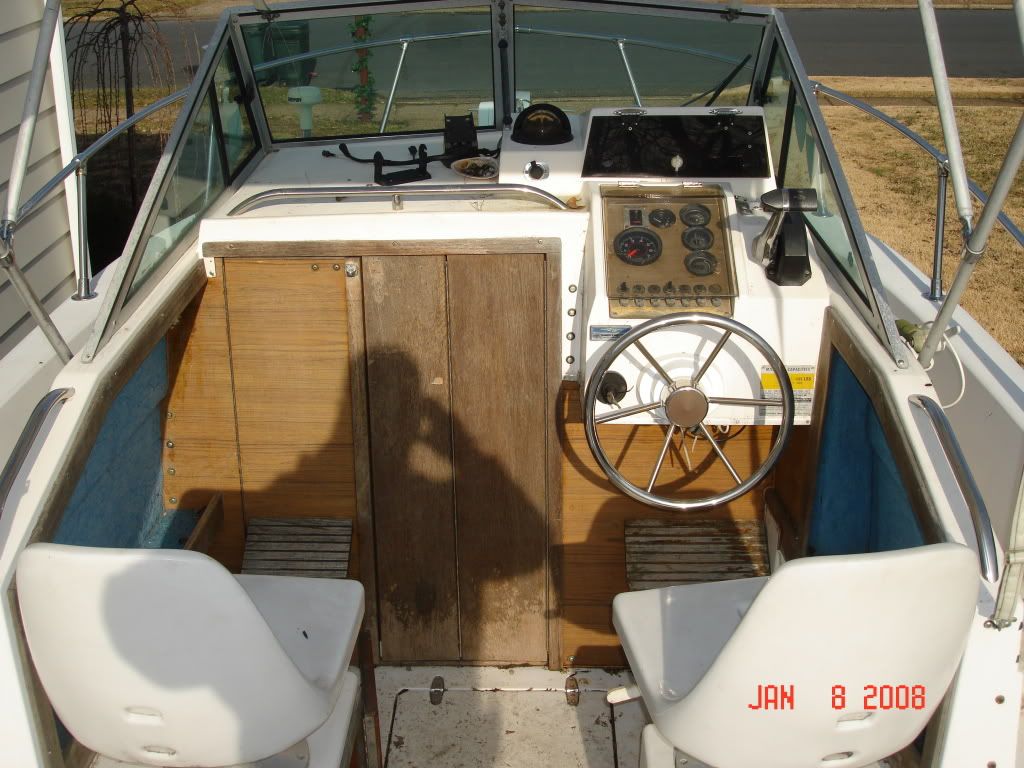
Hey all, Robalo owner here, but my buddy got a 1988 20' Overnighter with original engine. Here goes, engine runs great, GPS, FF, VHF, am/fm stereo, windlass, and dual axle trailer all included. Bought for $2000.00. I thought it was an awesome deal, so he went ahead and got it. I have to do some glasswork on the boat and detail it, but overall, it's a clean boat. I'm replacing gauges and panel, installing rocker switches and new fuses, redoing wiring in boat, detailing boat, and refinishing engine paint. Started it up after sitting for two years and it fired right up. Will do all the plugs and oil and what not just to be on the safe side. Here are some pics.....
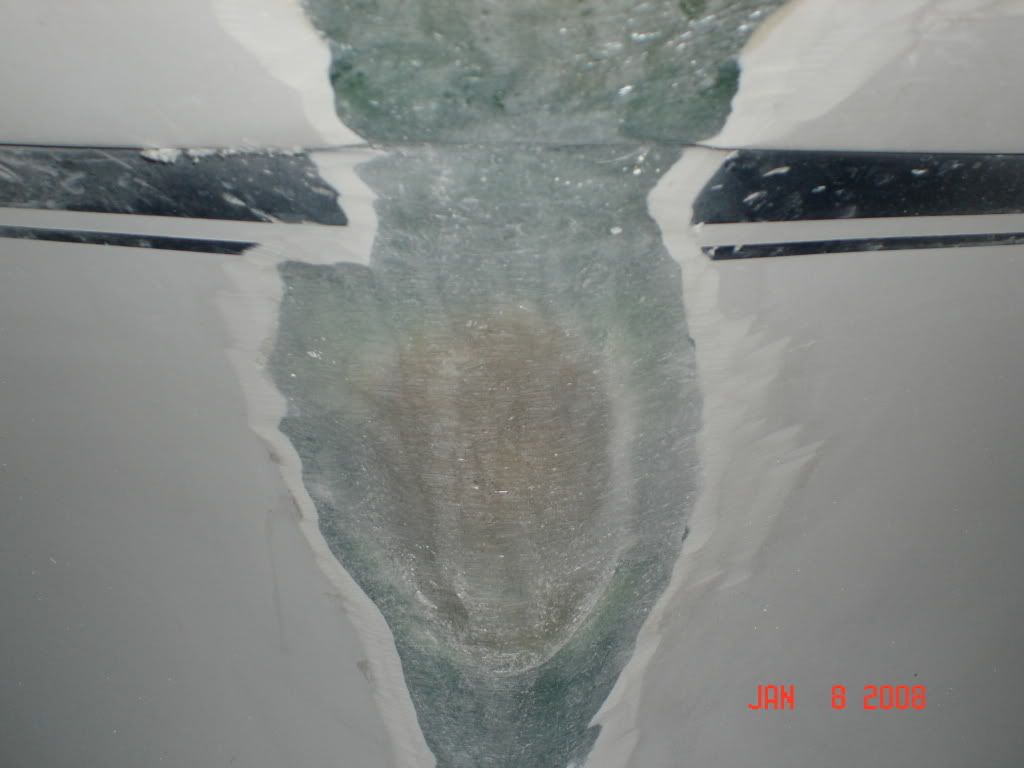
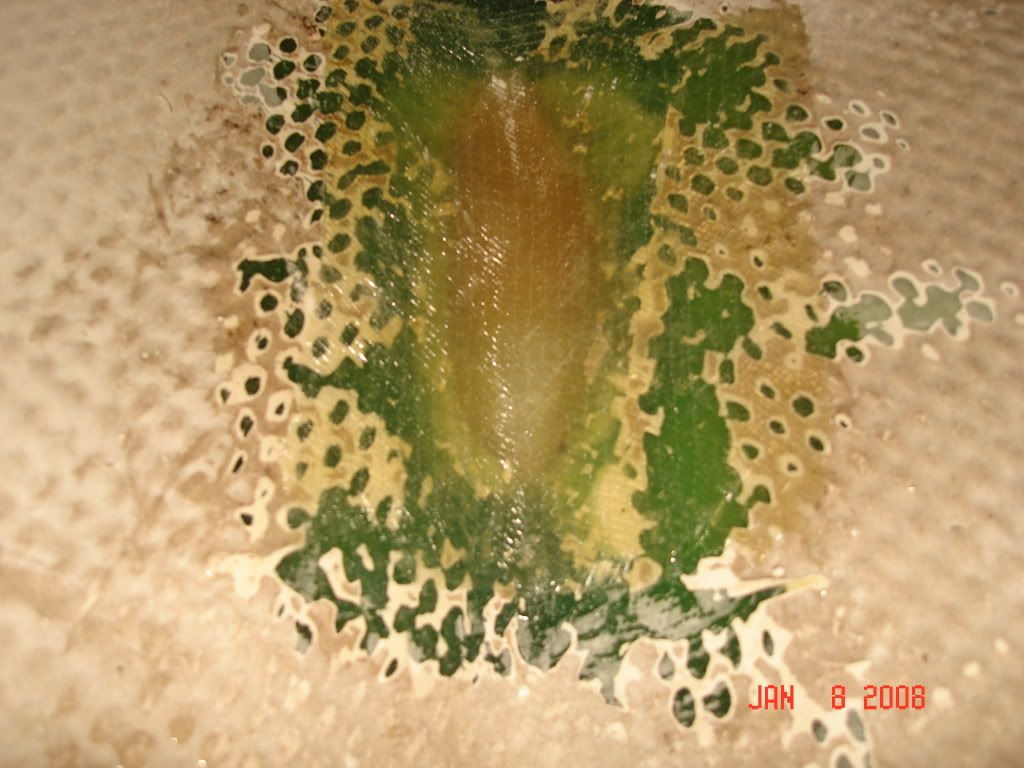
DSC00977.jpg


DSC00971.jpg


DSC00972.jpg


DSC00968.jpg


DSC00970.jpg


DSC00978.jpg


DSC00976.jpg


DSC00982.jpg


DSC00992.jpg


DSC00988.jpg


DSC00990.jpg


DSC00975.jpg
 

jrgrady

Active Member
Joined
Jan 8, 2008
Messages
38
Reaction score
0
Points
0
Thank You, heading there now. This is a very onformative sight and I have been perusing the threads for about two weeks now. I'm also registered at classicmako.com and robaloboatowners.com/forums. Other very good sights....in case anyone is interested. By the way, thanks to whoever's thread I read about POE Marine in New York about the decals. Asked the boat owner to buy them and he said they were very helpful and reasonable. Will reccomend them to any Grady owner.
 

BobP

GreatGrady Captain
Joined
Apr 27, 2005
Messages
4,746
Reaction score
6
Points
38
Location
Long Island, NY
Model
Sailfish
That's interesting, my 88 Overnighter had the switch panel where this one has the hull plate. Mid year design change perhaps.
 

gw204

Well-Known Member
Joined
Jan 31, 2005
Messages
2,481
Reaction score
22
Points
38
Location
St. Leonard, MD
Welcome to the site jr. :D

Please allow me to offer my rookie-ish glass repairman opinion. :) 
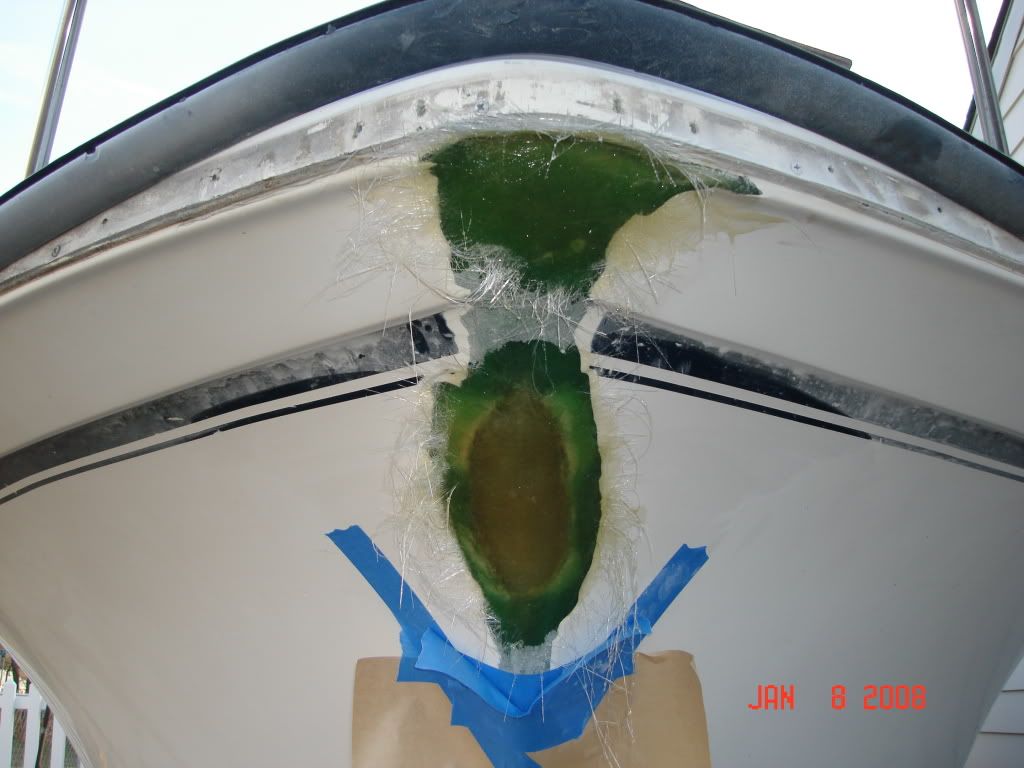
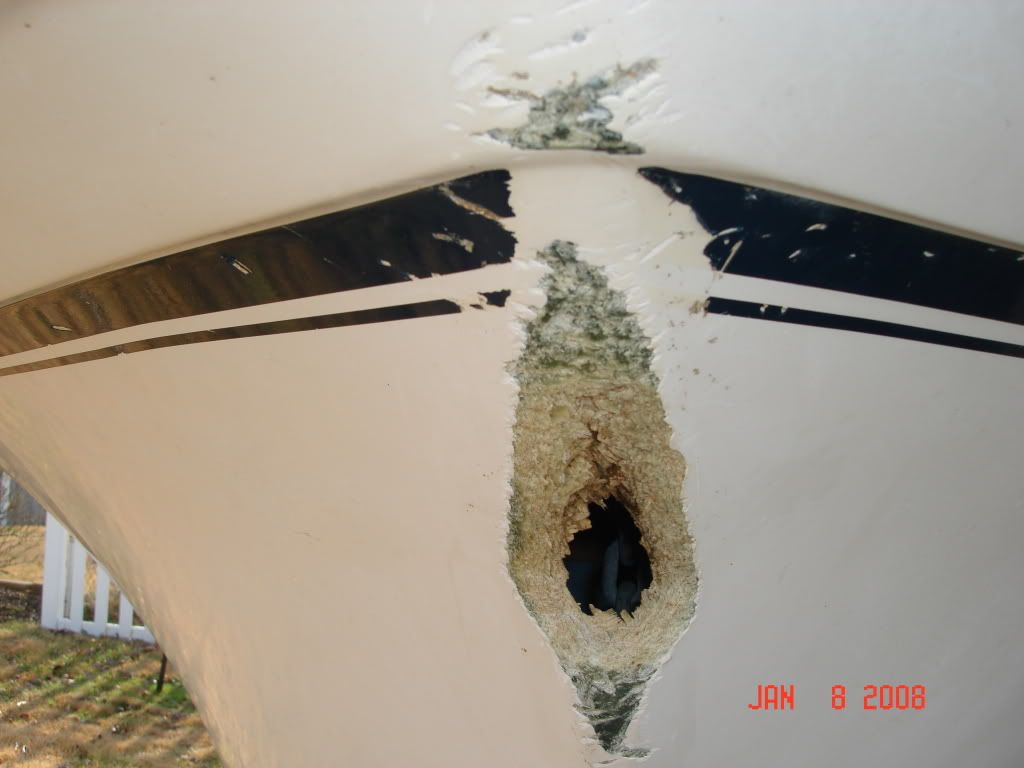
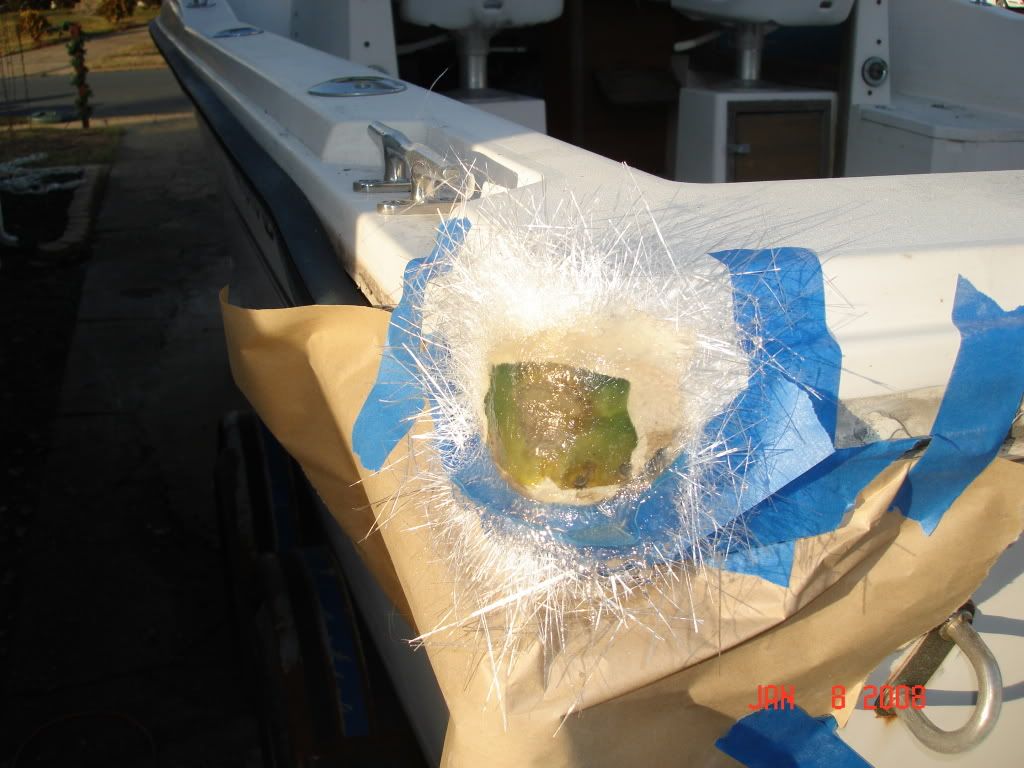
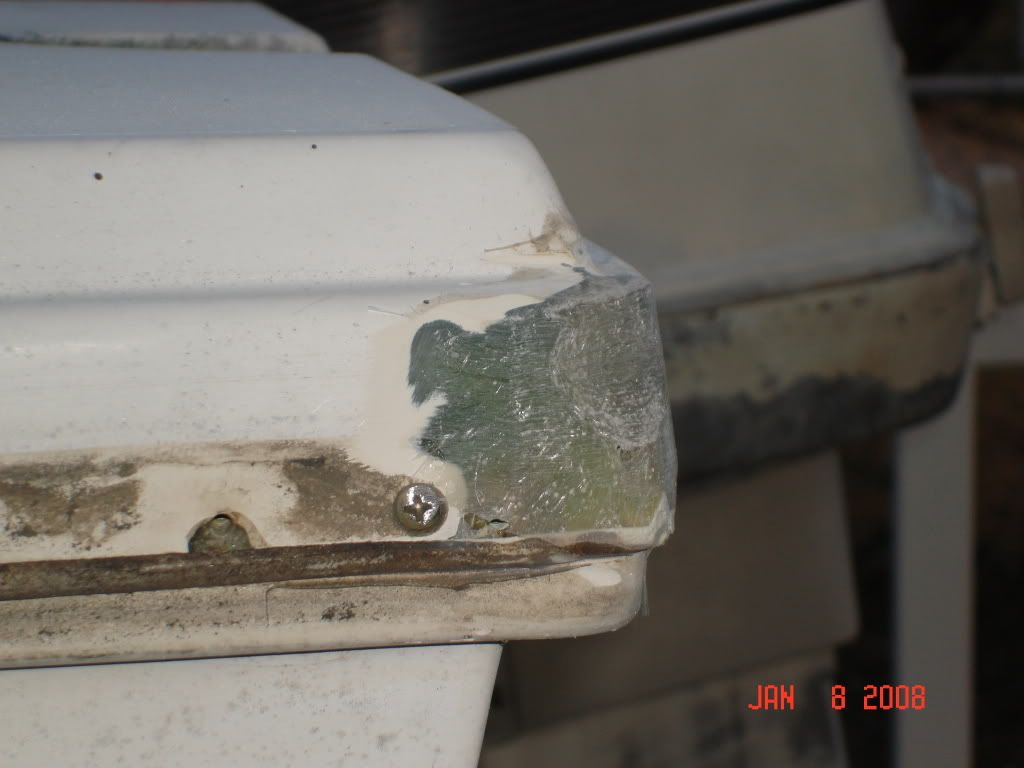
It looks to me like you should have done a bit more grinding to you bow repair to bevel the edges a bit more. As it is now, you have very little surface area when the new glass meets the old. When I do glasswork, I like to use about a 12:1 bevel. That equates to grinding back a minimium of 3" for laying up a repair of 1/4" think.

Also, with the grinding you did do, did you get to a point where you had completely solid glass and none of that chewed up stuff? If not, grind it off and redo it.

What did you use for materials? From what I can see there is chopped strand mat only. I would substitute either 1708 or 1808 for the mat or use alternating layers of mat and at no less than 12 oz. cloth for maximum strength.

If you already plannded this and you're just not done, disregard. :D

Getting that area faired properly may be tough. I think the way I would have approached this repair would have been to find an identical, undamanged hull and ask the owner's permission to pull a mold off of the section you need to repair. That mold could then have been used to build a new part to glass in place and would have decreased the amount of finishing work tremendously as it would have already had the proper contours.

Good luck and keep the pics coming. :)
 

jrgrady

Active Member
Joined
Jan 8, 2008
Messages
38
Reaction score
0
Points
0
I am not a proud man so I am very open to tips, suggestions and criticism. As far as the inside repair, I could only bend my arm so far and I actually was grinding it blindly and had to keep checking. I laid four layers of biax mat inside and three layers outside. I used the chopped strand to build up low areas and generally build up the repair area. You are absolutely correct about the grinding away of the loose glass. The hull was actually delaminated about an inch past the hole in all directions. I ground all the way back until the glass looked like it was one solid piece. You know what I mean by that. I think trying to find someone with the same hull to pull a mold from would be to much. I will try my best to retain the original hull lines and contours. I ordered Grady gelcoat from Minicraft.com and hopefully the repair will not be noticed by the naked eye. Keep me on my toes gw204, this is a blast, I love comparing notes with other glass guys..........
 

gw204

Well-Known Member
Joined
Jan 31, 2005
Messages
2,481
Reaction score
22
Points
38
Location
St. Leonard, MD
I've used that Minicraft gelcoat before and it matches very well. But depending on how faded the hull is, you may have to do some compounding to the get rest of the boat to match your new gelcoat. Did you buy the liquid so you can spray it, or the paste?

You guys should have found this boat 3 years ago. I used to have the same hull in a 204 Fisherman and could have pulled the mold for you. :)
 

jrgrady

Active Member
Joined
Jan 8, 2008
Messages
38
Reaction score
0
Points
0
I bought the liquid and plan on spraying the areas. Compounding the boat is part of the resto project. All the decals are coming off first and new decals are already ordered from POE Marine in New York (Thanks to you guys from previous threads I searched) Ive never used paste before, would that be for like air chips in the gelcoat. I have a couple of them and I was just going to use a syringe filled with gel to fill the void and then fair it out. What do you think?
 

gw204

Well-Known Member
Joined
Jan 31, 2005
Messages
2,481
Reaction score
22
Points
38
Location
St. Leonard, MD
I did my first spot repairs on hullsides with paste and I'll never use it again. It was so thick I ended up with tiny pinholes. The next time I tried, I added a reducer that I got from Minicraft and that helped a lot, but it was still a pain.

Now I just use liquid all the time and if I need to make it thicker, I just add a bit of cabosil and mix to the desired consistency, then I tint it and lasty I catalyze it.
 

jrgrady

Active Member
Joined
Jan 8, 2008
Messages
38
Reaction score
0
Points
0
cut my dash panel today and it came out pretty good. I am working on ways to label the switches, but for now will wire everything first. I am using fuse blocks under the dash rather than installing fuse "buttons" on the dash

032.jpg
 

gw204

Well-Known Member
Joined
Jan 31, 2005
Messages
2,481
Reaction score
22
Points
38
Location
St. Leonard, MD
I like those gauges! Are they Faria Chesapeake SS? :)

My recommendation would be the build your panel on UV-stable Rowmark engraving stock and have the switch functions engraved in the panel itself. Also, IMHO the switches would be better layed out and more easily labeled if you put them all in a single row, side by side.

This is the panel I built for my 204. Maybe it will give you some ideas.

IMG_0513.jpg
 

jrgrady

Active Member
Joined
Jan 8, 2008
Messages
38
Reaction score
0
Points
0
called scott at vectorled and he is going to hook me up with a new panel. Think I'm going to make a panel to cover the electronics box on top of the dash too. Make that a flush mount vhf panel. Also probably going to replace the bulkhead and get rid of the woodgrain. I searched for hours last night and couldnt find pics of the job done to other boats. I will probably be using some kind of nidacore with glass and gelcoating it to match the original grady color. Any thoughts?
 

jrgrady

Active Member
Joined
Jan 8, 2008
Messages
38
Reaction score
0
Points
0
I took the bulkhead out and am going to use the old one to trace it onto the new one I'm going to make. I cant believe grady-white did not fiberglass this bulkhead so no moisture could get in. On the new one, instead of using starboard, I'm going to glass and gelcoat the new core. Obviously I'm going to use the grady gel so everything matches. Will take plenty of pics during the process. For anyone considering this, it took me about 1.5 hours to remove old bulkhead. Tomorrow I am looking to trace and cut the new panels. Here is a pic of the bulkhead removed

004.jpg
 

dheywood

Member
Joined
Dec 25, 2006
Messages
20
Reaction score
0
Points
0
Location
Squamish, B.C.
Replacing dash

I did a complete refit of my 81 weekender last winter and my dash was beyond repair. I covered it all with a sheet of 3/16 aluminum. After cutting holes out for all my guages, helm, throttle, and switches I had the aluminum anodized flat black and had the switch labels silk screened on. I purchased bezels for all my guages to tilt them towards me. Check out some photos at:
http://dheywood72.squarespace.com/welcome/
 

jrgrady

Active Member
Joined
Jan 8, 2008
Messages
38
Reaction score
0
Points
0
to the Whinna family, get out.....just kidding, but no more pics until the boat is done.. LOL
 

TBone

Well-Known Member
Joined
Nov 26, 2007
Messages
227
Reaction score
0
Points
0
Location
Worcester, Ma
Yup, Me Too!!!! :roll:

While removing the trim from the bottom i noticed it was starting to get a little soft, so out it came!

But I never want to replace them again, so.....

I called Scott C. @ at vectorled, again, He said he can re-make the panels,
which on mine have different curves and angles, to an exact fit
and re-drill the holes.

Scott will remake theses panels out of Seafoam Starboard,
threfore I wll put them in and never touch them again!!! 8) 8)
 

cvjahnes

Member
Joined
Oct 9, 2007
Messages
5
Reaction score
0
Points
0
Bulkhead repair/replacement

Hi JRGRADY,
so I'm not the only one repairing a bulkhead his year?:) My brother and I have a 1989 Gulfstream and the bukhead was rotted at the bottom. We were offshore this summer in some heavy swells and noticed the bottom of the bulkhead moving laterally by 1/3". I bought some 3/4 teak p-wood from Conden Lumber in Westchester and made a new one. I also spent a bunch of time cleaning the electrical lugs to the instrument panel while it was easily accesseble.
So why did you have to repair your bulkhead? Was it rotted?
Hardtack4
 

jrgrady

Active Member
Joined
Jan 8, 2008
Messages
38
Reaction score
0
Points
0
Yeah, mine was rotted to the point that it pretty much fell out. The previous owner did not take car of the boat at all, so it is easier to just replace the bulkhead and rewire the boat now before the season. I'm also installing a tilt helm, flush mounting the vhf, new dash panel and gauges, and steering cable. Once I'm finished with the boat, it's heading to the shore to get wet. Here are some pics of my new bulkhead in the making. I also took a couple pics of the dash work I'm doing. I'm going to wind up gelcoating the entire dash area, theres to much body work that I'm doing. The shifter is going to wind up coming out and all that. Should be done soon though as long as the weather cooperates.

019.jpg

This is the panel after being cut out

0202.jpg


023-1.jpg

Almost ready for gelcoat

021.jpg


P1010069.jpg

Panels Scott C made for me. the switches light up red
 

jrgrady

Active Member
Joined
Jan 8, 2008
Messages
38
Reaction score
0
Points
0
Got the panels from Scott and I set up the panel since we had an ice strom today. Heres what the panels look like with eberything installed

026.jpg


025.jpg