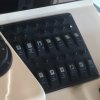
282 sailfish switch layout? 2005

Twimpg

Member
Joined
Apr 30, 2017
Messages
7
Reaction score
0
Points
0
I need some help, 2005 282 sailfish - can someone post a picture of there switches? I have new switch covers with nice, readable labels, however I don't know which switch is which, as it's a new boat to me, and all existing labels are worn off...
If you have a picture, please share. If you know what they are from left to right, please list them out.

Thanks in advance!!
John
 
Going off memory. I'd test each one to be sure.

Left Side: Cockpit Light, Nav/Anchor Light, Livewell, Washdown, Water Pressure
Right Side: Horn, Wiper, Forward Bilge, Aft Bilge, Accessory
 
On the Grady White website you can download the owner manual for your year/model. It will show the standard layout which is a good place to start.
 
Thanks - yes, the manual, page 5-3, however it is stated to be a 'generic' layout, and that the actual model / year will differ.....looking for someone to snap a quick picture of their switches if you can....thanks for the responses so far.....
 
This from either an 05 or 06 282 Sailfish that we didn't buy . . . it was also a close match to the switch panel on our 2002 282 that I recently did the switch replacement on. I agree that the owners manual could have been far more specific with the switch layout.

Also echo what others have said, just test each of yours to determine you're putting the appropriate cover for each switch on the panel. The red "horn" button is the lower row left most item that's obscured in this photo.

Bob.
 

Attachments

  • fullsizeoutput_24c6.jpeg
    fullsizeoutput_24c6.jpeg
    76.3 KB · Views: 636
Thanks! agreed on trial / error at this point.....the layout in the picture does not align to my 2005. Mine are straight across, one each side of the compass.

Appreciate the reply, I'll post mine once completed for others to use as a reference.

John
 
All set, trial and error. Old switch covers are on top, can't read a thing....you'll need the actuator removal tool (Amazon) to remove the old. It's the grey item upper right. New covers simply snap in place.
 

Attachments

  • IMG_0975.JPG
    IMG_0975.JPG
    80.2 KB · Views: 606