86' 240 Offshore Restoration

Joined
Apr 7, 2020
Messages
9
Reaction score
2
Points
3
Age
37
Model
Offshore
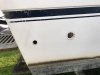
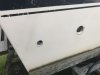
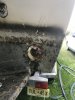
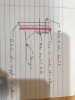
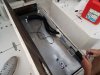
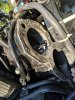
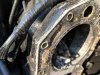
I have started restoring my 1986 240 Offshore. I have had the boat for 2 years and fished it hard in the atlantic ocean. Two years ago I replaced the 93 gallon fuel tank and all its plumbing. Last year I added a new navigation. While driving to the boat ramp to end the season piston number two blew up. Its a 2006 225 Etec which I am looking into rebuilding or replace (TBD). I will be working on the hull until I figure out what I am doing motor wise. I will be posting photos along the way and would appreciate any advice!

Here is my to do list so far... I plan to use the boat this summer so some projects will get bumped to the following offseason.

To do list (will be updated):

Bottom paint
stripes
thru hulls
Rub rail
Electrical system
Add radar system
Lighting
Stripes / decals
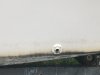
Reset leaking windows
Dashboard
New cabin cushions
Enclosure
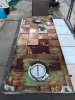
Paint floor with non skid
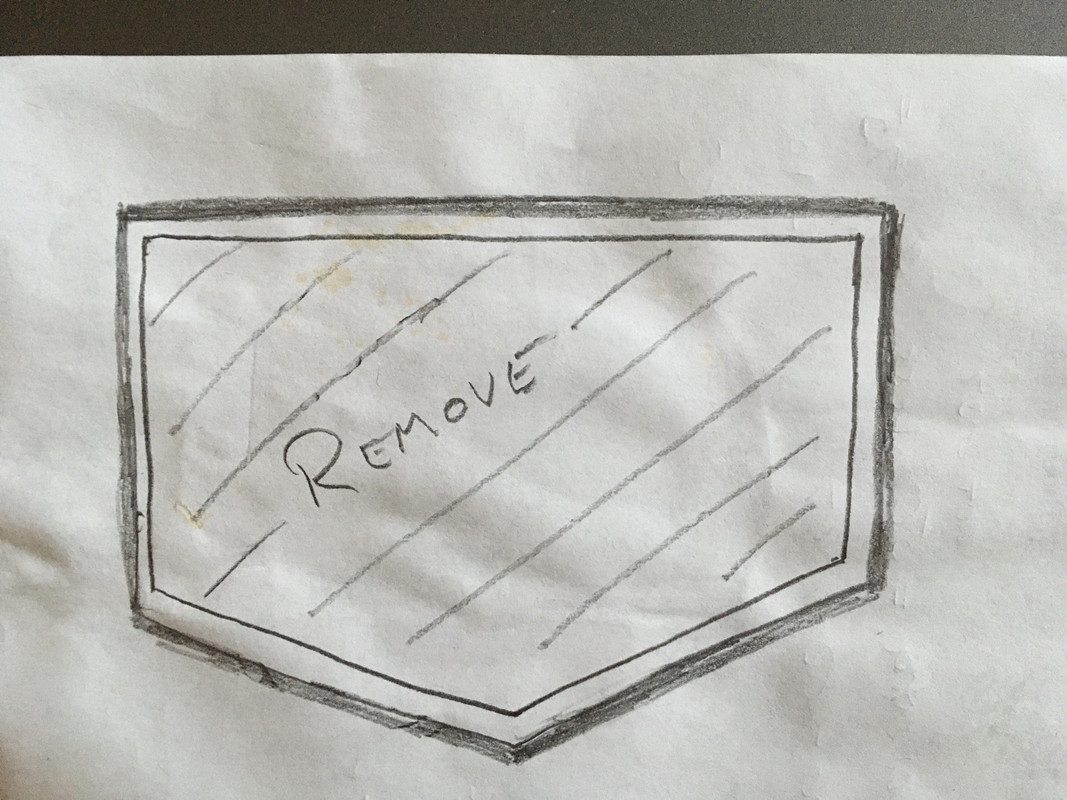
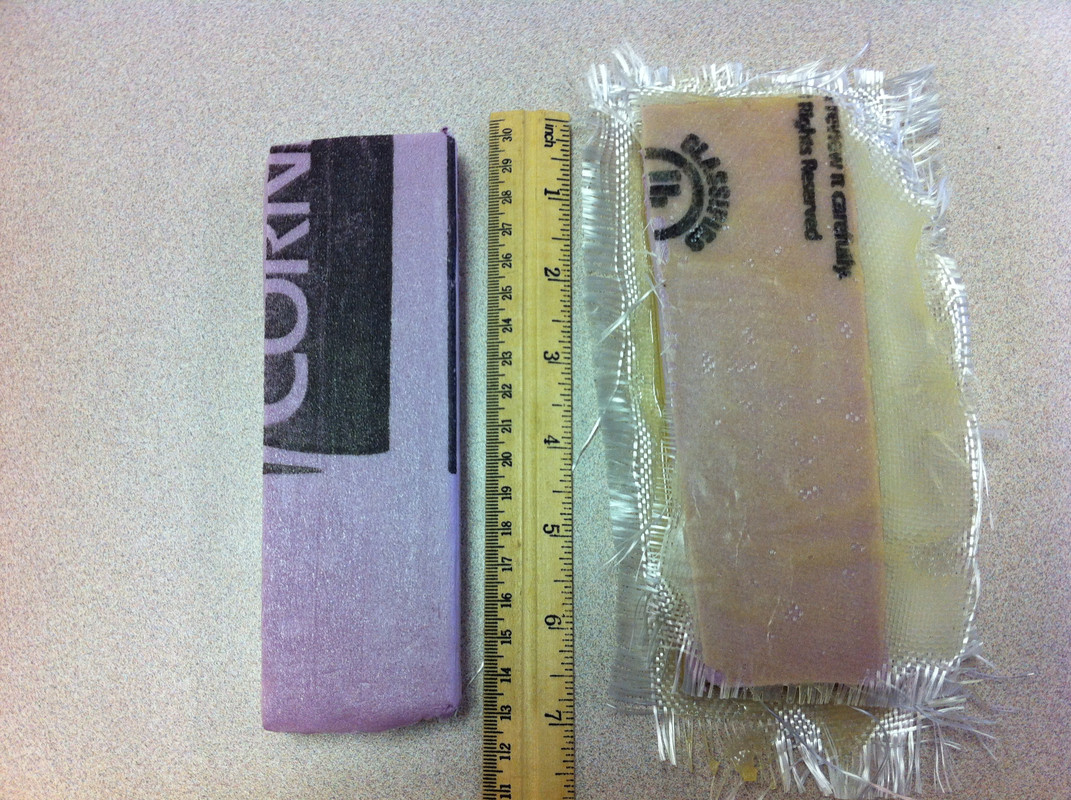
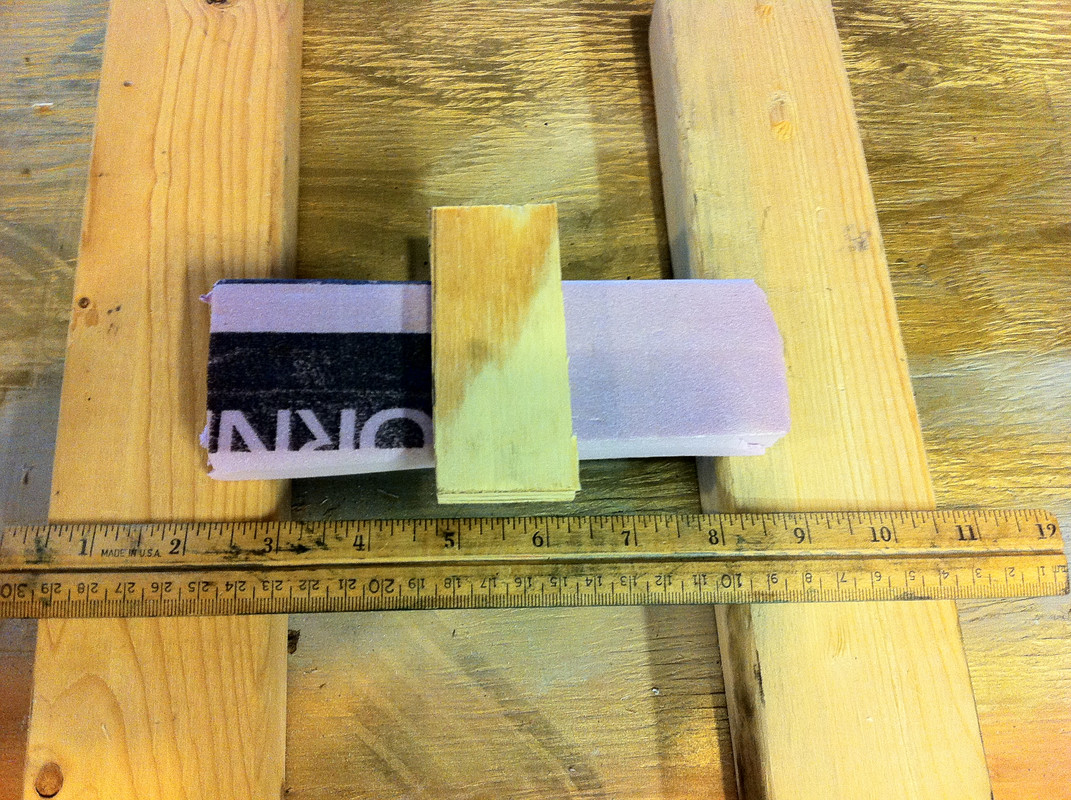
Cleanup gel coat throughout ... 86 was a long time ago
 

Attachments

  • IMG_0334.JPG
    IMG_0334.JPG
    283 KB · Views: 46
  • IMG_0719.JPG
    IMG_0719.JPG
    94.6 KB · Views: 45
  • IMG_0720.JPG
    IMG_0720.JPG
    114.9 KB · Views: 41
  • IMG_0721.JPG
    IMG_0721.JPG
    84.2 KB · Views: 37
  • IMG_0721_1.JPG
    IMG_0721_1.JPG
    84.2 KB · Views: 36
  • Like
Reactions: UCPA111
Joined
Apr 7, 2020
Messages
9
Reaction score
2
Points
3
Age
37
Model
Offshore
Today I removed the rub rail, took a few of the thru hulls out (the ones that were easily accessible) and I stripped down the gas tank panel as best i could for now. Ended up with one hole due to chop stand mat not being properly wet out. I will repair that from below and will be hidden by non slip paint, The whole panel was made of scrap wood.


Plan:

Get thickened resin to repair rub rail holes
Order new rub rail
Get chop strained mat and woven mat for floor panel
remove remaining thru hulls

Can anyone recommend a rub rail?

My stern scuppers have flappers and wouldnt come out after i had the nut off.. are those flappers drilled into the hull separate?
 

Attachments

  • 92240039_666401660801551_80835527938408448_n.jpg
    92240039_666401660801551_80835527938408448_n.jpg
    93.1 KB · Views: 47
  • 92274128_228773435149208_2979270452179894272_n.jpg
    92274128_228773435149208_2979270452179894272_n.jpg
    91.3 KB · Views: 45
  • 92475167_2807709712646183_8714972772297605120_n.jpg
    92475167_2807709712646183_8714972772297605120_n.jpg
    228.3 KB · Views: 53
  • 93021061_280713849591546_2032379701288239104_n.jpg
    93021061_280713849591546_2032379701288239104_n.jpg
    159.2 KB · Views: 49
  • Like
Reactions: UCPA111

DennisG01

GreatGrady Captain
Joined
Sep 1, 2013
Messages
6,817
Reaction score
1,209
Points
113
Location
Allentown, PA & Friendship, ME
Model
Offshore
Actually, those plywood squares aren't "scrap" pieces - Grady designed it that way to help eliminate moisture transmission. But, there are any number of ways to properly rebuild it. You can do the same idea. You can use one sheet of plywood - either regular that's fully pre-saturated with resin or, ideally, marine ply (still saturate for longest life). But don't use PT. You can step up your game and use something like Coosa. I experimented with mine and, knowing the core material isn't really the "strength" part of the hatch, I used that pink-ish foamboard insulation from Home Depot. That was about 5 or 6 years ago.

A key component to making a hatch better than original is to make sure that any penetrations (screws, etc) NEVER touch the core. Oversize drill the hole, fill with resin, then drill your pilot hole. That keeps the hatch 100% waterproof, even if water leaks past the screw's sealant.

Scuppers... remove the two outer, plastic rings.

FYI... you won't find chop "strained" mat, but you will find chop "strand" mat. :)

Before you go too far on all of the aesthetic stuff - have you checked out the transom REAL well (not just a visual)?
 
  • Like
Reactions: dbiscayne

UCPA111

Well-Known Member
Joined
Jul 24, 2017
Messages
325
Reaction score
103
Points
43
Location
Erie, PA
Probably conversing with each other on facebook via Grady White Owners lounge. Keep up the good work!
-Shawn Gross
 
Joined
Apr 7, 2020
Messages
9
Reaction score
2
Points
3
Age
37
Model
Offshore
Actually, those plywood squares aren't "scrap" pieces - Grady designed it that way to help eliminate moisture transmission. But, there are any number of ways to properly rebuild it. You can do the same idea. You can use one sheet of plywood - either regular that's fully pre-saturated with resin or, ideally, marine ply (still saturate for longest life). But don't use PT. You can step up your game and use something like Coosa. I experimented with mine and, knowing the core material isn't really the "strength" part of the hatch, I used that pink-ish foamboard insulation from Home Depot. That was about 5 or 6 years ago.

A key component to making a hatch better than original is to make sure that any penetrations (screws, etc) NEVER touch the core. Oversize drill the hole, fill with resin, then drill your pilot hole. That keeps the hatch 100% waterproof, even if water leaks past the screw's sealant.

Scuppers... remove the two outer, plastic rings.

FYI... you won't find chop "strained" mat, but you will find chop "strand" mat. :)

Before you go too far on all of the aesthetic stuff - have you checked out the transom REAL well (not just a visual)?

Dennis thanks for all the insight. Drilled the transom, some water at the bottom. I have a motor on a bracket so I took a hammer and did some tap testing around the mounts and it sounded pretty solid. In the near future I will address the transom. Have you seen anyone do it from the outside, seems like the easiest option considering the hull layout.

As a former bayliner guy I am pretty familiar with glass work :mad:

I was able to get the scuppers off.
 
Joined
Apr 7, 2020
Messages
9
Reaction score
2
Points
3
Age
37
Model
Offshore
I went over to the boat for awhile today before the rain came in. ( I am still working) I started removing more thru hulls. If Grady did everything as well as they calked in the thru hulls I wouldnt have anymore work to do! I realized after an hour that no matter what I did they broke ... so why not just crack them and push them in?!? Saved a lot of time and did zero hull damage.

Tomorrow looks like rain so I am going to the fiberglass supply. Friday I hope to fix the damage where I removed the rub rail.

The rain came before I was able to measure all the thru hulls ... where did people order theirs from?

In the last photo there is a thru hull on the starboard side of the boat near the bow at the water line, does anyone know what that thru hull connects to?
 

Attachments

  • IMG_3101.JPG
    IMG_3101.JPG
    2.2 MB · Views: 25
  • IMG_3100.JPG
    IMG_3100.JPG
    1.4 MB · Views: 24
  • IMG_3099.JPG
    IMG_3099.JPG
    1.1 MB · Views: 25

dbiscayne

Well-Known Member
Joined
Apr 3, 2017
Messages
57
Reaction score
10
Points
8
nice boat, I've got a 1990 same model. Did you relocate your tank to the front area?
If so does it ride any different than when it was in the back?
 

DennisG01

GreatGrady Captain
Joined
Sep 1, 2013
Messages
6,817
Reaction score
1,209
Points
113
Location
Allentown, PA & Friendship, ME
Model
Offshore
Sure, Brian, you could replace the transom core from the outside. I've done it on a couple boats - not a Grady, but a boat is a boat is a boat, you know? It's pretty straight forward, although time consuming, project. But essentially, you "skin" the transom. Remove the rubrail from the stern, come in about an inch or two from the perimeter (about two or three inches from the bottom) with a saw and make a cut all the way around. Separate the outer skin and save it to put back on. R&R the core and glue the skin back on. You can probably hide your upper cut under the rubrail and the bottom will be hidden with bottom paint. You'll be left with the two, visible cuts in the other areas - they're only aesthetic so you could leave them as be, if you want. Otherwise, filling with a gelcoat (Spectrum Color) and finishing should get you close.

Take the extra little bit of time to make sure no coring material is is exposed to any holes (scuppers, for example). Leave the coring absent from there and fill with thickened epoxy where you mix in shredded glass with it. Now, when you redrill the hole, even if water finds it's way into the hole, it just seeps into the bilge - it doesn't penetrate into the core... ever.
 
Joined
Apr 7, 2020
Messages
9
Reaction score
2
Points
3
Age
37
Model
Offshore
Sure, Brian, you could replace the transom core from the outside. I've done it on a couple boats - not a Grady, but a boat is a boat is a boat, you know? It's pretty straight forward, although time consuming, project. But essentially, you "skin" the transom. Remove the rubrail from the stern, come in about an inch or two from the perimeter (about two or three inches from the bottom) with a saw and make a cut all the way around. Separate the outer skin and save it to put back on. R&R the core and glue the skin back on. You can probably hide your upper cut under the rubrail and the bottom will be hidden with bottom paint. You'll be left with the two, visible cuts in the other areas - they're only aesthetic so you could leave them as be, if you want. Otherwise, filling with a gelcoat (Spectrum Color) and finishing should get you close.

Take the extra little bit of time to make sure no coring material is is exposed to any holes (scuppers, for example). Leave the coring absent from there and fill with thickened epoxy where you mix in shredded glass with it. Now, when you redrill the hole, even if water finds it's way into the hole, it just seeps into the bilge - it doesn't penetrate into the core... ever.

Dennis thanks for the explanation. So I am clear I would cut straight through the inside gel coat essentially removing the stern allowing me to structurally tie into the stringers and the sides of the hull?


One issue with doing this work this year would be I wouldn't be able to get respirator cartridges or tyvek suits!
 

UCPA111

Well-Known Member
Joined
Jul 24, 2017
Messages
325
Reaction score
103
Points
43
Location
Erie, PA
Dennis thanks for the explanation. So I am clear I would cut straight through the inside gel coat essentially removing the stern allowing me to structurally tie into the stringers and the sides of the hull?


One issue with doing this work this year would be I wouldn't be able to get respirator cartridges or tyvek suits!
I believe if you're cutting from the outside you would NOT cut through the inside layer. Otherwise, you defeat the purpose. I attacked mine from the inside. It requires removing the gunnel to fit in the new transom core. But, I did it this way to also beef up stringers/etc. and I was enclosing the transom.

If you attack this...purchase a Rockwell sonic /oscillating tool and a bunch of blades. Made my life so much easier.....
 

DennisG01

GreatGrady Captain
Joined
Sep 1, 2013
Messages
6,817
Reaction score
1,209
Points
113
Location
Allentown, PA & Friendship, ME
Model
Offshore
Brian, no, do not cut all the way through. All you're doing is cutting about a 1/4" deep to remove the outer transom "skin". Stay back from any corners, whether inside or outside, to retain their inherent strength.

As UCPA mentioned, an oscillating tool is fantastic tool to have. Take a close look at my second picture - you'll see my Dremel oscillating tool (it's the beefier one that you can buy at HD). I absolutely beat that thing and it's still working like new. Lot's of good choices for these kinds of tools, nowadays. If you look closely, you'll also see a blue, shingle removing tool. It's nice and heavy and I was able to jamb/slide that in between the skin and core to help separate it. See the "skins" piled on the stbd side?

D0385-F46-2-AD4-4-C5-E-AAF3-06-C6962-D09-EC.jpg


IMG-3923.jpg
 
  • Like
Reactions: UCPA111
Joined
Apr 7, 2020
Messages
9
Reaction score
2
Points
3
Age
37
Model
Offshore
Brian, no, do not cut all the way through. All you're doing is cutting about a 1/4" deep to remove the outer transom "skin". Stay back from any corners, whether inside or outside, to retain their inherent strength.

As UCPA mentioned, an oscillating tool is fantastic tool to have. Take a close look at my second picture - you'll see my Dremel oscillating tool (it's the beefier one that you can buy at HD). I absolutely beat that thing and it's still working like new. Lot's of good choices for these kinds of tools, nowadays. If you look closely, you'll also see a blue, shingle removing tool. It's nice and heavy and I was able to jamb/slide that in between the skin and core to help separate it. See the "skins" piled on the stbd side?

D0385-F46-2-AD4-4-C5-E-AAF3-06-C6962-D09-EC.jpg


IMG-3923.jpg
Dennis I love this method but here is the issue I see. As a structural engineer I always need to over analyze everything. My thought on the transom replacement you describe is that the only thing holding the outboard on is the glue used to attach the transom to the inside skin. If you skin the transom replace the filler without re glassing to the stringers the only structural strength comes from the adhesive. If you glue to the inside skin which is attached to the framing you are only as strong as your adhesive?
 

DennisG01

GreatGrady Captain
Joined
Sep 1, 2013
Messages
6,817
Reaction score
1,209
Points
113
Location
Allentown, PA & Friendship, ME
Model
Offshore
Dennis I love this method but here is the issue I see. As a structural engineer I always need to over analyze everything. My thought on the transom replacement you describe is that the only thing holding the outboard on is the glue used to attach the transom to the inside skin. If you skin the transom replace the filler without re glassing to the stringers the only structural strength comes from the adhesive. If you glue to the inside skin which is attached to the framing you are only as strong as your adhesive?
Brian, I'm not quite understanding what you're asking... but I wonder if it might be because you have your terminology confused... maybe don't fully understand the boat construction method... or maybe I didn't fully explain the process.

The "transom" is the entire piece at the back of the boat that runs port to stbd. It consists of two, thin fiberglass "skins" and a core (in this case, plywood). Essentially, it's a PB&J sandwich were the bread is the fiberglass skins and the PB&J is the core. The core of the transom does not come into contact with the core of the stringers. The stringers (core and glass) are glassed (tabbed) to the transom. The tabbing is what connects them - sort of like an angle brace on the inside and outside of two pieces of wood that intersect perpendicularly. In other words, the stringers don't factor into this equation.

Once you properly rebuild the transom (using either polyester or epoxy resin... that's a discussion for another day... but either is fine), the glass-core-glass "sandwich" will as good as new, or better. The bond between the glass and core is permanent - the plywood's layers would separate before the plywood to glass bond fails. Another way to explain this... take (2) 2x4's and epoxy them together. If you try and separate them, the wood will splinter before the bond will fail.

This is a VERY normal way to do rebuilds - I work in the industry, fyi. It's this "core" idea that gives the strength - specifically the separation of the two layers of glass.

Here's an example... When I was rebuilding my cockpit floor, knowing I could easily re-do a large 2'x4' hatch if needed, I experimented and used rigid foamboard insulation that you can buy at HD. To my knowledge, no one had done this before so I wanted to play around and give it a try. But, first, I did a few experiments to see just how much rigidity two, thin layers of glass can add to the foam. Note, that I didn't even put the glass on vertical sides of the foamboard. I wasn't interested in that - it's quite obvious that a vertical application of glass would add a tremendous amount of rigidity since the vertical sections would essentially act as I-beams. I was more interested in the bond strength of the glass-epoxy-foamboard and was curious how much rigidity just a top and bottom layer would add.

In the end, the piece of FB with glass held 3x the amount of weight till it failed - but "it" didn't fail. Instead, I had failed in the control of the experiment - the piece of plywood rocked a few degrees (didn't stay perfectly balanced from all the weight) and point-loaded the FB and that's what caused the failure. In the end, though, it was a success as it proved the epoxy:FB bond was more than acceptable to create the rigidity needed. I re-built that hatch 5 or 6 years ago... it's still rock solid!

The 3rd and 5th pictures are using the exact same amount of weight.

My post is a little lengthy, but given your area of expertise, I figured you might appreciate the info and this little "home experiment" :)

IMG-4030.jpg


IMG-4053.jpg


IMG-4055.jpg


IMG-4056.jpg


IMG-4058.jpg


IMG-4059.jpg


IMG-4061.jpg
 
  • Like
Reactions: leeccoll

leeccoll

GreatGrady Captain
Joined
May 18, 2019
Messages
1,052
Reaction score
416
Points
83
Age
60
Location
Reno NV
Model
Seafarer
That's just an awesome tutorial Dennis!

Now I know whom to pester should I need to address my transom down the road.
 
Joined
Apr 7, 2020
Messages
9
Reaction score
2
Points
3
Age
37
Model
Offshore
Dennis, I agree there is probably a lost in translation between your being an industry guy and my being a DIY hack, I appreciate your patience! I am sure from our very few back and forth posts you know I wouldn't consider an in-depth analysis "lengthy" rather I think it awesome! Your experiment is proof of the distributed load strength of the cloth and glass. My concern is with what would be called withdraw strength that being a failure between the new core and the inside skin as it is no longer a homogeneous glass job. I included two figures one which I think shows how the glass to core to inside skin interface should be. Since the skin is still glassed to the stringers and angle brackets I believe the glass should over hang the core and attach to the inside skin. The second shows how I believe the loading is on the glue to skin.

If this job is industry standard I will be relieved as it will be much easier. To do this job from inside the hullI would have significant repair work since I have the enclosed stern.
 

Attachments

  • IMG_0762.JPG
    IMG_0762.JPG
    664.7 KB · Views: 8
  • IMG_0763.JPG
    IMG_0763.JPG
    673.4 KB · Views: 9

DennisG01

GreatGrady Captain
Joined
Sep 1, 2013
Messages
6,817
Reaction score
1,209
Points
113
Location
Allentown, PA & Friendship, ME
Model
Offshore
My concern is with what would be called withdraw strength that being a failure between the new core and the inside skin as it is no longer a homogeneous glass job.
Ah, OK. I understand what you're thinking, now. First, rest assured, this is a normal, everyday way to rebuild a transom. That's the beauty of fiberglass and polyester resin - they bond amazingly well, even after the initial layup where everything was still wet. Epoxy resin is even more tenacious than polyester. This WILL BE a permanent repair. The resin is going to soak into the core - in fact, you should coat the core a few times, until it no longer soaks in (stays shiny), before installing it. When you remove all of the old core, the core side of the skin is going to be rough - that's good - as it provides more surface area for bonding. BUT, even if you had two, smooth pieces of fiberglass, and you bonded them together, it would still be a fully functional bond as fiberglass is slightly porous.

To ensure a good bond from the core to the skins... as long as you squeeze the "sandwich" tight, you're good. But, you can take an extra step and use a single piece of lightweight mat laid onto each skin, first (they won't increase the thickness very much, at all) and also between each piece of plywood. You can even run screws, or bolts through the transom to squeeze the core tight. Remove/cut them off after and just fill with some thickened resin. Coat them with a mold-release wax (or just a really good paste wax) and they might even come right out. Nylon bolts/nuts are another option.

As far as tabbing goes... that's why we're not cutting right to the edge/perimeter of the outer transom. We're going to leave a two inch-deep "channel". You can leave a deeper channel if you want, it just gets harder to get all of the old core out and the new core back in. If you looked at a cross section of this channel, that runs the full perimeter of the outer edge of the transom, it would look like a "J" with the long leg of the J being the inner transom skin. I like to fill that channel with thickened epoxy, first - both for better adhesion and also so I don't have to worry about cutting the core to the "exact" size. FYI, it is OK to cut each core sheet into two pieces - just stagger the cut lines from one layer of core to another. You could even make the cut in a zig-zag shape... then make the cut in the second core layer with the zig-zag going the opposite way.

Now, you could take one more step after you finish up with everything else. Follow the initial cut you used to remove the outer skin and grind a shallow bevel into it. You can then build that depression back up with layers of glass - tabbing the repair.

Get some resin and start playing around with it. Practice, practice, practice... on something OTHER than your boat! One last recommendation... even though it's more expensive, use epoxy resin rather than polyester. It's MUCH easier to work with and doesn't stink anywhere near as much (not as big of a deal when outside, though). Epoxy is also stronger.

Oh... also go onto the West System (it's NOT "West Marine") website (the Gougeon Brothers). Go their "how to" section - they have a vast library of projects and how-to information... with pictures :) It's an excellent source for learning how to do all kinds of glass repair. Although their epoxy is more expensive, it's an excellent product and their pump system makes mixing the proper ratio foolproof.
 
  • Like
Reactions: Shipfaced