95 Johnson 175 OIS 2000 issue

Newtgadget

GreatGrady Captain
Joined
Mar 28, 2015
Messages
32
Reaction score
0
Points
0
Age
60
Location
Yardley Pa
Website
www.t-c-pro.com
Can anyone points in the proper direction with what is going on with this motor?
Motor starts and runs for about 10 seconds then dies.
Start motor again and it runs for about 5 seconds and dies
Start motor again and it runs for about 3 seconds and dies
Try to start a fourth time and nothing

Fuel ball is not being sucked flat and pumping it slowly does nothing. Kill circuit disconnected and still does same. Checked ohm readings according to CDI and all within specs, took all 6 carbs off and thoroughly cleaned and rebuilt, swapped CDI power pack from other motor to this motor and same results, swapped key switch from one motor to other motor and same, have 110 psi +/- 2% across all cylinders, spark test jumps 7/16 gap.

Only thing we have not done is DVA test of stator as we are trying to locate someone who has a DVA meter we can use.

Could this be some sort of bad ground issue? We are perplexed because it seems like the motor is depleting something (fuel, spark, or a wire is heating up with each and every time we try to start) as evidenced by the way it tries to run shorter in duration each and everytime we try to start it.

Any ideas?
 
Sorry if their is a duplicate reply out there somewhere.....I thought I posted but don't see it.....

Fuel is new. We have tried running it on a portable tank with same results. Other motor runs with no issues on boat tank gas.
Filters and pre-filters cleaned and or new.


Pulled the optical eye out last night and will clean it according to CDI (does not look dirty) and encoder ring looks good with no breakouts.
 
It certainly can be something else... it's just that from what you posted it sounds like a fuel problem. When you ran on a portable tank, did you use the existing motor's fuel line? Fuel lines can fail on the inside and create a "check valve" of sorts that can block fuel. Try running with the new fuel line directly to the engine. Also, are all of the carb bowls full of fuel when it dies? Or... "how" does it die? If it slowly dies, then that is likely fuel related. If it turns off like a switch, then that is more likely electrical.

Checking grounds and positives (starting at the battery) is NEVER a bad idea when chasing gremlins. But, you must do more than just a quick visual check... remove, inspect, clean and replace. Note that sometimes corrosion can wick it's way underneath the sheathing - and that is harder to detect.

If something is heating up that fast, it shouldn't be too hard to find just by feeling around. But "usually" (at least from my experience), nothing will heat up that quickly to make the issue you are seeing.

How do the plugs look? All about the same and in decent condition? You mentioned doing a spark test... did you test for spark at EACH plug? After it dies, do you STILL have spark at each plug? Fuel, air or spark - gotta be one of those things. Most likely you can eliminate air (but still check that to be sure... the air manifold/intake box and any small hoses that may be attached to it, if any), so that leaves fuel and air.

If you can exhaust all variables on the fuel side, then that at least narrows down your search to the electrical side. Since you have twins, you can even swap things like plugs and wires.
 
Carb bowls are all filled after it fails to start.
We did check each and every plug and they all jump there same 7/16th gap.
The fuel lines are new both on boat and portable tank.
When motor quits it seems to shut off like a switch.

I need to find some sort of "inline" spark tester so I can watch what is happening when it runs briefly.
Agreed 120% on corrosion on wires. Will have to thoroughly check all connections / wiring.

We swapped entire CDI, coils, plugs, and wires with exact same issues from known good motor to the one that is driving me nuts.

I suppose next step has to be DVA readings......hate to buy an adapter or meter for this simple test. Seems to be a conversion formula for reading highest AC voltage my Fluke reads (min / max settings) while doing DVA test and multiply by the square root of 2 (1.41421) to obtain "peak voltage" readings.
I'm not sure if this workaround to get to peak DVA readings is legit or not so I'm skeptical on relying on this method.


Any more ideas.....keep them coming. LOL
Truly appreciate everyones input
 
I'm trying to remember exactly what I did a number of years ago, but I was able to figure out I had an issue with my stator without using a DVA adapter. I believe there were some test procedures outlined in the service manual using resistance. However, in my case, my engine ran just fine - the issue was with the charging side. But maybe there are tests (Ohms) that can be done for the starting side? However, maybe just swap the stator from one engine to the other? Should be a pretty quick swap.
 
Thanks for the help.
We have the resistance charts from CDI and everything ohms out correctly.
Going to work on this motor this weekend and hopefully come up with an answer.

I'll post the results once we get it figured out to hopefully help someone else with similar issues.
 
Good luck - I know how frustrating gremlins can be! The answer is usually something simple... although finding the answer is not always simple... ;)
 
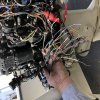
Found four broken wires where harness runs out the stern and across the engine bracket. Someone has done hap hazard repairs prior. I have enough factory harness ( factory insulation) across bracket and past the Deutsche connector. I’ll solder connections at that point.

Not sure any of those broken wires are the problem I am experiencing but I have to make this right prior.
 

Attachments

  • CB9F6307-B1CA-4B79-A1F4-B6E0B090559C.jpeg
    CB9F6307-B1CA-4B79-A1F4-B6E0B090559C.jpeg
    155.4 KB · Views: 583
Well that don't look right! :)

You're right - gotta fix that before going any further. Certainly makes sense that this "could" be the issue, though.

Can I make a suggestion about soldering? Don't. In this situation, a more reliable connection is a butt joint with heat shrink (or, even better, a butt joint with adhesive-lined heat shrink already attached). Too much solder can make the joint weaker and more prone to breaking... and even so, a soldered joint should only be used on a boat when it can be mechanically supported on both sides of the joint... which obviously can't be done here.
 
Thank you.

Going to take my time and clean the wires thoroughly so I can identify and compare to Grady schematics.
Gotta love electrical tape and all the goo that is left on the wires. Trying to identify color with stripe will be an adventure. LOL

I
 
Yeah, electrical tape is quick and easy when you put it on... not so much when you take it off. A rag saturated in Good-Off makes quick work of it, though - a little better than acetone as it doesn't attack vinyl sheath.
 
I am not sure that is your problem but the wires need to be cleaned up. As mentioned, no solder on marine applications. Use adhesive shrink/crimp butt connectors. You can buy them at Home Depot, just make sure you get the adhesive lined ones. Probably the blue ones are the size you need. Although a regular crimp tool sort of works, a ratchet crimper works easier and makes better connections. If you have to use a regular crimper, I suggest non insulated butt connectors with a piece of heat shrink tubing skipped on the wires before crimping. When crimped, slide the tubing over the joint and heat to shrink.

My first thought was fuel related. Hopefully when you cleaned the carbs, you cleaned the jets and needles as well as checked the float needle valve for sticking. Next thing I would check are fuel pumps.

How cold was the weather when you started the motors? Your choke could be bad and disengaging before the combustion chambers are heated up. Try a little starter fluid to see if the motor fires after it stalls. If it starts on starter fluid, the electrical is probably OK but the motor is fuel starved.
Good luck
 
Yes the carbs were cleaned thoroughly. Needle valve, high speed jet, etc. Float was reset as well.
Carb bowls are full of fuel. We check each and everyone of them by pulling the bowl screw after the fourth try of starting. Most recent try was this morning.

Now I'm seriously confused. We did the work as stated above.
Pulled extra wiring harness from boat across Grady bracket and into motor where Deutsche connector is located. Cut out about 18 inches of the wiring harness that used to run across the bracket (wires stiff and numerous butt connectors found). I even ohmed all wires we cut out....the 18 inches or so, and found many with resistance readings of .5, .7. .3 k ohms in 18 inches....UGH.

We made temporary connections color for color, per Grady schematic we have and motor would not fire at all. Now I have to go back and look at the broken wires we found prior, identify what they control and why the motor is not working with them installed.

Thats enough aggravation for me today. Be back at tomorrow morning prior to the Flyers Game!

Thanks for all the help!
 
It might be easiest to just rewire competely with new harness. Just a thought. Years ago, I was working on another Grady - with a Mercruiser - and was noticing wires in the shape you are experiencing. The harness was less than $200... and I ended up ZERO time invested in chasing wiring ghosts and ZERO worries that if I had an electrical gremlin pop up that the issue was somewhere in the electrical harness. Well worth it.
 
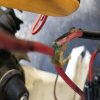
Finally done with all the wiring corrosion issues. Everything is temporarily re-connected. Found numerous bad spots in wiring such as the one pictured.

Tried to fire motor and same exact symptoms.
Checked Fuel side of VRO and no fuel. Pulled pulse limiter and no obstructions.

We did the quick check on the VRO by applying 15 PSI pressure etc, then doing 15 inches of vacuum and pump seems ok according to flow chart. What gives? ......... Disregard. We tested the pump incorrectly. It is bad.

Is it even worth replacing a VRO or is it better to pre-mix and use a dual diaphragm pump? I can purchase two of these for the same price as one VRO, convert both motors, then never ever worry about oiling issues as long as we pre-mix.
 

Attachments

  • gkBN%8obRZiuErJR2+yleQ.jpg
    gkBN%8obRZiuErJR2+yleQ.jpg
    63.2 KB · Views: 174