- Joined
- Apr 11, 2020
- Messages
- 108
- Reaction score
- 74
- Points
- 28
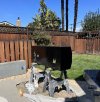
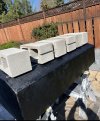
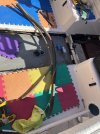
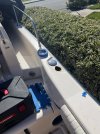
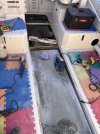
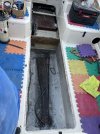
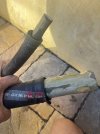
So my winter project was to replace all the fuel hoses, pull out my main tank, inspect it and done. Ha nothing is never that easy my main 92gal tank turned out to be badly pitted on the bottom so it needs replacing. The previous owner replaced the auxiliary tank but whoever did the work cut some corners. They didn’t replace any of the hoses and spliced the fill hose. I’m in the process of getting quotes for the main tank so if you have anyone that you recommend I’ll be very happy to take their contact info. The hoses were not difficult to remove at all. The tank was a little more challenging because I had to grind/sand the hatch lip so the tank can be removed. I will probably end up glassing the corners on the aft lip a little. So once I get a tank I plan on putting an epoxy coat on it and gluing (5200) some strips of expanded pvc on the bottom. I’ll post my progress as things move along. The good news is I’m doing this on my terms so I can take my time. Our fishing season doesn’t start until April/May.
Attachments
-
 F3EFA3E0-E88C-4AD8-B529-BB6268191D81.jpeg2 MB · Views: 59
 -
 1D6C044A-31BF-4434-ACF3-6E0B934EECF8.jpeg2.4 MB · Views: 64
 -
 096895BE-FB6A-4B67-92C2-FB12F8F5C4BF.jpeg2.3 MB · Views: 61
 -
 4CFEDFA3-EEC7-4086-ADC1-31C5BD2E960C.jpeg1.6 MB · Views: 62
 -
 808D2C7B-A230-4E99-8A95-130AD7EAB7BC.jpeg2.3 MB · Views: 58
 -
 96FF2976-B625-4B51-A967-BFA1EE98FA17.jpeg1.4 MB · Views: 57