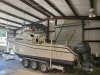
On this episode of this old boat, I decided to follow some tips from this forum to repaint/finish the trim around the storage doors on my 268 Islander. I'm posting this because during this process I learned how to replicate the broken blown out corners of the plastic before I repainted. I found that a mold made of foil worked well when I filled the gaps with super glue and baking powder. This formula hardened almost instantly into a very hard plastic that I could then sand to look just as it once did. You can find this process on you tube pretty easily. Worked like a charm.
Attachments
-
 20190919_103231_resized.jpg539.5 KB · Views: 50