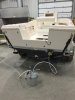
Hard to say how bad the issue is. You can try a few things like standing and bouncing on the anti cavitation plate with the motor trimmed down and look for deflection. If its more than a 1/4" of movement, the structural integrity might be compromised. Also look for obviois signs like stress cracks along the top of the transom. You can also use a plastic mallet or screwdriver handle and tap all over the transom looking for clues. It should be a sharp crack, a dull thud could inicate the presence of water logged areas. These are just a few tips I was given, I had a wet transom as well due to improper sealing of the trim tabs. For peace of mind I had mineinspected by a fiberglass specialist. Very common problem in the older boats but it may still be fine for several years more, I would get it inspected to be on the safe side.
As for DIY repair, you may be able to drill several holes in the problem area, shop vac out some of the water and fill with epoxy or git rot product. Seems like more of a bandaid solution as opposed to a transom rebuild. Anyway try some of the checks above and see what a reputable shop thinks about it. Hope this helps.