
- Joined
- Jul 25, 2020
- Messages
- 19
- Reaction score
- 6
- Points
- 3
- Age
- 59
- Location
- Virginia Beach
- Model
- Seafarer
I installed a new 3 gang rocker switch panel on the instrument panel. First I ran it off my navigation wire (grey). This allowed the rocker switch panel to light up with the factory switch panel when the Nav lights were on. When the nav lights were off no power to switches. I removed it from nav lights and installed it on the fuse block. Now it works when ever the battery switch is on.. It is always lit up too I know there is a way to have it only light up with nav lights, just got to play with them wires some more. I also had a different switch for the raw water wash down. It only lights when on.
Attachments
-
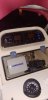 rocker switch panel and washdown pump.jpg838.7 KB · Views: 5


")