Marlin Transom Cap Replacement

MA208

Well-Known Member
Joined
Mar 13, 2011
Messages
196
Reaction score
20
Points
18
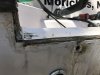
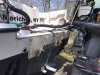
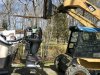
Marina launched my boat this week. This spring I had them pull both motors off to replace the aluminum transom cap (Grady calls this the bang cap). I spoke to Grady customer service about the process and they gave me the part number for the new plastic cap they use. Ordered it from my local dealer and had the marina get to work. Fortunately there was no water intrusion. They sanded and glassed over the transom at the rear and then installed the new cap. I was surprised how open it came from the factory under the cap, it's a lot better now. Hard to take pics in the water, but it turned out well.

Since the motors were off and I have 2005 F225's I had them do both exhaust midsections. 860 hours and no signs of corrosion according to Yamaha tech. Replaced them anyway for good measure. Also had a new helm put on as the old one squeaked and leaked. Not exactly a cheap spring commissioning.

IMG_1569.jpg
IMG_1570.jpgIMG_1571.jpg
 
Hello, looks like your motors are on the second mounting hole, is there a reason. Mine was the on first hole when
boat had two stroke 250’s , now I repowered with 225 4.2L 4 strokes left them on first hole.
 
Looks good. I need to do that at some point....
 
That transom cap seems to be one of the biggest complaints that I hear regarding Gradys. It gets blamed for water intrusion into the transom and many folks have it removed and the transom top glassed over when they repair the transom.
 
Last edited:
Second hole was original to this boat as far as I know. Original motors. I thought about leaving the cap off but figured it would show stress cracks in the gel coat as the motors were put back on and screwed in. Cap doesn’t look too bad.
 
Man that looks good!! Mine has the metal bang cap and it looks terrible, let me rephrase it, needs work lol! I’m really not in the mood to pull the engines and replace, should I put some 4200 in there as a bandade until I repower or get after it soon? What cha think?
 
just gotta make sure they are permanently sealed before putting the pretty cap on. #1 goal is keep the water out.
 
I'd pull the screws out one by one and bed so no way water gets by them....
 
Just did this project on my 2003 27 islander the other day. Long day doing it but it definitely needed it.
 

Attachments

  • 58B8C799-C98C-4CAB-99A0-07446ABA5F1D.jpeg
    58B8C799-C98C-4CAB-99A0-07446ABA5F1D.jpeg
    2.3 MB · Views: 63
Another shot
 

Attachments

  • 2CDE7F70-A79C-43BD-9AB4-22B001AFE2CF.jpeg
    2CDE7F70-A79C-43BD-9AB4-22B001AFE2CF.jpeg
    119.7 KB · Views: 53
wow. looks like you definitely needed it.
 
What did you use a gantry or two engine hoist
 
I used a skid steer with forks took port engine totally off n left starboard connected just moved back
 

Attachments

  • F30BEEBD-7286-43AE-9727-F2B1AD45C37E.jpeg
    F30BEEBD-7286-43AE-9727-F2B1AD45C37E.jpeg
    179.5 KB · Views: 23
  • Like
Reactions: bac0701
When I purchased the boat last spring I noticed the bang plate corrosion so I just caulked it for the season. After doing this job the other day I would advise anyone that sees any corrosion on the bang plate to repair it sooner rather then later. I never realized there was such a seam under that plate. I would think it should be glassed over from the factory since it’s always a wet area but I guess I’m just a dummy that likes to fish. Lol
 
I replaced mine on voyager last summer. I used stainless steel about the same thickness as the aluminum one I replaced. When I say I actually a boat repairman did the work. After removing the old part we inspected and cleaned the transom. It seem to be solid . We sealed the cavity then installed the stainless .
The repairman had the stainless made for the repair.