Thank you I appreciate it.
Hi. Sorry for the late reply; my friend wasn’t able to get to his boat to measure. From his memory the scoop is below the hatch at the front of the splashwell; more forward of where it will be located on an Adventure 208.
I just installed mine this weekend. 10” port from centerline (referenced off of the bilge drain) and 10” forward from the transom. I picked the location as it was easily accessible from the deck plate in the splashwell and the surface inside of the bilge was relatively flat for mounting the backing block. All parts were standard Groco 3/4”. I wrote up what I did below so I wouldn’t forget. There’s guaranteed to be a better way to do it and I’ve likely missed some steps but feel free to ask questions or provide feedback.
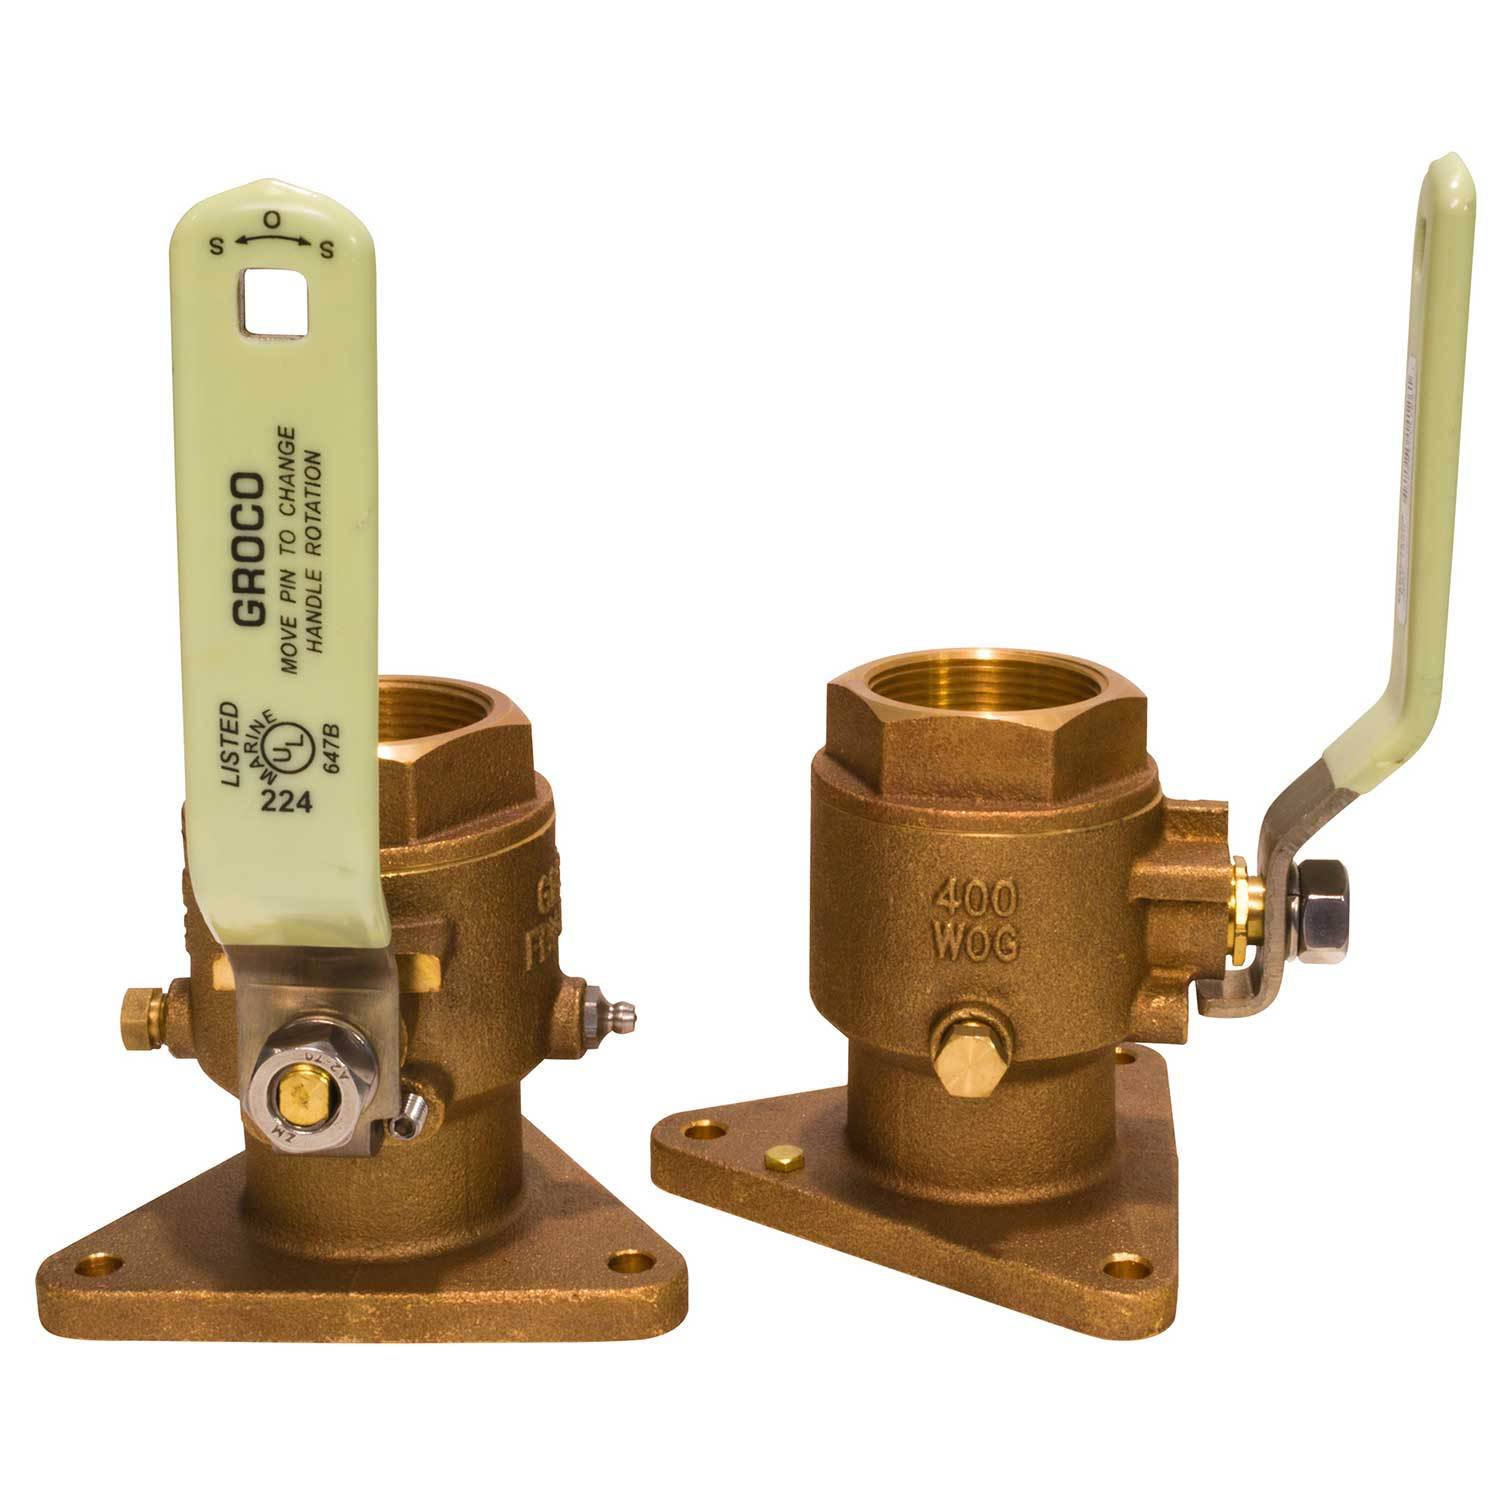
Seacock - FBV-750
Check out our Full-Port Flanged Bronze Seacocks and more from West Marine!

www.westmarine.com
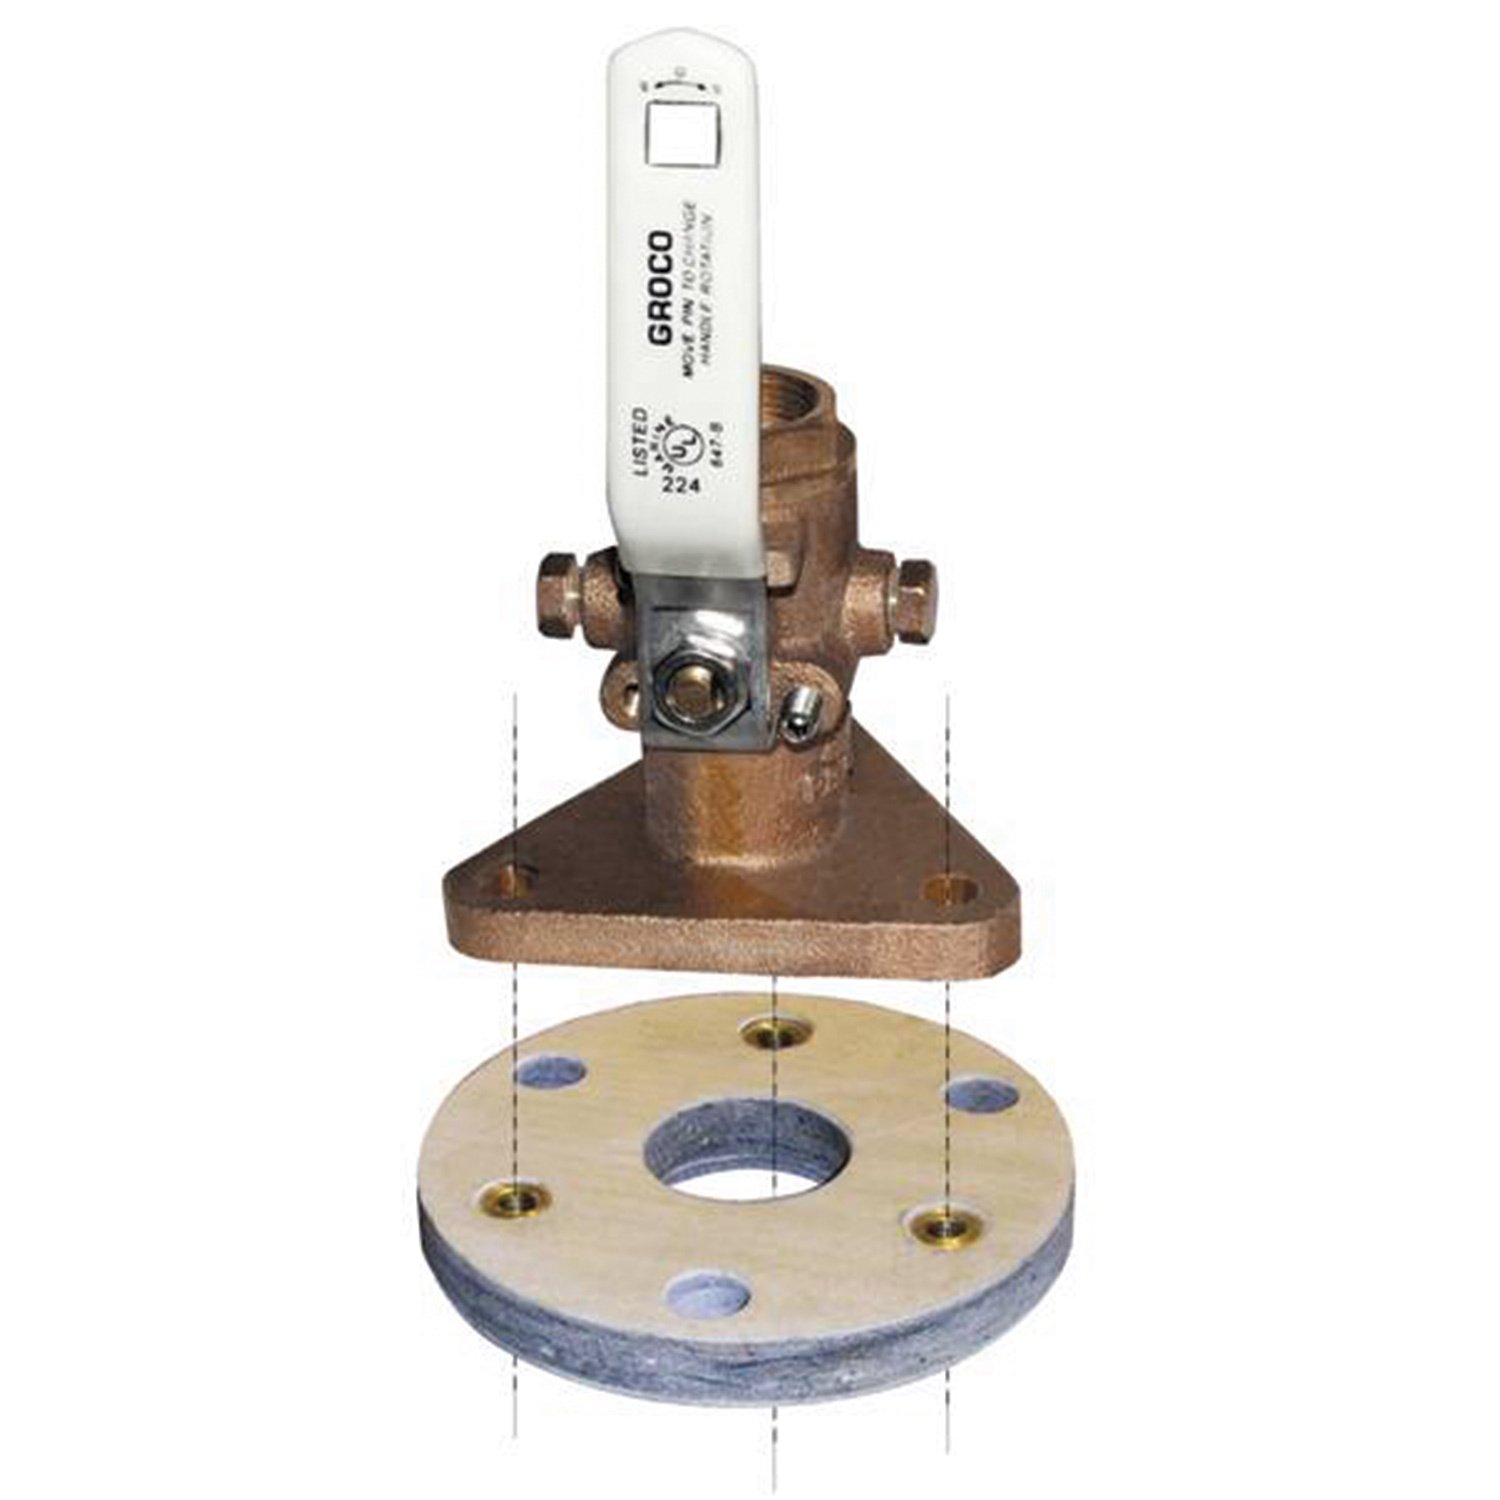
Backing block - BB-1
Check out our Seacock Backing Blocks and more from West Marine!
www.westmarine.com
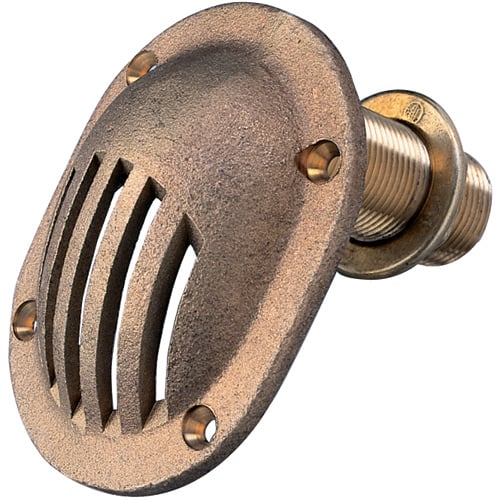
Scoop strainer - STH-750-W
Check out our Bronze Thru-Hull Intake Strainers and more from West Marine!
www.westmarine.com
Dry fit everything first/measure twice cut once...
Started by assembling the backing block, seacock, and bait pump first and placing in the bilge to ensure I could reach and there would be no interference from the pump outlet fittings when actuating the seacock handle.
I then traced the outline of the backing block and marked the center. After this I confirmed there would be no interference with the trailer bunks by transferring measurements from the bilge to the outside of the hull (add 2” for transom thickness) and drilled the pilot hole from the inside (bilge).
Taped off around the pilot hole on the outside of the hull and started the hole saw slow/in reverse to through the gelcoat nicely. It’s imperative that this hole is drilled perpendicular to the hull, not vertically in reference to the ground.
I installed the strainer and marked the hole 4 #10 screw locations then used the strainer as a guide for the bit to drill the pilot holes. These screwswill see more shear than tension loading as they keep the scoop strainer in alignment; the seacock will serve as the “nut” to keep the strainer tight against the hull.
Fit the backing block and seacock from the inside again to ensure the strainer threads did not bottom out in the seacock and to ensure proper orientation and of the backing block and that it is snug against the bilge. Mark the backing block/bilge for orientation reference.
Disassembled everything, cleaned all mating surfaces with acetone/mineral spirits, and bedded the backing block and strainer with 4200 fast cure. I loosely installed the bolts in the seacock/backing block to ensure everything was lined up and left it for a day to cure.
Verified everything cured/was sealed well and installed the seacock. I filled the gap between the scoop strainer tube backing block center hole with 4200 FC and added a little to the bottom of the seacock after I threaded it in to the strainer.
Notes:
The hole for the scoop strainer was made with a 1” hole saw and opened up a little with 120 grit sandpaper wrapped around a rod. The strainer has 4 screws to hold it in place; I used #10 x 1/2” SS screws but have ordered silicone bronze screws (eBay to the rescue).
Sorry if this got off track... just wanted to write it down before I forgot.