NavNet 3 install in a 258*** Need Feedback

258 Grady

Active Member
Joined
Sep 24, 2007
Messages
31
Reaction score
0
Points
0
I just completed the new fiberglass dash in my 258. The previous one would not work with the new flat panel displays. I am looking for feedback on the instrument layout. What do you guys think... I am looking for ideas before cutting holes.
Thanks
Ed
DSCN451511.jpg

DSCN451711.jpg

DSCN453211.jpg
 

BobP

GreatGrady Captain
Joined
Apr 27, 2005
Messages
4,746
Reaction score
6
Points
38
Location
Long Island, NY
Model
Sailfish
Top notch!

Why did you offset the mulitifunction gauges? Try symetrical for looks an dmay leave some more (future ) room.

You 're probably using GPS for speed (?)

Do you intend future flow scan? Is so, leave room.

I presume tab control is below (?)

Nice setup, monster MFD in my future plan list too. Have to do something very similar on glass.
 

258 Grady

Active Member
Joined
Sep 24, 2007
Messages
31
Reaction score
0
Points
0
I offset the gauges because I am limited on opening space behind the panel. I tried the symmetrical approach first but they wouldn't fit. Also not shown are the 2 USB connectors and Mic holder. I will post another photo of the reconfigured space behind the panel. I wanted to use flow scan but they didn't have a NEMA 2000 unit for my twin F150's Gas.
Ed
 

bc282

Well-Known Member
Joined
Aug 12, 2008
Messages
290
Reaction score
5
Points
18
Location
canada
Nice project! I might have to do some thing very similar as my 12" NN3D likely won't fit the console either.

How did you go about the new dash/console? It looks great and a perfect fresh canvas for customization.
 

258 Grady

Active Member
Joined
Sep 24, 2007
Messages
31
Reaction score
0
Points
0
I will try and post some more photos today. What I did was take the old vacuum plastic dash and modified it using wood, bondo and foam to make it perfectly flat. I then used this piece to make a mold. I then put release agent on the mold and sprayed the interior with Grady gelcoat. When this dried I fiber glassed the interior of the mold. It took a little time fitting the new piece so the edges were as tight as the factory original. What I ended up with was a much stronger dash than the plastic factory original. In the end I have what I wanted from the start and that was a Factory looking dash in which to install my new Furuno System.
Ed
 

258 Grady

Active Member
Joined
Sep 24, 2007
Messages
31
Reaction score
0
Points
0
The attached photos show the old dash piece that was fared out flush to make the mold from. The only mistake I made was not spraying this piece with Lacquer. The bondo sucked up the release agent and I broke the piece getting it out. The other photos show the mold.
DSCN4519.JPG

DSCN4534.JPG

DSCN4536.JPG
 

BobP

GreatGrady Captain
Joined
Apr 27, 2005
Messages
4,746
Reaction score
6
Points
38
Location
Long Island, NY
Model
Sailfish
With the Yamaha instruments, the panel gap between them doesn't have to be there, if you wanted to move them closer to each other.
 

pilotart

Well-Known Member
Joined
Apr 13, 2008
Messages
45
Reaction score
0
Points
0
Location
SW Florida
Production Mold

How did you get "Grady Gelcoat"? What a great improvement over "vacuum plastic..."
258 Grady said:
I will try and post some more photos today. What I did was take the old vacuum plastic dash and modified it using wood, bondo and foam to make it perfectly flat. I then used this piece to make a mold. I then put release agent on the mold and sprayed the interior with Grady gelcoat. When this dried I fiber glassed the interior of the mold. It took a little time fitting the new piece so the edges were as tight as the factory original. What I ended up with was a much stronger dash than the plastic factory original. In the end I have what I wanted from the start and that was a Factory looking dash in which to install my new Furuno System.
Ed
DSCN4536.JPG


DSCN4534.JPG

Beautiful piece of work!!!

You should offer to rent or sell that mold to other 258 Grady operators. :) :idea:
 

258 Grady

Active Member
Joined
Sep 24, 2007
Messages
31
Reaction score
0
Points
0
I have since cut out some more fiberglass behind the panel and moved the engine instruments inline. This leaves lots of room for future expansion. I was hoping that Furuno would come out with a NEMA 2000 small flat screen data reader with more functions than the RD-30 that would fit into this space.
On the Gelcoat question. Grady sells Gelcoat by the quart or gallon and it is very consistent as to correct color.
 

alantani

Well-Known Member
Joined
Oct 24, 2005
Messages
140
Reaction score
0
Points
16
Location
saratoga, ca
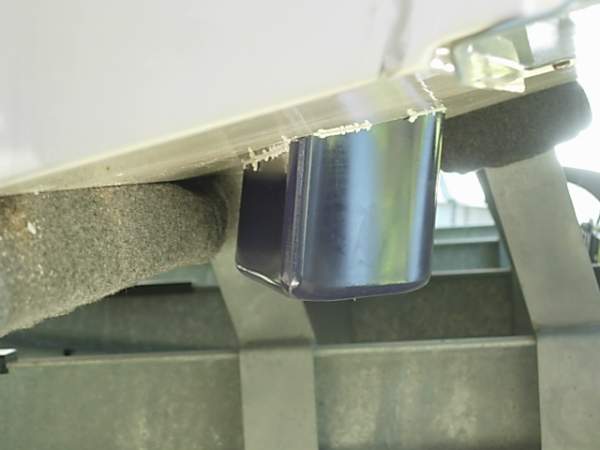
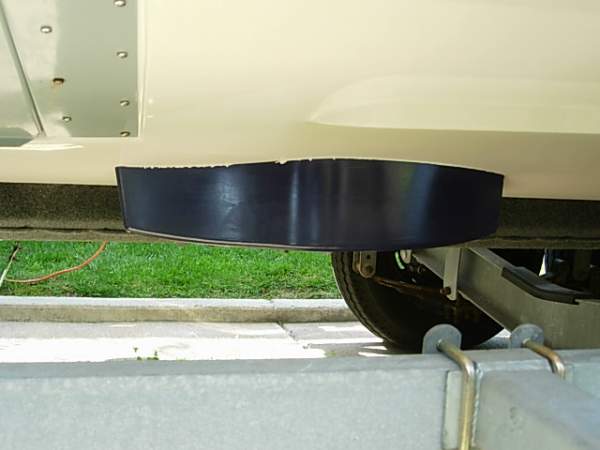
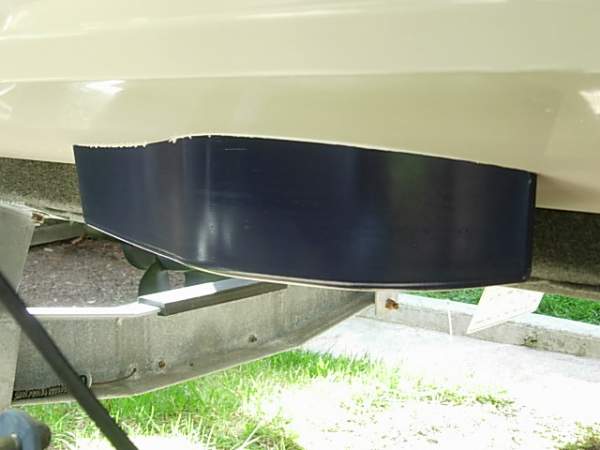
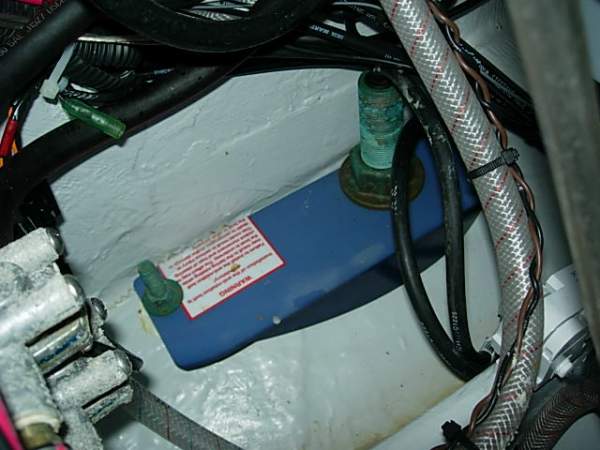
Good morning, Alan. This week I plan to install the B-260/Furuno Transducer in my 258. I would love to see what you did before I start. I have some options 1. Mid Ship and 2. The Aft Battery compartment. I would prefer the battery compartment but I am concerned about interrupting the flow to the engines and props especially while turning. Any photos you have would be appreciated. Regards, Ed

hi, ed! the faring block is 21 inches long and holds a 1 kw transducer. there is a 1 inch hole in the hull to hold the tranducer itself, then a single bolt through the hull that screws through from the forward end of the faring block. looks like there is plenty of 5200 gooped on as well. the widest part of the faring block is 22.75 inches from starboard, the rear of the faring block is 15 inches from the transom. here are some photos.

1_18_03_09_11_43_50_0.jpeg


1_18_03_09_11_43_50_1.jpeg


1_18_03_09_11_43_51_2.jpeg


1_18_03_09_11_43_52_3.jpeg


1_18_03_09_11_43_52_4.jpeg


1_18_03_09_11_44_41_0.jpeg


hope this helps. alan