Original Tank?.... and what’s with the bilge draining?

Joined
Nov 19, 2018
Messages
11
Reaction score
1
Points
3
Age
67
Model
Adventure
First time owner and first post! Just purchased a 1996 Adventure 208 in need of TLC. So, first order of business, I removed the fuel sender unit and removed 25 gallons of 3 year old fuel. First 5 gallons was pretty milky; I’m not planning on attempting to use any of the 25 gallons. Wow, expensive to get rid of it!
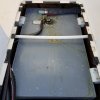
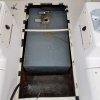
First question: does this look like the original tank? Please see photo; the 2x4’s securing the tank are toe-screwed into the fiberglass bulkheads running fore-aft. Pretty ugly workmanship, which makes me think this is a replacement tank? That would be a pleasant surprise!
Second question: I removed water tank to see why there was water in the bilge below the fuel tank and not draining aft. Unfortunately, there’s a “shelf” below the water tank and I cannot access / assess how bilge drains to the rear bilge. Any thoughts? I used a wet/dry vac and got as much bilge water out as possible. Now that we’re back to freezing temps, I have a 1” skating rink in the bilge. Should I be concerned?87386A35-DB9E-4B5F-AEE8-CD544B021D53.jpeg
Many thanks; from what I’ve read so far, this site/ forum is a wealth of info and experience. Happy Thanksgiving! CT
 

DennisG01

GreatGrady Captain
Joined
Sep 1, 2013
Messages
6,818
Reaction score
1,209
Points
113
Location
Allentown, PA & Friendship, ME
Model
Offshore
Crazy... there's been a whole slew of recent posts about "draining bilges"... and they're pretty much all the same... "What's going on with this"? :)

Yes, that is normal. You won't get all the water out unless the bow is tilted quite high. The forward bilge area is slightly lower than the rear bilge. Again, this is common to most Grady's.

Can't say for sure, but the tank does look original. The use of the 2x's screwed into the stringers (bulkheads go port to stbd), is also how Grady would have done it - although they are not the primary thing that holds it in place.

No, a couple inches of ice in the bilge won't damage the boat in any way. "Possibly" the aft bilge pump - but that's about it.
 

Halfhitch

GreatGrady Captain
Joined
Nov 11, 2017
Messages
1,350
Reaction score
424
Points
83
Location
Venice, Florida
If the water in the forward portion of the hull is of concern and you don't want to mess with having to elevate the trailer tongue enough to get it to limber aft, then while you have the cockpit sole open you can install a piece of hose, even garden hose will work. Just make sure that one end is located in the lowest point of the forward bilge and restrained in some fashion so it won't shift while underway. Then route the other end up to one of the inspection covers in the sole so that when you pop out the inspection cover the end of the hose is right there so you can stick your shop vac on it and in seconds, suck the last bit of water out. Be sure to restrain the upper end also so it doesn't get lost.
 

Ky Grady

GreatGrady Captain
Staff member
Joined
Mar 1, 2006
Messages
2,918
Reaction score
1,272
Points
113
Location
Berea, KY/Cross, SC
Model
Seafarer
I'm with Dennis, that looks to be your original tank. If you are removing your tank, be prepared to do a little fiberglass removal. Grady gives us a nice big removable cover to see out tanks, but the hole it sits in is not big enough to lift tank out of, have to trim the lip the hatch sits on.
I just got done removing my auxiliary tank due to it leaking around the fuel sender and pickup tube. Corrosion has eat up the flange for the sender so I'm ordering a new tank right after Christmas. The 2004 version of tank hold downs are poly wedges screwed in at angle and sitting on two rubber strips.20181104_123209.jpg20181104_163953.jpg
 

SkunkBoat

Well-Known Member
Joined
Oct 12, 2017
Messages
4,233
Reaction score
1,466
Points
113
Location
Manasquan Inlet NJ
Website
www.youtube.com
Model
Express 265
On other 20 or 30 year old boats I have found lots of junk blocking the passages from forward to aft bilges. I've seen fish hooks, big fish scales from striped bass, lead weights, nuts & washers, leaves & acorns...but the big blocker is broken off pieces of foam and the resin adhesive of the deck to stringer joint. Some people suggested putting a hose nozzle in the aft pvc tube and blow it out but it all ends up back in front of the passages eventually. All you can do is gain access to the forward side of every cross bulkhead and clear them out.
So try to get a flex camera in that space under the tank. If its blocked you'll have to pull the tank. While your are looking in the tank space, see if there is a glassed-in pvc pipe running thru that space from fwd to aft. Often boat builders don't let water flow from fwd into the tank space, they pass it aft thru a pipe. Not sure what Grady did there.

There is a bulkhead fwd of the fuel tank. You have to get a look at the fwd side of that too. Hopefully you have access to it.

On a Wellcraft I had to cut an access into the bottom of an insulated fish box...two handfuls of junk there.


As for the tank..its probably original, the MFG label is missing. I would think a newer tank would not have lost it yet...


KY Grady- when I had a new tank made they used thicker aluminum and the welded a reinforced Thick circle where the sender unit mounts. Also added extra baffles to reduce gas sloshing.
 
Last edited:

Ky Grady

GreatGrady Captain
Staff member
Joined
Mar 1, 2006
Messages
2,918
Reaction score
1,272
Points
113
Location
Berea, KY/Cross, SC
Model
Seafarer
KY Grady- when I had a new tank made they used thicker aluminum and the welded a reinforced Thick circle where the sender unit mounts. Also added extra baffles to reduce gas sloshing.

I've already contacted FMT which built my original tanks and have a quote from them. My original tank has baffles in it but I did notice on the quote that they have gone to a thicker gauge aluminum.

Surprisingly, the tank is in pretty good shape other than the flange. The bottom Macropoxy coating has rubbed through to the aluminum where it sits on the rubber strips, but it doesn't seem to be pitted.
 

suzukidave

Well-Known Member
Joined
Sep 24, 2013
Messages
383
Reaction score
9
Points
18
First time owner and first post! Just purchased a 1996 Adventure 208 in need of TLC. So, first order of business, I removed the fuel sender unit and removed 25 gallons of 3 year old fuel. First 5 gallons was pretty milky; I’m not planning on attempting to use any of the 25 gallons. Wow, expensive to get rid of it!
First question: does this look like the original tank? Please see photo; the 2x4’s securing the tank are toe-screwed into the fiberglass bulkheads running fore-aft. Pretty ugly workmanship, which makes me think this is a replacement tank? That would be a pleasant surprise!
Second question: I removed water tank to see why there was water in the bilge below the fuel tank and not draining aft. Unfortunately, there’s a “shelf” below the water tank and I cannot access / assess how bilge drains to the rear bilge. Any thoughts? I used a wet/dry vac and got as much bilge water out as possible. Now that we’re back to freezing temps, I have a 1” skating rink in the bilge. Should I be concerned?View attachment 5933
Many thanks; from what I’ve read so far, this site/ forum is a wealth of info and experience. Happy Thanksgiving! CT

my 94 223 tournament tank is original and looks just like that only the coating is intact. there was a manufacturer stamp with a date. my 85 190 has an uncoated aluminum tank. both had lumber bracing which may well have been updated over the years when owners pulled the hatch. note that the stringers are not fiberglass. they are glassed in pieces of lumber. grady only recently and reluctantly stopped using wood.

you might wish to consider pulling the tank and sealing it with coal tar. that will preserve it for many years. it is a lot cheaper than replacing the tank.
 
Joined
Nov 19, 2018
Messages
11
Reaction score
1
Points
3
Age
67
Model
Adventure
OK, I’m on-board with pulling the gas tank now that it’s empty. I like the idea of inspecting the exterior corrosion of the tank bottom and doing what I can to prolong its lifespan! SuzukiDave: coal tar? You mean like automotive undercoating or spray-on bed liner stuff? Also, I understand G/W used some sort of rubber insulation upon which the tank rides? And that insulation is the culprit for soaking-up water and corroding where the tank contacts the insulation? So, do I take an angle grinder with a wire wheel and clean-up the outside of the tank or just coat it?
 

SirGrady226

Well-Known Member
Joined
Nov 7, 2017
Messages
229
Reaction score
95
Points
28
Upon removing my tank from my 226 Seafarer, I found corrosion at every point that rubber pads were used for isolation. After wire brushing them, holes developed at the corrosion points, so I went the route of having a new tank made. The new tank was constructed of 3/16" heavy gauge aluminum instead of the thinner grade that was used for the previous tank. I sanded the tank finish with 150 grit to take away the shine and smooth surface, and allow for self etching epoxy primer adhesion. I applied two coats. At the bottom contact points where the tank sits on the raised support areas in the bilge, I applied 3" X 5" X 1/4" fiberglass bearing pads to the bottom of the tank using 5200 to attach to the tank. This should keep any moisture out between the materials and not allow the bearing points in the bilge to wear into the aluminum when the boat is pounding in choppy seas. All other contact points on the sides and the top were treated with expanded PVC material that was also attached to the tank with 5200. The expanded PVC doesn't contain the carbon that rubber does, I'm told the carbon against aluminum is what creates the very aggressive corrosion on these tanks. So rubber gaskets, and rubber pads are a big no no on aluminum tanks. My sending unit gasket is nylon for this reason also. So in between every bearing point or contact point on my tank, it has two coats of epoxy primer, 5200, and either expanded PVC or fiberglass. Not sure if I could of done anything else to prevent the tank from failing again. Hope this helps.

Tank.jpg
 

Ky Grady

GreatGrady Captain
Staff member
Joined
Mar 1, 2006
Messages
2,918
Reaction score
1,272
Points
113
Location
Berea, KY/Cross, SC
Model
Seafarer
Did your original tank have have the Macropoxy coating on it or was it raw aluminum? If I remember right, your replacement tank was raw aluminum and you have coated it, correct?

The quote I received from FMT includes the Macropoxy coating as an option. My original tanks are coated and I will coat the new ones also.

On the guys that have replaced tanks or anyone else for that matter, are you running the anti-siphon valve on fuel pickup line? Considering going to just a open barb and do away with the anti-siphon barb.
 

Halfhitch

GreatGrady Captain
Joined
Nov 11, 2017
Messages
1,350
Reaction score
424
Points
83
Location
Venice, Florida
Looks like you did a fine job of prepping and installing your new tank. About your final question about the ASV. I removed mine and installed a standard barb fitting. Outboards are not required to have the ASV.
 

SirGrady226

Well-Known Member
Joined
Nov 7, 2017
Messages
229
Reaction score
95
Points
28
Did your original tank have have the Macropoxy coating on it or was it raw aluminum? If I remember right, your replacement tank was raw aluminum and you have coated it, correct?

The quote I received from FMT includes the Macropoxy coating as an option. My original tanks are coated and I will coat the new ones also.

On the guys that have replaced tanks or anyone else for that matter, are you running the anti-siphon valve on fuel pickup line? Considering going to just a open barb and do away with the anti-siphon barb.
The tank I removed was not original, probably around 10 to 12 years old and not coated. I did away with the anti siphon and ran my fuel lines very high in the bilge.
 
  • Like
Reactions: Ky Grady

suzukidave

Well-Known Member
Joined
Sep 24, 2013
Messages
383
Reaction score
9
Points
18
On the guys that have replaced tanks or anyone else for that matter, are you running the anti-siphon valve on fuel pickup line? Considering going to just a open barb and do away with the anti-siphon barb.

just curious as to why you would delete it?
 

DennisG01

GreatGrady Captain
Joined
Sep 1, 2013
Messages
6,818
Reaction score
1,209
Points
113
Location
Allentown, PA & Friendship, ME
Model
Offshore
Concerning the ASV, I don't believe the type of engine has anything to do with it (although inboard engines almost always have a fuel line dropping below the tank top given the placement of the engine. The requirement is in regards to fuel siphoning out by itself should a fuel line burst or spring a leak. The type of engine on the other end doesn't matter. What WOULD matter, though, is whether or not the fuel line is secured well enough so that if it should rupture, the fuel line doesn't drop below the top of the tank. In other words, as long as the fuel line is secured, in multiple places, to permanently stay above the top of the tank, then the ASV is not required.

For what it's worth, the ASV rarely fails. We can find failure examples about it online since information is so readily available and it makes it seem like it's common. But from working in a shop... it very, very rarely happens. For the most part, it's one of those things that you never think about. Of course, like anything, a device can only last so long - so age does play a role in it's lifespan. And, I certainly understand that it's hard to reason when someone has had a personal experience with it. But the primer bulb would not be a good substitute for an ASV as the bulb is too far from the tank. BUT, as long as you can make sure that there are no dips in the fuel line or that it's secured in enough spots where IF the fuel line should completely fail, it wouldn't drop below the top of the tank, then all is good as that prevents the siphoning action, which is the whole idea.

Regarding the fiberglass tank strips adhered to the bottom... In addition to providing wear protection, they also help to keep air moving around the tank. Aluminum will "self protect" itself from corrosion, but it needs air to do so. One of the problems with the way that wear strips are sometimes installed is not using enough adhesive. The adhesive should be applied liberally enough so that it squeezes out all around the strip. Then, using your finger, fillet the edge so that there is no chance for water to stay in contact with the aluminum. The same would be true for anything along the sides and/or along the top - nothing should be installed in such a way as to trap water against the aluminum.

Things are a lot easier with plastic tanks!
 

SirGrady226

Well-Known Member
Joined
Nov 7, 2017
Messages
229
Reaction score
95
Points
28
Concerning the ASV, I don't believe the type of engine has anything to do with it (although inboard engines almost always have a fuel line dropping below the tank top given the placement of the engine. The requirement is in regards to fuel siphoning out by itself should a fuel line burst or spring a leak. The type of engine on the other end doesn't matter. What WOULD matter, though, is whether or not the fuel line is secured well enough so that if it should rupture, the fuel line doesn't drop below the top of the tank. In other words, as long as the fuel line is secured, in multiple places, to permanently stay above the top of the tank, then the ASV is not required.

For what it's worth, the ASV rarely fails. We can find failure examples about it online since information is so readily available and it makes it seem like it's common. But from working in a shop... it very, very rarely happens. For the most part, it's one of those things that you never think about. Of course, like anything, a device can only last so long - so age does play a role in it's lifespan. And, I certainly understand that it's hard to reason when someone has had a personal experience with it. But the primer bulb would not be a good substitute for an ASV as the bulb is too far from the tank. BUT, as long as you can make sure that there are no dips in the fuel line or that it's secured in enough spots where IF the fuel line should completely fail, it wouldn't drop below the top of the tank, then all is good as that prevents the siphoning action, which is the whole idea.

Regarding the fiberglass tank strips adhered to the bottom... In addition to providing wear protection, they also help to keep air moving around the tank. Aluminum will "self protect" itself from corrosion, but it needs air to do so. One of the problems with the way that wear strips are sometimes installed is not using enough adhesive. The adhesive should be applied liberally enough so that it squeezes out all around the strip. Then, using your finger, fillet the edge so that there is no chance for water to stay in contact with the aluminum. The same would be true for anything along the sides and/or along the top - nothing should be installed in such a way as to trap water against the aluminum.

Things are a lot easier with plastic tanks!
Exactly, I have a friend that lives very close to me and he runs a boat repair company. He showed me how to run my fuel lines along the stringers above the top level of the fuel tank, also fasten it so it will never fall to a lower level. He also stated that he has run across problematic ASV's enough to not use them on most of his personal vessels. I'm pretty sure he has to use them on customer boats that originally came with them though for liability reasons. As you can see in the previous picture of my new tank, it shows the 5200 oozing out from the strips and no moisture should be able to get between it and the tank. Nice thing is, the epoxy primer is the final protection. I'm thinking the tank will outlast the hull now being 3/16" thickness, lets hope so anyway.
 

SirGrady226

Well-Known Member
Joined
Nov 7, 2017
Messages
229
Reaction score
95
Points
28
I've previous experience in another boat with it seizing up due to corrosion. The primer bulb is in essence an anti-siphon valve. Just one less fuel restriction to contend with.
Yep, my boat mechanic friend told me to let those loopers drink! :)
 

suzukidave

Well-Known Member
Joined
Sep 24, 2013
Messages
383
Reaction score
9
Points
18
I've previous experience in another boat with it seizing up due to corrosion. The primer bulb is in essence an anti-siphon valve. Just one less fuel restriction to contend with.

got it. i think i prefer a belt and suspender approach given the downside. my asvs are accessible from the inspection hatch if they get stuck. if yours is not you could maybe get an inline one and position it right under the hatch for each access.