Outboard spacer for transom bang plate repair

Jzeno186

Well-Known Member
Joined
Sep 16, 2019
Messages
180
Reaction score
21
Points
18
Age
39
Location
NY
Model
Gulfstream
no problem, I was posting the same threads before I did it. I got the whole
Job done for $700 and it took a half day. The best part was checking the transom and confirming that it was solid and bone dry! Good luck with it. Once it’s done you’ll never have to worry about the transom. Still don’t know why it wasn’t built this was to begin with !
 

Summertop511

Well-Known Member
Joined
Jan 21, 2017
Messages
315
Reaction score
68
Points
28
Location
NJ
Model
Seafarer
What I ended up doing. Called grady and got their new stuff. $3 a foot and matches perfectly. Doesn’t bow with heat and used 1/4” starboard as a spacer. Works great so far this year.


Ridge Runner

Well-Known Member
Joined
Apr 30, 2015
Messages
157
Reaction score
30
Points
28
Where are some good sources to find .125" stainless angle? I have my transom apart and prepped, but all I can find is .25"... I don't want to space the motors out.
 

Jzeno186

Well-Known Member
Joined
Sep 16, 2019
Messages
180
Reaction score
21
Points
18
Age
39
Location
NY
Model
Gulfstream
Where are some good sources to find .125" stainless angle? I have my transom apart and prepped, but all I can find is .25"... I don't want to space the motors out.
Go to any metail shop I had a place make it for me in last than 15 minutes from scratch
 

Ridge Runner

Well-Known Member
Joined
Apr 30, 2015
Messages
157
Reaction score
30
Points
28
Go to any metail shop I had a place make it for me in last than 15 minutes from scratch
I've called every place within 100 miles that I can find; none have .125, all they bother with is .25...
 

Jzeno186

Well-Known Member
Joined
Sep 16, 2019
Messages
180
Reaction score
21
Points
18
Age
39
Location
NY
Model
Gulfstream
I've called every place within 100 miles that I can find; none have .125, all they bother with is .25...
Just to confirm your looking for the metal bang plate ? Not a spacer for your engine mount? If so this is who did mine may be worth a phone call
 

Attachments

  • 07DDF093-951E-4910-AC6E-7CBCF6DB5EEA.jpeg
    07DDF093-951E-4910-AC6E-7CBCF6DB5EEA.jpeg
    557.9 KB · Views: 2

Lt.Mike

Well-Known Member
Joined
Oct 18, 2013
Messages
879
Reaction score
165
Points
43
Age
63
Location
Farmingdale NJ
Model
Overnighter
I did this very thing on my Overnighter. I used heavy gauge aluminum angle iron and shimmed the OB out from the transom with the same thickness of Aluminum plate. Of course I made liberal use of 3M 5200.
I’ll post some pics of that project when I get time later.
 

trapper

GreatGrady Captain
Joined
Jan 7, 2010
Messages
794
Reaction score
197
Points
43
Same as Lt. Mike but used heavy duty stainless steel angle iron and shimmed the OB with the same thickness in starboard with sicaflex. Separating the dissimilar metals. Pics are included under my posts going back a year or two.
 

Summertop511

Well-Known Member
Joined
Jan 21, 2017
Messages
315
Reaction score
68
Points
28
Location
NJ
Model
Seafarer
Same as Lt. Mike but used heavy duty stainless steel angle iron and shimmed the OB with the same thickness in starboard with sicaflex. Separating the dissimilar metals. Pics are included under my posts going back a year or two.
His post is what gave me the idea for 1/4” starboard.
 

Lt.Mike

Well-Known Member
Joined
Oct 18, 2013
Messages
879
Reaction score
165
Points
43
Age
63
Location
Farmingdale NJ
Model
Overnighter
Sorry I took a little long posting these pics but perhaps there still something useful that can be still taken away from them.

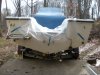
This is the transom before repair when I did my motor swap.
There are cracks and prior epoxy repair. I assumed that the transom brace and epoxy repaircame after the cracks.

DSCN7685.JPG

Sanding the epoxy repair away I could see the two large cracks. The small holes for the trim was letting water in, which was early before any real damage was done as the transom is still solid.

DSCN7697.JPG

I opened the cracks and the screw holes to allow fresh epoxy to bond.

DSCN7703.JPG

Marinetex laid down before sanding smoth.

DSCN7709.JPG

The new trim is heavy 2x2" aluminum angle stock trimmed to fit like factory.
If I were to do it again I'd go with stainless steal angle instead of aluminum like Trapper did.
Not that the aluminum has had an issue, it hasn't but if you can build it better... ;)

DSCN7711.JPG

Everything installed with 3M5200 sealing all holes. Three shims of aluminum stock the thickness of the angle piece were installed again with 3M5200, one long directly under the angle and two lower where it bolts up. I thru bolted the ends with stainless bolts and double fender washers to further add strength to the transom.

DSCN7718.JPG

You can see the shims better in this shot.

DSCN7717.JPG

Here you can see the transom saver plate all painted nice and remounted, the reinforcing extra bolts to the sides, and you can just make out the white traction tape I laid down prior to bolting it all up. The wide traction dresses it up, hides imperfections, and protects the repair underneath.
This was all done in 2015 and still looks as good today.

DSCN7720.JPG
 

Attachments

  • DSCN7716.JPG
    DSCN7716.JPG
    1.7 MB · Views: 2
Last edited: