Penetrating epoxy into freshwater hatch help

mac83

Well-Known Member
Joined
Jan 24, 2010
Messages
100
Reaction score
1
Points
18
Age
41
Location
Suffolk, VA.
Model
Adventure
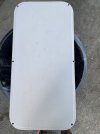
Hey guys, I was wondering if there are any tips to doing this. Yesterday I got rid of the old caulk and thought I’d pull the hatch over my freshawater tank on my 208 Adventure and found two small wet spots. I have a heat lamp on the areas as we speak to make sure it’s dried out. I went to west marine and was going to try this stuff to see how it does. I also was going to fill the files with epoxy and re drill them.
Of course, the picture that I need to post is saying it’s too large.
 

Attachments

  • 92C39A80-2156-48AA-935A-99C166E82288.jpeg
    92C39A80-2156-48AA-935A-99C166E82288.jpeg
    2 MB · Views: 28
Let's see the other side. These panels are cored with plywood. Unfortunately they leak into the screw holes that hold them down. Over time the plywood rots out. There is a chance you could get some life out of the panel but Git-Rot is not a miracle cure.

Take a look at SkunkBoat's project. This may be looking at to repair on a smaller scale.

 
Last edited:
Really depends how the core is. If ok, you can glass or resin over and see how it goes.
 
+1 to both things mentioned above.

Also... those "small" wet spots will be at least twice or three times as big as you think. The question becomes whether or not they've been wet long enough to either cause the glass to delaminate from the wood and/or if the wood has started to rot.

However, if your skill set is decent - and it's the construction type I'm thinking of - it's only a couple hours of work to completely remove the core, re-core and glass.

What holes are you referring to that you're going to fill with epoxy?
 
I can’t figure out why it keeps saying the files are too large. I’m trying take them with my phone.
 
+1 to both things mentioned above.

Also... those "small" wet spots will be at least twice or three times as big as you think. The question becomes whether or not they've been wet long enough to either cause the glass to delaminate from the wood and/or if the wood has started to rot.

However, if your skill set is decent - and it's the construction type I'm thinking of - it's only a couple hours of work to completely remove the core, re-core and glass.

What holes are you referring to that you're going to fill with epoxy?
The screw holes that hold the hatch in place. Enlarge them, fill with epoxy, re-drill. They need to be 100% waterproof. May not be the same "holes" Mac83 is referring to.
 
I can’t figure out why it keeps saying the files are too large. I’m trying take them with my phone.
I sometimes have to resize my iPhone files. Email them to yourself and select a in-between size. Then save back to photos.
 
  • Like
Reactions: mac83
I can’t figure out why it keeps saying the files are too large. I’m trying take them with my phone.
Go into settings, find "phone" and under "format" , set to "high efficiency ". This will make smaller files but your picture quality will not change for normal use.
 
Not sure what I’m looking at. Looks like two corners of the whole part. Doesn't look that bad. Lookat the upper left corner of the second photo. See where the glass mat is separated from the gel coated top/side. That screw hole has been leaking and water has gotten unto the core. Not as bad in the lower left corner but you can see it is happening there too.

When it happened to my hatch I stood it up to inspect the fuel tanks and I had a coffee colored liquid leaking out that was sticky from the plywood glue.

I think you can "save" the hatch without a complete rebuild. If it were mine I would drill out all the holes from the the underside with a 1/2" bit being careful not to go all the way thru to the finish side. Dry out as best possible. Tape off the holes on finish side and fill with West System epoxy thickened with a some chopped mat fiberglass. Dremel out the corner that is separating and expo it as well. Then re-drill the holes from the finish side.
Thanks Hookup... I posted a picture of the whole hatch early in the thread. Sorry, I was having an issue sending them all at one time.

I really appreciate the advice. I got some penetrating epoxy but I guess that’s not really what I needed.
 
Penetrating epoxy is thin. If you opened it you could use it around the upper left edge. If you can return get a small West System like the one below. It's way more than you need but I didn't see it in a smaller package. Glass mat can be chopped up with a scissor. You don't need more than a 6" x 6" piece.

 
It doesn't look that bad to me either. For now, I would just reinstall the lid and caulk the seams as well as coat the screw holes with silicone caulk.
The bilge area on the 208 is typically quite dry. I suspect moisture is coming in from the top side.
 
It doesn't look that bad to me either. For now, I would just reinstall the lid and caulk the seams as well as coat the screw holes with silicone caulk.
The bilge area on the 208 is typically quite dry. I suspect moisture is coming in from the top side.
It was definitely coming in through one failing portion of caulk and a couple of the screw holes. My fishbox and live well hatch are both toast so I have some projects ahead of me.
 
The failing caulk is a non-issue for this dilemma as it doesn't affect water getting into the core of the hatch. While we can't see the whole underside of the hatch (the topside doesn't really matter), I can see more than one place where the underside "skin" is separating - in addition to the spot around that screw hole. I don't think that skin was bonded well to start with. It also appears the core goes too close to the edge in some spots which means the screw holes are penetrating the core. The core should have been a bit smaller.

I'm going to take a different route on this fix suggestion. I think you're going to find that there are other areas of the core that are compromised and it will only get worse over time. Rather than fixing it twice, just rip the core out and re-do it. It really doesn't take much time to do so and then you'll be good for decades and decades.
 
  • Like
Reactions: dbiscayne
mac, I put mine on hinges with a pull latch and a deck hatch spring to hold it open. I use the space for storage (rod holders leads etc. also my battery charger, and leave it open when not in use to help dry out the area, as is right over the bilge.
 
  • Like
Reactions: mac83
I did mine, and strongly recommend using foam core from your local fiberglass supply place rather than plywood. Saves weight, adds strength, and lasts longer (I hope).
 
With the price of ply go grab some honeycomb board. It’s about $55 a sheet for 1/2”. FGCI might sell half sheets or repair panels.
 
I started cutting this corner back and I just want to make sure that this use to be wood before I get too far into it. I was just going to cut those couple corners back and then just use some chopstrand to replace/reinforce.
 

Attachments

  • image.jpg
    image.jpg
    2.4 MB · Views: 15