Replacing bilge drain tube

jk

Member
Joined
Aug 8, 2009
Messages
17
Reaction score
3
Points
3
Location
Buzzard's Bay
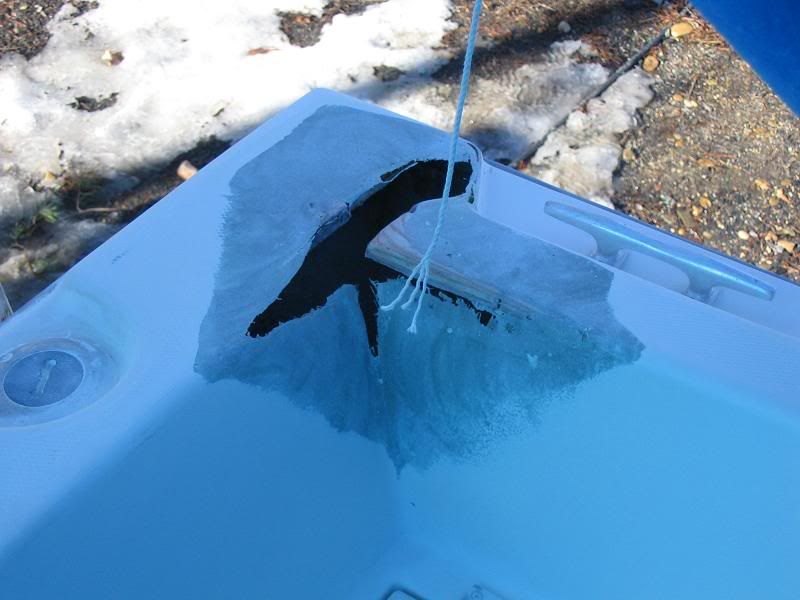
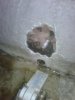
Looking for some insight from someone who may have replaced the bilge drain tube. Long story short, but I came to discover that mine had deteriorated and allowed water to enter the exposed plywood (from the bildge side) in the transom. The boat is a '88 Offshore with a full transom and bracket. At this point, it the damage appears to be fairly localized to an area approx 6" radius from the drain tube. Game plan right now is to clean out the bad plywood from the inside, let it dry, bore out the hole and fill with thickened epoxy, then redrill for the new tube. Any thoughts or experiences would be appreciated.

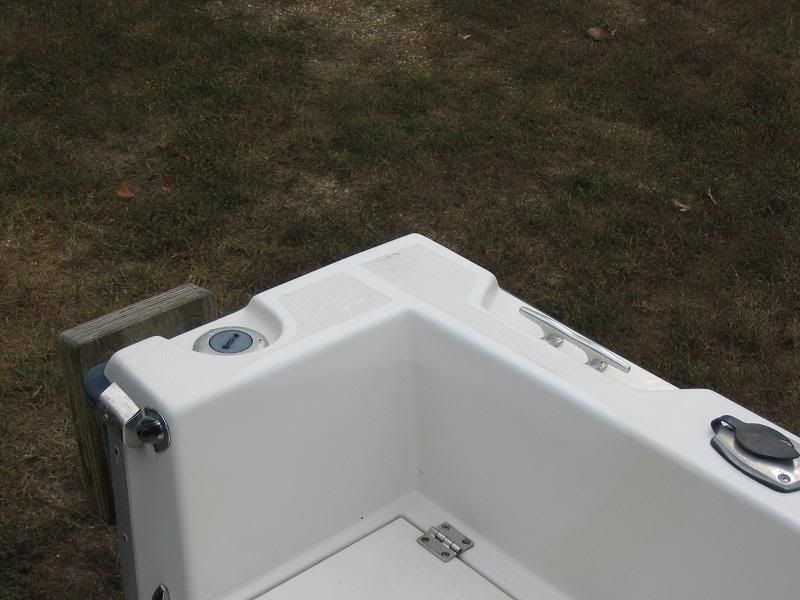
By the way, a big thanks to the Grady engineer who designed that large, roomy opening for easy access to the area!
 

jk

Member
Joined
Aug 8, 2009
Messages
17
Reaction score
3
Points
3
Location
Buzzard's Bay
Already removed the delaminated fiberglass on the inside (+/-4" dia) and dug out the loose plywood and mush. Thinking I will have to drill out and enlarge the existing bilge drain tube and clean out any other plywood that I can access. Then I need to get the wood to dry.
 

gw204

Well-Known Member
Joined
Jan 31, 2005
Messages
2,481
Reaction score
22
Points
38
Location
St. Leonard, MD
More likely than not, the wet area will extend farther than you think and you might not be able to get to all areas that are wet. So, I would cut back the skin and dig out the core until you get to solid structure that may just be damp, and not soaked. Heat lamp the crap out of that a get it as dry as possible.

Then I would grab a small piece of Coosa Bluewater 26 and cut it to fit. Bevel the edges of the Coosa and the existing core to increase the surface area for the bond and bed it in resin thickened w/ cabosil (paint several coats of unthickened resin on the wood core and let it soak up as much as possible first). Once that's cured, glass over it, gelcoat, redrill for the drain and install you drain of choice (brass tube, PVC, fiberglass tube, etc).

You could use wood for the new core section too if the Coosa isn't available. I don't think I would simply use thickened resin though as you might end up having a sizable section of core to replace.

That's the way I would go about it if not replacing the entire transom. Good luck.
 

NOTHING ELSE MATTERS

GreatGrady Captain
Joined
Jun 26, 2006
Messages
1,993
Reaction score
5
Points
38
Age
59
Location
LONG ISLAND NEW YORK
I will have to agree with Brian on this one. You HAVE to remove all the "black" wood first, then you can patch it up. If the "black" wood is too much, i would(i did) change the transom core.
 

jk

Member
Joined
Aug 8, 2009
Messages
17
Reaction score
3
Points
3
Location
Buzzard's Bay
Brian
Thanks for the advise. The process you describe is what I had in mind. So far, I've scraped back to solid wood and removed much of the loose "mush". I would guess that I've removed about 3/4" depth until I hit the solid wood. The damage is located on the interior of the transom. I'm now trying to get it dry, which is proving to be a slow process. A hair dryer seems to work the best. I was hoping not to have to go the route of adding wood and glassing as that would be a first for me, but I realize it may be the best way to go. Here's a photo from a couple of days ago. The dark wood has since dried.

The only reason I discovered this was because I happened to notice that the washer around the bolt was depressed into the fiberglass about 1/8". After removing it, I discovered the crack in the skin and the separation of the glass in that area. This is where I originally thought the water was getting in. Upon opening it up and scraping out the dark wood did I discover the absense of the drain tube and now believe that is where the water was getting in and wicking up. There is no wet wood above the bolt, nor horizontally beyond the hole I opened. I think I will need to open up more around the drain opening though.
 

Attachments

  • Copy of bilge-1.jpg
    Copy of bilge-1.jpg
    92.4 KB · Views: 3,487

gw204

Well-Known Member
Joined
Jan 31, 2005
Messages
2,481
Reaction score
22
Points
38
Location
St. Leonard, MD
jk said:
There is no wet wood above the bolt, nor horizontally beyond the hole I opened. I think I will need to open up more around the drain opening though.

Looks like you may have gotten lucky. :)

I think your best bet is to start grinding glass over the dark wood. Pull it down to where you just expose the top of the wood and then commence your drying. Like I said, aim a heat lamp at it and walk away for hours/days. If you're hitting it with a hair dryer for 30 minutes or so, you're only drying the surface.

Don't be afraid of adding wood or glass. It's not as hard as it sound and we can walk you through the whole process.

The first time I tried glassing, I had this to deal with...

IMG_0248.jpg


Ended up this...

IMG_0627.jpg


Just keep the pics coming!