
- Joined
- Apr 2, 2022
- Messages
- 12
- Reaction score
- 1
- Points
- 3
- Age
- 59
- Model
- Bimini
I had a slight smell of fuel, had a pressure test done to 1 lb and the aft tank had some holes around the fill line. This group has always provided very good feedback, and I wanted to contribute as well as ask a question or two. All fuel removed... I ran them low knowing I may need to replace tanks.
I did this myself, as I am currently not working and received quotes of 18-20 k to remove and replace (2) tanks.
Process;
1-remove all batteries / plumbing disconnect any items at the leaning post.
2- remove leaning post, I took the port and starboard insert compartments /drawers out, to access the screws. This is necessary and will lighten the leaning post up. Once free it probably weighs about 200 lbs. I tied rachet straps and had forklift at marina pick up.
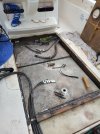
3- remove large deck piece, screw gun and utility knife to cut caulk.
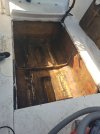
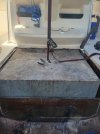
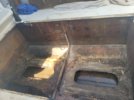
4- removal of fuel tanks.
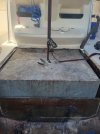
There are plastic wedges that hold the tanks down. The tanks sit on rubber hoses. The design is very nice excepting the bulkhead that you will need to cut down in order to pick up the front tank and slide it aft to completely remove it. I contacted Grady (I have had 3 Gradys) Carolyn in service noted that bulkhead is just for separation. I think it does provide some structure as well; certainly, hope they changed the design in the newer canyon model to me this is ridiculous, they only would have needed to reduce the size of the tanks 4 inches. I have seen on other post people would -reinstall the piece after removing it ... I'm going to go with 3/4 " starboard and bolt in place after I seal the edges of the plywood.
5- I have priced out the tanks from a couple suppliers in Florida. The original tanks were from Florida marine tanks. I reached out, the prices they gave me were ridiculous. You can find very good tanks in the 4k range for both. heavier gauge and coated.
6-Fuel supply lines look relatively easy. The fuel fill and the vent look a bit challenging ............
Question; has anyone have knowledge of any tricks with the fuel fill and vent lines? I have heard they could be a bit tough
7- I will get the tanks in a week or soo and update the thread.
thank you
I did this myself, as I am currently not working and received quotes of 18-20 k to remove and replace (2) tanks.
Process;
1-remove all batteries / plumbing disconnect any items at the leaning post.
2- remove leaning post, I took the port and starboard insert compartments /drawers out, to access the screws. This is necessary and will lighten the leaning post up. Once free it probably weighs about 200 lbs. I tied rachet straps and had forklift at marina pick up.
3- remove large deck piece, screw gun and utility knife to cut caulk.
4- removal of fuel tanks.
There are plastic wedges that hold the tanks down. The tanks sit on rubber hoses. The design is very nice excepting the bulkhead that you will need to cut down in order to pick up the front tank and slide it aft to completely remove it. I contacted Grady (I have had 3 Gradys) Carolyn in service noted that bulkhead is just for separation. I think it does provide some structure as well; certainly, hope they changed the design in the newer canyon model to me this is ridiculous, they only would have needed to reduce the size of the tanks 4 inches. I have seen on other post people would -reinstall the piece after removing it ... I'm going to go with 3/4 " starboard and bolt in place after I seal the edges of the plywood.
5- I have priced out the tanks from a couple suppliers in Florida. The original tanks were from Florida marine tanks. I reached out, the prices they gave me were ridiculous. You can find very good tanks in the 4k range for both. heavier gauge and coated.
6-Fuel supply lines look relatively easy. The fuel fill and the vent look a bit challenging ............
Question; has anyone have knowledge of any tricks with the fuel fill and vent lines? I have heard they could be a bit tough
7- I will get the tanks in a week or soo and update the thread.
thank you