
Ran into another issue with the new 227 last night. As I was pulling out the last of the original thru-hulls, I noticed that the drain in the port side fishbox has broken and is missing about half of the flange. So, that has to be replaced as well. Only problem is there is absolutely no way to access it!!! There is only a 4" inspection port that is right up against the hull side. I can barely get to the thru-hull through here...let alone manipulate my arm to reach 12" under the fish box. :roll:
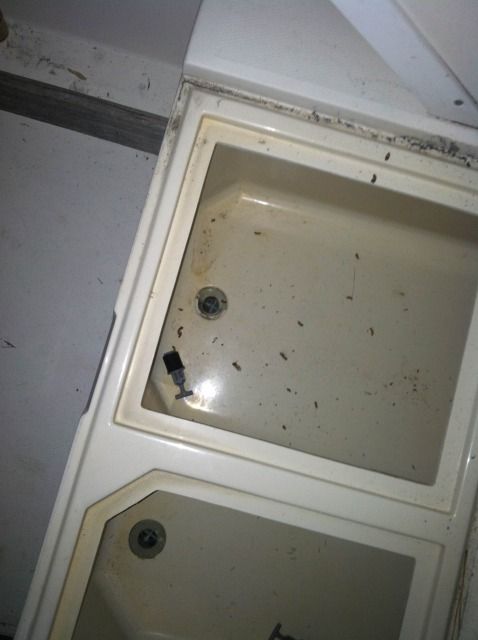
You can see the broken flange here...
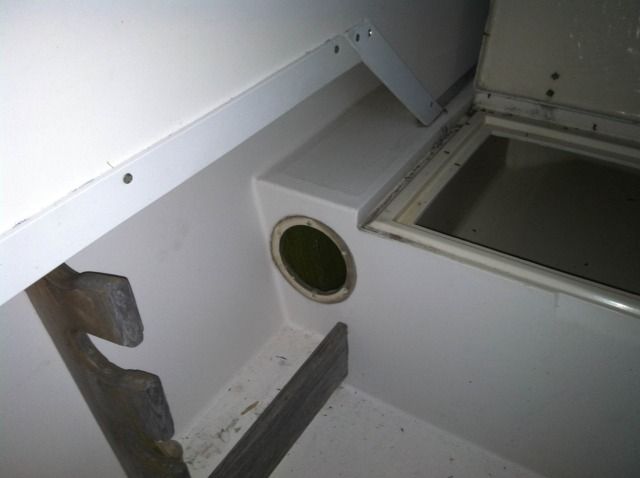
The 4" inspection port that gives me "access"...
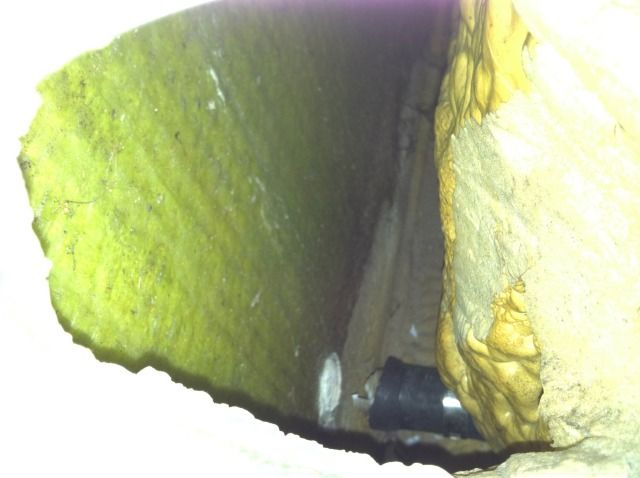
Looking down into the inspection port...
I figured I have a few different options to get to those drains. Let me know what you guys think.
1. Cut a hole in the bottom of the fish box for an inspection port. I'm not keen on this idea because it would sacrifice the "watertightness" of the box and I run the risk of having any water that gets in there leaking down into the hull.
2. Same as no. 1, but glass the section I cut out right back in after the fitting are replaced. Make the bottom of the box pretty again when I get a chance.
3. Cut a hole in the stringer main stringer since I already have the gas tank out. I THINK I could reach the fittings by doing this as long as the outboard stringer wasn't up to the deck as well. I don't believe it is, but I would have to check again. The main stringers are probably 16" tall so this shouldn't cause any decrease in strength and I could glass the piece I cut out right back in and not have to worry about making anything pretty.
4. Cut a hole in the floor for an inspection port. Last resort. I don't like inspection ports all over the place and I don't want to get into reglassing the hole and trying to replicate the diamond non-skid (although I have done that before).
5. Install a new thru hull and cap it. Seal off the existing drains and remove water manually or add new drains on to the deck. The deck is higher than the bottom of the boxes, so I would still have some water collect in there that I would have to remove on occasion.
Right now, I'm leaning towards no. 3 if the outboard stringer isn't full height. Any thoughts or other suggestions?
You can see the broken flange here...
The 4" inspection port that gives me "access"...
Looking down into the inspection port...
I figured I have a few different options to get to those drains. Let me know what you guys think.
1. Cut a hole in the bottom of the fish box for an inspection port. I'm not keen on this idea because it would sacrifice the "watertightness" of the box and I run the risk of having any water that gets in there leaking down into the hull.
2. Same as no. 1, but glass the section I cut out right back in after the fitting are replaced. Make the bottom of the box pretty again when I get a chance.
3. Cut a hole in the stringer main stringer since I already have the gas tank out. I THINK I could reach the fittings by doing this as long as the outboard stringer wasn't up to the deck as well. I don't believe it is, but I would have to check again. The main stringers are probably 16" tall so this shouldn't cause any decrease in strength and I could glass the piece I cut out right back in and not have to worry about making anything pretty.
4. Cut a hole in the floor for an inspection port. Last resort. I don't like inspection ports all over the place and I don't want to get into reglassing the hole and trying to replicate the diamond non-skid (although I have done that before).
5. Install a new thru hull and cap it. Seal off the existing drains and remove water manually or add new drains on to the deck. The deck is higher than the bottom of the boxes, so I would still have some water collect in there that I would have to remove on occasion.
Right now, I'm leaning towards no. 3 if the outboard stringer isn't full height. Any thoughts or other suggestions?
