Restoring the Floor Panel

DennisG01

GreatGrady Captain
Joined
Sep 1, 2013
Messages
6,827
Reaction score
1,211
Points
113
Location
Allentown, PA & Friendship, ME
Model
Offshore
I kinda like Divinycell better, although I've only used it once or twice. I'm trying to remember why I liked it better - it might simply be because it was less expensive. While this won't affect you and your project, foam board can't be screwed into. It needs to have an area dug out and filled with epoxy in order to hold a screw.

As far as brands of epoxy goes, pretty much any of them will do. Being as this is your first time, though, I would recommend using the West System (not related to West Marine). It's a bit more expensive, but you're not using all that much. The advantage is that it's easier to use and measure the appropriate amount. Not that others are hard, but West really takes all the guess work out of it. They have a great website with lot's of "how-to's", as well. You'll get the 105 resin and then one of their hardeners. If you can work on it in moderate temps, go with the 206 hardener.
 

Lt.Mike

Well-Known Member
Joined
Oct 18, 2013
Messages
879
Reaction score
165
Points
43
Age
63
Location
Farmingdale NJ
Model
Overnighter
Tony Hi, I went through that very same project last year. While you have the lid off check the top of the tank under the supports. Mine had a dozen pinholes under the supports. I know... :roll: but better to know for sure.
I went with west system epoxy over the poly resin and while it was an extra $100 it was absolutely the way to go.
Cut your ply wood core to leave 1/2" from the edges as solid epoxy. That way the deck screws don't go through the wood core allowing it to get wet again. For filling gaps you can use the west system extender or sawdust as filler (as suggested by a WM rep).
You can see my project at...
viewtopic.php?f=3&t=21478
The finished deck is as solid as a rock!
good luck with it, Mike.
 

TonyD

Well-Known Member
Joined
Apr 29, 2010
Messages
180
Reaction score
10
Points
18
Location
Lake Hopatcong, NJ
Hey guys - thanks! Mike, thank you for that tip - I was thinking about replacing those supports since they were wet but now i am going to pull them up anyway just to make sure...

I had a couple of questions:
I am still chipping away at the old core out of the "shell" but I was curious, most of what is left is that "onion" peel from the old wood core. Is all that necessary to come out? (Dennis I reading in your thread about how you left that?) I am also curious about the old epoxy that is still stuck to the shell, that too all needs to come up? (see pic below to point out what I am looking at)

Also.. was curious as to how the glass is applied - epoxy/resin > core/foam > new glass. Or do I need to resin over the top side of the foam again for the biaxle to apply to the foam?
 

Attachments

  • IMG_0166.JPG
    IMG_0166.JPG
    81.9 KB · Views: 3,321
  • IMG_0167.JPG
    IMG_0167.JPG
    89 KB · Views: 3,321

DennisG01

GreatGrady Captain
Joined
Sep 1, 2013
Messages
6,827
Reaction score
1,211
Points
113
Location
Allentown, PA & Friendship, ME
Model
Offshore
Tony, just to be clear, in my other post when the term "onion skin" was referred to... That's in reference to the paper-thin layer of fiberglass on the UNDERSIDE of the cockpit floor coring. It's like the layer of fiberglass you first removed to expose the core - but in the case of the cockpit floor, it is very thin.

You don't need to remove every single last remnant of wood. If there's a little bit of wood left here or there - especially thin enough that you can just about see through it - I wouldn't worry about it. The resin that you use will soak right through that easy enough. From what I can see in the pictures, you're good to go.

Basic "Layering" process... and this isn't 'set in stone', by any means...

-- Soak the foam (wet-out) in resin as you'll want it to soak in well before you use it for a good bond.
-- Paint the hatch with resin.
-- Lay in a piece of lightweight glass mat (always cut the glass ahead of time, by the way) and wet-out. Cut it big enough that it extends all the way to the edge - even wrapping up the side somewhat to strengthen the edges.
-- Add foam and more resin.
-- Add your bi-axial glass and wet-out.

The reason for the lightweight mat is to help take up any irregularities in the hatch surface

Don't forget to work on a perfectly flat worksurface
 

TonyD

Well-Known Member
Joined
Apr 29, 2010
Messages
180
Reaction score
10
Points
18
Location
Lake Hopatcong, NJ
Thanks, Dennis. That helps me out a lot - thanks!

For the light weight matt (glass) is this what I am looking for? 1.5oz light enough?

http://fiberglasssupplydepot.com/FIBERG ... OUNCE.html

OHH, I also wanted to ask - for the top side, you mentioned putting tape

Just tape over the topside before you do the epoxing.

Is there a specific kind of tape I should be looking for or just any tape?

And again, thank you all for your patience with me on this, sometimes I can be a little dense but I also just don't want to misunderstand :D
 

DennisG01

GreatGrady Captain
Joined
Sep 1, 2013
Messages
6,827
Reaction score
1,211
Points
113
Location
Allentown, PA & Friendship, ME
Model
Offshore
No worries, at all, Tony. I'm glad you're finding it helpful. I used blue painter's tape but, yes, any old tape would work. It doesn't need to be super sticky - in fact, it's probably easier if it isn't. Yup, 1.5oz is fine.
 

TonyD

Well-Known Member
Joined
Apr 29, 2010
Messages
180
Reaction score
10
Points
18
Location
Lake Hopatcong, NJ
Thanks! I'll keep the thread posted as I progress! In the meantime, have a great weekend!
 

TonyD

Well-Known Member
Joined
Apr 29, 2010
Messages
180
Reaction score
10
Points
18
Location
Lake Hopatcong, NJ
So, I got everything I need to start and complete this project - I can't believe the foam Divinycell would/will/hope be strong enough to support the floor. Wow.. a little nervous.. :)

So here is what I was wondering - I am going to wet out the foam but do I let is cure before handling it again or wet it out and while still "soaked" in epoxy mixture, piece it together to the panel?

Here are my steps as I begin - just thinking out loud and making sure I have my steps correctly (And also to be helpful to anyone else along the way)

- find a nice flat work area
- pre cut/fit matte, glass and foam
- wet out foam
- apply epoxy to fiberglass panel
- lay down matte
- apply epoxy over matte and lay down foam
- apply epoxy lay down glass
- roll out air bubbles on new glass
- apply last coat of epoxy
 

TonyD

Well-Known Member
Joined
Apr 29, 2010
Messages
180
Reaction score
10
Points
18
Location
Lake Hopatcong, NJ
Hey, got a maybe silly question - for the fiberglass, which side lays down on top of the foam? I have silvery back side and the other side is fiberglass strands -… does it matter?
 

DennisG01

GreatGrady Captain
Joined
Sep 1, 2013
Messages
6,827
Reaction score
1,211
Points
113
Location
Allentown, PA & Friendship, ME
Model
Offshore
While it's not imperative that you keep the foam 'wet' as you're working with it, it does make things easier. If it dries, you can get an amine blush that needs to be removed and, of course, sanding. But more importantly, you will get the 'best' bond if everything is wet - or at least still tacky - while you do everything.

I've always left the 'silvery' (smoother) side facing out as it will leave a nicer finish. It also seems to conform to curves nicely that way.
 

Helpermunkey

New Member
Joined
Apr 27, 2015
Messages
1
Reaction score
0
Points
0
Dear Grady Friends,

I recently purchased a 1985 204c Overnighter. The original tank had already been replaced with a polypropylene tank that was made for a different boat. The gas lines had been replaced with PVC pipes and joints to enable a tank not designed for the boat to work. Unfortunately I did not discover this until after I purchased the boat. I had a reputable shop remove the current tank and replace it with a new tank made to original specifications and they replaced all the gas lines with real gas lines.

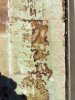
However, the floor panel / gas tank cover is soft and gives when you step on it. I have been reading as many threads as I can find on this forum by folks who have re-cored their floor panel / gas tank cover after finding it in similar condition and the posts and pictures have been very helpful.

I have a lot of experience using power and hand tools. I do general carpentry work and even build furniture occasionally. Unfortunately I have never, NEVER, worked with or been around when anyone else was working with fiberglass or epoxy. In the threads I have read I feel like I have a good basic understanding of taking the floor panel out, cutting through the bottom layer of glass and removing the rotten wooden core or the not rotten wooden core and even doing some sanding to get the last bits of wood off of the underneath of the top of the floor panel. However, that seems to be where I start getting on shaky ground. Folks start using terms that I am completely unfamiliar with and describing in shorthand what I am sure is a more lengthy process. One term I can think of is “wet out”.

Dennis01 suggested the following and I would like to ask the questions below as indicated by brackets () :

-- Remove panel from boat
-- Cut the core out by removing the underskin of glass, and then the wooden core

(By that does he mean using a saw to cut through the glass underneath the panel, to allow the bottom layer of glass to be removed and to give access to the old plywood core? If that is the case, will the glass that is cut out and removed be reused when I put this back together or will it be discarded and new glass used in it’s place?)

-- Replace core with new marine plywood or foam

(Should that be ½ inch material?) (Should epoxy be placed between the new core material and the top or the skin of the floor panel?)

-- Lay on a piece of 1708 bi-axial glass

(Do you know of a video on youtube or similar video channel that shows the proper way to apply the 1780 bi-axial glass with epoxy or fiberglass resin? I have not found any good ones)

(Should the bi-axial glass be cut to but up against the side wall of the top nonskid skin or should it go all the way to the outside edge of the nonskid skin?) (Are the glass and resin and or epoxy all available at stores like West Marine?)

-- Reinstall panel, attending to any stripped screw holes, and caulk of soaking with epoxy,

Tony D stated that this would be his process:

- find a nice flat work area
- pre cut/fit matte, glass and foam WHAT IS THE MATTE HE SPEAKS OF? IS THAT WHAT DENNIS01 describes as 1708 bi-axial glass
- wet out foam IS THIS DONE WITH EPOXY OR RESIN?
- apply epoxy to fiberglass panel IS THE FIBERGLASS PANEL, MATTE? 1708 bi-axial? or something completely different?
- lay down matte AGAIN WHAT IS THIS?
- apply epoxy over matte and lay down foam
- apply epoxy lay down glass IS THIS "glass" the MATTE? The 1708 bi-axial glass or something different?
- roll out air bubbles on new glass
- apply last coat of epoxy

Thank you for any input you can share.
 

TonyD

Well-Known Member
Joined
Apr 29, 2010
Messages
180
Reaction score
10
Points
18
Location
Lake Hopatcong, NJ
Hey all! Sorry just getting back now! But just to update - the floor is back in and it's pretty darn solid! Amazing!

I guess though I know how well of a job I did by how long it takes to have to do this again! :dance

That all said - thanks everyone (ands especially Dennis) for all the time and patience with helping me put this together - really appreciate it!
 

DennisG01

GreatGrady Captain
Joined
Sep 1, 2013
Messages
6,827
Reaction score
1,211
Points
113
Location
Allentown, PA & Friendship, ME
Model
Offshore
Congratulations, Tony! Next time I have to do this, I'll send the boat to you!!! :D


This is a picture from when it was close to being done, but taken from the same angle. New (main) floor done, the hole where the stern drive was is re-constructed, rear access hatch is part way constructed (never was one there).


TonyD

Well-Known Member
Joined
Apr 29, 2010
Messages
180
Reaction score
10
Points
18
Location
Lake Hopatcong, NJ
Haha, not so sure about that, Dennis! That was quite a project you had there though. That would take me all summer if not longer.