
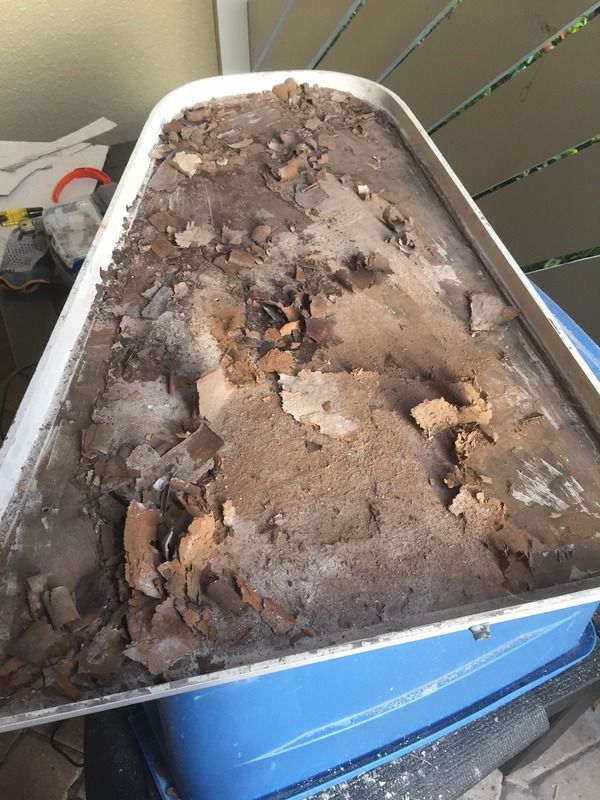
Just bought a Grady 306, 2000 vintage and quickly noticed that the casting platform bow hatches had some flex to them and some slight cracking in the gelcoat around the edges as a result of them having give when people stepped on them. At some point in the boat's history, someone attempted a makeshift repair glassing in small strips of wood as a cross brace. My original plan was to take off the cross braces and put down a fresh sheet of 1708...that was until my screw driver easily poked through into the core, which led to a more involved project. The pictures below are a step by step, with the exception of a few miletstone photos I forgot to take. I'll take more detailed photos on Hatch #2 when I finish that one tonight.
Basic steps are as follows:
1. Cut out back of hatch
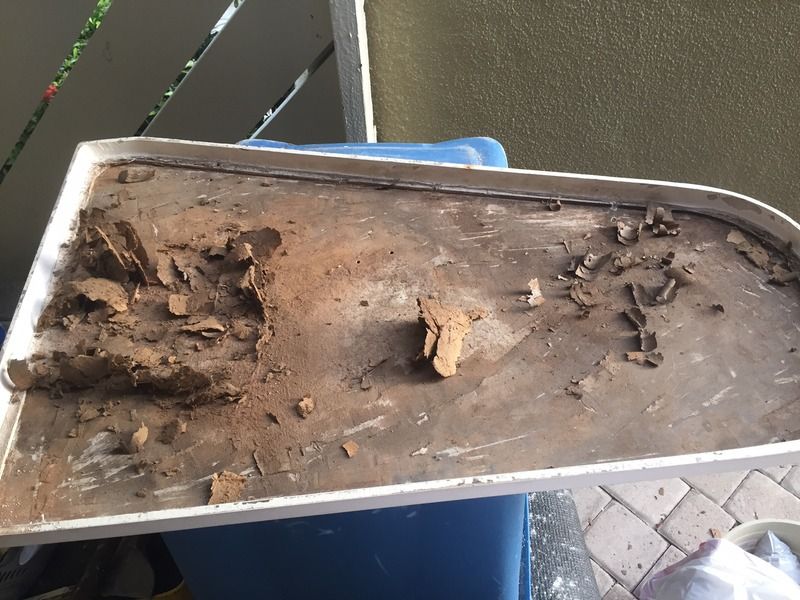
2. Dig out old waterlogged and flaky coring (not sure what it even was..never saw it used before. Looks like 3/16" MDF backing board...similar to what you see on the back of a media cabinet or used as peg board in a garage.
3. Sand/grind surface clean down to skin
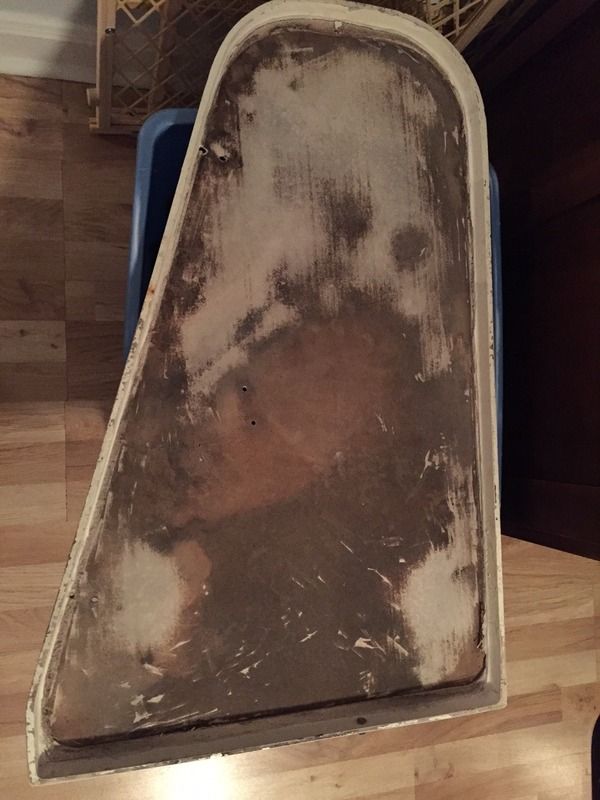
4. Make core template from cardboard and use to cut new core (1/4" Coosa Bluewater 26...expensive stuff!)
5. Used thickened resin...mixed with fused silica...to bed Coosa to skin
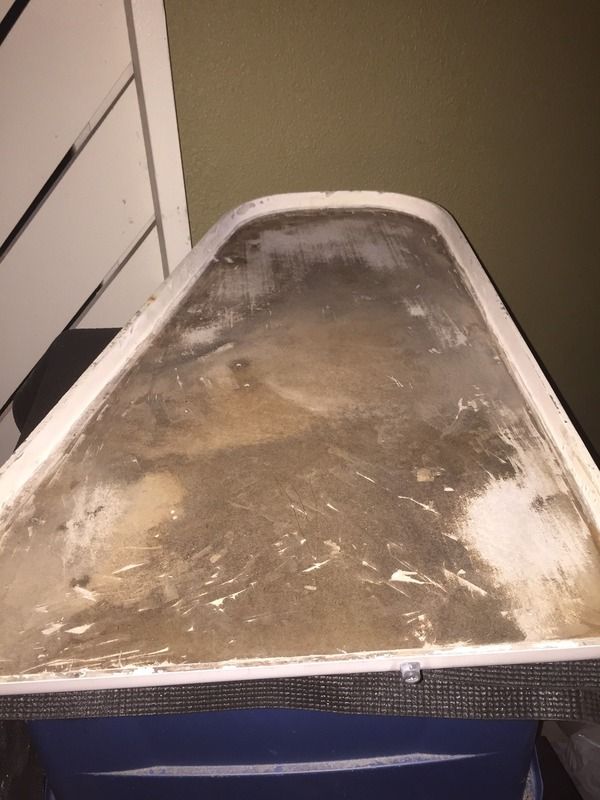
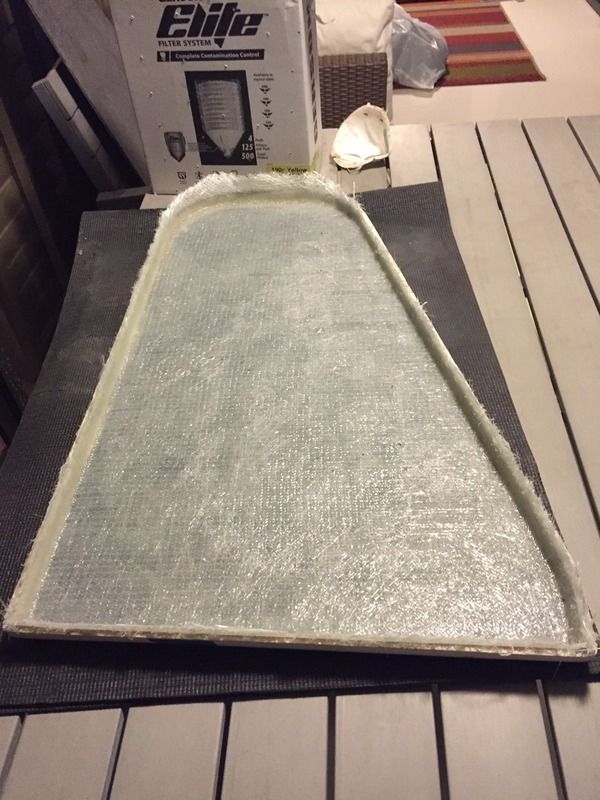
6. Follow up with 2 layers of 1708. First layer was chopped mat side down. Second layer was chop side up so I can sand and finish smooth before gel coating.
Tonight I get to trim the edges off from the fiberglass overhang and temporarily install on casting platform....then jump on it and hope its solid!!
The hatch was 15lbs before doing anything to it, and that was with a soggy core. Will re-weigh the new layup tonigh and see where it ends up. Details to come!


Basic steps are as follows:
1. Cut out back of hatch
2. Dig out old waterlogged and flaky coring (not sure what it even was..never saw it used before. Looks like 3/16" MDF backing board...similar to what you see on the back of a media cabinet or used as peg board in a garage.
3. Sand/grind surface clean down to skin
4. Make core template from cardboard and use to cut new core (1/4" Coosa Bluewater 26...expensive stuff!)
5. Used thickened resin...mixed with fused silica...to bed Coosa to skin
6. Follow up with 2 layers of 1708. First layer was chopped mat side down. Second layer was chop side up so I can sand and finish smooth before gel coating.
Tonight I get to trim the edges off from the fiberglass overhang and temporarily install on casting platform....then jump on it and hope its solid!!
The hatch was 15lbs before doing anything to it, and that was with a soggy core. Will re-weigh the new layup tonigh and see where it ends up. Details to come!


