Suzuki DF200AP maintenance tips

I'll likely end up changing my oil due to the calendar rather than the hours. Hopefully I can get that alarm to work for my needs.
I am surprised how inconvenient they made it to cancel the oil change notification. I can't help but think a lot of mechanically uninclined Suzuki owners end up heading back home the 1st time that alarm goes off.
If you run less than 100hrs a year you are going to do oil change between seasons. This is where it gets you. Say you ran 75 hrs. pull the boat for winter. change oil and "think" you reset the alarm.
25 hours into next season the alarm goes off while you are underway.
The procedure requires you to turn OFF the Key, turn ON the Key, pull the kill switch and press the Start/Stop button(3 times in 10 seconds) for the alarming engine. If you have twins, you need to do the procedure twice. There is one Key and one Kill switch but two Start/Stop buttons.
 
  • Like
Reactions: family affair
Looks like using the good ole fashion duct tape log might be a good belt and suspenders approach for me since my brain is a steel trap - with both ends wide open!
 
did my 100hr yesterday on trailer from another post (no problems with trailer). question can you add gear lube in the top vent hole and stop when lube starts to flow from fill hole. something like a seastar helm filling device would work fine.
 
You have DF250s so I can't say for sure yours looks like my DF200s

so, as I said in the first post of this thread...
"Zukes have an "extra" gear oil "vent" hole above the Oil Level hole. This actually allows you to fill from the Oil Level hole. We are all used to pumping up from the Drain hole.
This year I learned that I can, in fact, ditch the pump and just squeeze the bottle into the Oil Level hole. "


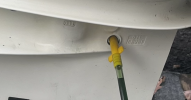
There is nothing marked "fill". From highest to lowest, there is "Oil"(this is the air vent), "Oil level" and there is an unlabeled "drain" at the bottom.

You can't put oil in thru the vent. I tried it that way, with the Level open, and it leaked right out of the Level hole.

With the Vent open and the drain plugged, you CAN put oil in the Oil Level. I used a pump on the first motor. It will take almost all of a quart before it comes out the higher VENT.
Then you remove the pump and let it dribble out the Level hole and put the Level plug in.
Screenshot 2024-03-06 at 7.36.51 PM.png
On the second motor, with Vent open, I ditched the pump and used the cut pointy top of the gear oil bottle and squeezed it into the Oil Level. Because there is a higher vent, it fills right up to the level hole. Depending on whether the pointy nozzle is tight in the hole, it will overflow out the vent when full. Same amount as before. Basically the whole quart.

The book would have you leave the level closed, vent open, and pump up from the drain til it comes out of the vent. then close the vent and remove the pump and close the drain. Then open the oil level and make sure it dribbles out...showing that you are at the level.

I did it that way my whole life. It is messy. The third hole makes the new way possible

Remember, the DRAIN plug is different. It has a magnet.
 
same 3 holes on mine, will look at it again in 100 hrs
 
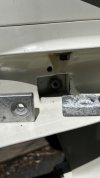
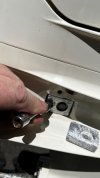
Learned something amazing while replacing my seastar cylinder

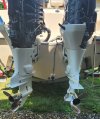
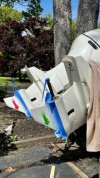
When you remove the tie bar bolt, YOU CAN MOVE THEM IN OPPOSITE DIRECTIONS!!!!! Genius!

no more squeezing between motors
 
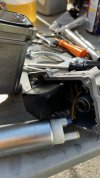
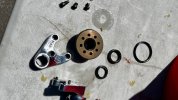
when working on my motors I noticed a slight wetness on one trim cylinder.
Rod not pitted.

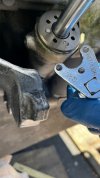
My Marine Tech Tools pin wrench MT0004 from the yamahas doesn't fit the hole pattern
Ordered a pair of replacement caps and a cheap tool MT0006 from amazon.

New caps arrive. Pin hole pattern doesn't match the new tool nor the old tool. RETURN...
Ordered a seal kit instead. Got seal kit

New wrench pins snap in a millisecond...

Luckily the Marine Tech Tools pins were also S4 size. Put them in the new cheap tool. Took it off like butter..

replaced just cap seals in just the drippy one. fluid looked nice so just did minimal cap seal work and topped off fluid.

IMG_3158.jpeg
IMG_3160.jpeg
 
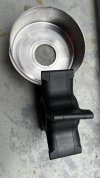
This is an impellor after 2 seasons and 400 hours. probably last another 400 no problem. But dropping the LU after a couple years could be a problem. So I changed them anyways....MAINTENANCE.

used impellor.jpeg
 
Good to know. Thanks for sharing.
Now if only the weather would cooperate for me to get out! Possibly my latest start to the season EVER! :(
 
OK 1000 hr maintenance! two engines.
Did this few weeks ago. Just getting to post.

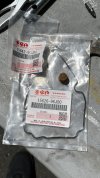
Calls for Replace High Pressure fuel filter but I also wanted to replace the screen filter in the VST.
Also replace Low Pressure filter and other standard maintenance.

LP filter is a no brainer. I always have a spare o-ring for the cup but did not need it. Filter was clean but discolored. there was no water or particulate matter in the cup.
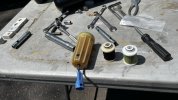
LP fuel filter Large.jpeg


zuke VST filter_00005 Large.jpeg

I loosened the VST and THOUGHT I could get away with not removing it entirely. Drained VST. NO water. NO junk. Screen filter discolored but it looks worse in the picture than in reality. mesh was clean.
No evidence of water ever touching the aluminum inside the tank. Beautiful!
replaced little screen on bottom of pump and new gasket and tried to put it back together
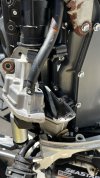
zuke VST filter_00006 Large.jpeg

That didn't work out. The pump will "fall down" when you try to reassemble.
I found that out the hard way when the motor would not start.

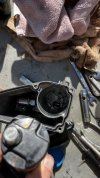
Pulled the VST entirely off. Pump was not seated in "grommet" so not pumping anywhere...
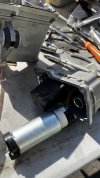
zuke VST filter_00004 Large.jpegzuke VST filter_00003 Large.jpeg zuke VST filter_00002 Large.jpeg

Notice there is a formed rubber seal on bottom of pump that hold the filter screen. This matches the form of the metal bottom of tank.
There is no wiggle. you have to place it oriented in the exact right direction. You have to do this on a bench.
In pix, the grommet wants too stay stuck on the pump but to get it all oriented you need to put the grommet in the top part and press the top down onto the already properly seated pump...while NOT screwing up the gasket...


Anyways got that motor running. Still had not changed the HP filter. I had ordered "cheap" filters because OEM zuke were $102 a piece.
I did not use the cheap ones. They were ....cheap.... left the originals on and got it ready to launch.
given that the VST was so clean, I am delaying that until the end of season wrap up.
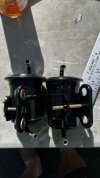
HP fuel filter_00002 Large.jpeg
The left one is OEM the right one is Amazon. Non stainless bolt, cheap construction, different angles of ports

As a stand alone project, the HP filter requires draining the VST to relieve fuel pressure and you NEED a fuel hose plier kit. It could be done by loosening, but without removing ,the VST.
But its tight space and short hoses....
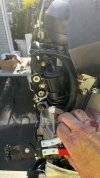
HP fuel filter_00001 Large.jpeg

This project required me to buy a (cheap) hose clamp kit. Some of the original clips came off easy and went back. Others were destroyed by pliers and could not be reused.
You will need this to do the VST and HP filter change.
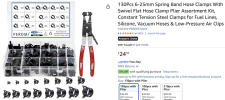

Screenshot 2026-05-26 at 8.51.12 PM.png


So final recommendation is to have everything ready before you start. Have the OEM suzuki gaskets, filters, screens. Have a hose clamp kit. Remove the VST to do the work and replace the HP filters as part of that process. Do one motor at a time and test the motor before moving on to the next. I would suggest this as a END of season project, not a "I need to launch in 3 days" project.

 
Last edited:
  • Like
Reactions: family affair