Thruster install on 232, will post pics!

Doctordrew01

Active Member
Joined
Dec 17, 2018
Messages
25
Reaction score
11
Points
3
Age
37
Model
Gulfstream
So, I just pulled the trigger on a Vetus 35 for my Gulfstream.
Doing the install myself.
I re cored the swim platform two years ago with Cosa board, glassed and gel coated it all myself. So I know I can handle this.
I just scoped under the the bow area and it’s totally clear. I’ll post pics of my project for you all!
Any one know which batteries are best with high amp hours for these thrusters? I can’t really find anything online. BCF51187-0184-4CED-A0E6-60D364249E83.jpeg
 
  • Like
Reactions: A&J Outdoors

Hookup1

GreatGrady Captain
Joined
Oct 16, 2007
Messages
2,546
Reaction score
709
Points
113
Age
69
Location
Cape May, NJ
Model
Islander
I did a Vetus BOW45D on my 27' Islander. The thread below documents the journey. I went with a Duracell AGM 34 marine from Sam's Club. Lighter and has worked out just fine. Battery up forward to keep power run short. Placement is tricky because of placement parameters. Where are you located?

 
Last edited:
  • Like
Reactions: GypsyRover

Doctordrew01

Active Member
Joined
Dec 17, 2018
Messages
25
Reaction score
11
Points
3
Age
37
Model
Gulfstream
Oh nice. Looks awesome!! I’m JUST north of Boston Ma. Did you fiber glass the entire length of the tunnel? Or just where it touches the sides.
I was worried about adding thickness to it but def want to cover the whole thing.
 

Hookup1

GreatGrady Captain
Joined
Oct 16, 2007
Messages
2,546
Reaction score
709
Points
113
Age
69
Location
Cape May, NJ
Model
Islander
You only need to glass the tunnel in. Use high density filleting mixed in to thicken and work the gaps. Then glass material all around the tube/hull edge.

I used West System epoxy for the install. I recommend it for the adhesion to the polyester resin used to build the boat. A little more expensive but you don't need that much (a gallon or so). Better control of the "kick" time but be careful with larger batches.

Placement is the most difficult thing. Use chalk or grease pencil and mark up the hull. Side Power installation guide was helpful. At a minimum you should be 1 tube diameter below the water line and have 10" of tube across the bottom. Flare the front top and bottom of the hull around the tube. It was tough to get the margins on a 268 - going to be tight on a 232.

Mine is installed in the forward compartment between the v-bunks. Vertically mounted although it can be rotated.

Make sure the store gets the correct tunnel tube. I had to "teach" Defender - they didn't stock the tube and had to special order it. Vetus support in USA was helpful.

IMG_0437.jpeg
 

Attachments

  • Side Power Tunnel_Installation_Guide.pdf
    914.3 KB · Views: 21
Last edited:

Doctordrew01

Active Member
Joined
Dec 17, 2018
Messages
25
Reaction score
11
Points
3
Age
37
Model
Gulfstream
awesome! Thanks for the help!
I’ll post my install to share!
 

Doctordrew01

Active Member
Joined
Dec 17, 2018
Messages
25
Reaction score
11
Points
3
Age
37
Model
Gulfstream
Here goes nothin!
First update.

I used a camera snake and looked under to see if it was clear and had some room- it was.
Then I cut to gain access under there. The center hole is going to be the finger hole to lift the panel.
Now I have to plan my attack for the holes. Im waiting to get ALL the parts to mark up where everything will line up before I do anything else.
 

Attachments

  • EA13D4A2-31F6-4770-8230-7A1F0D479DFE.jpeg
    EA13D4A2-31F6-4770-8230-7A1F0D479DFE.jpeg
    1.7 MB · Views: 61
  • B60A6752-C7FB-41A6-85FE-39D98B4B37FD.jpeg
    B60A6752-C7FB-41A6-85FE-39D98B4B37FD.jpeg
    1.9 MB · Views: 55
  • A7E5AA6E-C186-409E-B7A0-041555E5F136.jpeg
    A7E5AA6E-C186-409E-B7A0-041555E5F136.jpeg
    2.4 MB · Views: 60
  • D87B32AD-FA84-4377-9B8F-27077E9A6CD2.jpeg
    D87B32AD-FA84-4377-9B8F-27077E9A6CD2.jpeg
    2.1 MB · Views: 59
  • Like
Reactions: SkunkBoat

Doctordrew01

Active Member
Joined
Dec 17, 2018
Messages
25
Reaction score
11
Points
3
Age
37
Model
Gulfstream
My buddy scanned it with his phone and made a cad drawing to see how it would fit. Pretty cool stuff.
I also cut all the foam out, scraped it down and sanded with 60grit. Then wiped it down with surface prep in preparation of marking, cutting and glassing in the tube.


Attachments

  • D9999646-D61B-47D5-AF21-059A9DD7A29A.jpeg
    D9999646-D61B-47D5-AF21-059A9DD7A29A.jpeg
    1.3 MB · Views: 62
  • CF873B21-57DF-48BC-8D0C-01BC5AE3FE22.png
    CF873B21-57DF-48BC-8D0C-01BC5AE3FE22.png
    1.1 MB · Views: 61

Hookup1

GreatGrady Captain
Joined
Oct 16, 2007
Messages
2,546
Reaction score
709
Points
113
Age
69
Location
Cape May, NJ
Model
Islander
How deep is that compartment? Is there enough "headroom" to stand it up? They want 300mm or 11.8" across the bottom of the tube.
 
Last edited:
  • Like
Reactions: Halfhitch

Doctordrew01

Active Member
Joined
Dec 17, 2018
Messages
25
Reaction score
11
Points
3
Age
37
Model
Gulfstream
So it’s 18.5” deep.
I have to come up 5” from the bottom to get 11” tube length at the bottom of the tube.
The motor won’t bolt on straight up and down it’s going to be tilted 60deg forward and supported.
 

Doctordrew01

Active Member
Joined
Dec 17, 2018
Messages
25
Reaction score
11
Points
3
Age
37
Model
Gulfstream
Fiberglassed a mock tube for the inside. I’m gonna mount the motor to it and dry fit it where I want it.
 

Attachments

  • AB74106A-24A4-4229-80B0-09E3E4039707.jpeg
    AB74106A-24A4-4229-80B0-09E3E4039707.jpeg
    1.7 MB · Views: 72
  • 365E6A56-F233-40B5-9B95-98129E17B087.jpeg
    365E6A56-F233-40B5-9B95-98129E17B087.jpeg
    1.9 MB · Views: 74
  • CCD3D391-53AF-4448-B576-F6CB66A58082.jpeg
    CCD3D391-53AF-4448-B576-F6CB66A58082.jpeg
    1.3 MB · Views: 76
  • BA1388D0-C231-4DF7-A3E8-82FFE2031407.jpeg
    BA1388D0-C231-4DF7-A3E8-82FFE2031407.jpeg
    1.8 MB · Views: 75

Hookup1

GreatGrady Captain
Joined
Oct 16, 2007
Messages
2,546
Reaction score
709
Points
113
Age
69
Location
Cape May, NJ
Model
Islander
I would move the tube closer to the bulkhead at the bottom of the bulkhead. 3" or so. You need to be able to work putting the glass layers around it.

Also all the fiberglass in that area that will get fiberglass should be sanded with 60 grit inside and out before you glass anything in.

Last note is if you are using West System epoxy use the 206 slow hardener.

IMG_0467.jpeg Bow Thruster 2.jpg
 

Hookup1

GreatGrady Captain
Joined
Oct 16, 2007
Messages
2,546
Reaction score
709
Points
113
Age
69
Location
Cape May, NJ
Model
Islander
I know your are happy with your Duracell 34AGM.
How long would you say your Duracell lasts without a charge assuming you don’t charge on the water somehow.
My friend has a 27 AGM he wants to sell me but it’s like 65 lbs!
I’m using my thruster for docking but also fighting tuna (if the fish goes under the boat, to spin the bow).
I just want to prevent me spending the money on a 34 then wishing I went with a larger one.
Thanks for all the help and suggestions! The protest coming along good so far!
My boat is 27'. The Group 34 AGM does a great job. In Florida I have to turn the boat 180 degrees in a 35' wide canal. The bow thruster makes it a breeze. I also do a fair amount of sailfishing. See out post in the fishing forum. Often we have to turn the boat and chase the fish down. Once we have line back we rotate around the fish with the bow thruster and bumping the engines. Usually fishing with one other person onboard so it takes a while. Never noticed it running down.

I'm assuming you are two battery single engine? Adding a third battery? I'm not sure how you can charge the third battery while on the water without twins. I have charging shunts on boat engines. Each engine can charge a starting battery and another battery. There may be devices that can overcome this - members can help with that.

This chart show MCA. No hand-me-down battery - you need a good fresh one. In my opinion the 34 is the right choice. Higher MCA than a 27, lighter, smaller, inexpensive. Less AH but that hasn't been an issue. If thruster and he new battery is in the back I would be less concerned about weight and a using a 27. Mine in forward next to the thruster and weight up there can make a big difference.

I'm using all Duracell AGM's purchased at Sam's Club. Latest pricing.

Group 34 43.10 lbs. 955 MCA 55 AH. $134.86
Group 24 52.40 lbs. 800 MCA 78 AH. Did not see availability at my store.
Group 27 61.55 lbs. 900 MCA 92 AH. $199.28
Group 31 67.35 lbs. 1,000 MCA 105 AH. $214.32

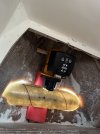
I used a Group 34M Duracell Marine AGM for my Yamaha F150's. About 9 lbs lighter than a Group 24 and 17 lbs lighter than a Group 27 with higher MCA rating but less capacity. Also used for my 4th battery for bow thruster, windlass and bait tank pumps.

For the house battery I use a single Group 27M AGM.
 
Last edited:

Doctordrew01

Active Member
Joined
Dec 17, 2018
Messages
25
Reaction score
11
Points
3
Age
37
Model
Gulfstream
Progress today. Got the hole cut (a little bigger than I had measured for, but I’m going to wrap a few wraps of fiberglass around the tube to snug it up and take up some of the crack before the fiberglass putty). Going to mount the motor and lay it down and install my motor support before cutting and glassing in the tube.

standby for more updates!
E516BBA6-C47D-4271-90EA-A5A7D6313F16.jpeg
 

Attachments

  • ECCAFAB5-D695-4DE3-9B19-0E30DFBE048B.jpeg
    ECCAFAB5-D695-4DE3-9B19-0E30DFBE048B.jpeg
    2 MB · Views: 74
  • 689ACA69-0ACA-4D72-8CFF-5B73F483C475.jpeg
    689ACA69-0ACA-4D72-8CFF-5B73F483C475.jpeg
    1.7 MB · Views: 77
  • 143FD3DF-6D3A-4D27-A404-658F4667DF64.jpeg
    143FD3DF-6D3A-4D27-A404-658F4667DF64.jpeg
    1.9 MB · Views: 78
  • 5396370D-FECA-48E2-8127-A23936962309.jpeg
    5396370D-FECA-48E2-8127-A23936962309.jpeg
    1.5 MB · Views: 77
  • Like
Reactions: SkunkBoat

Hookup1

GreatGrady Captain
Joined
Oct 16, 2007
Messages
2,546
Reaction score
709
Points
113
Age
69
Location
Cape May, NJ
Model
Islander
Progress today. Got the hole cut (a little bigger than I had measured for, but I’m going to wrap a few wraps of fiberglass around the tube to snug it up and take up some of the crack before the fiberglass putty). Going to mount the motor and lay it down and install my motor support before cutting and glassing in the tube.
The glass all around the tube inside and out should be sanded clean. I used epoxy thickened with West System 404 high density filler to fill the edges. Tab the motor and tube assembly in and when hardened remove the motor. Cut tube so it extends out at leading edge and bottom and tapers back to create a base for your "flare". With resins it's best to wipe down are repeat layers as soon as possible for a chemical bond not just mechanical bond.
 
  • Like
Reactions: Doctordrew01

Doctordrew01

Active Member
Joined
Dec 17, 2018
Messages
25
Reaction score
11
Points
3
Age
37
Model
Gulfstream
By tab the motor in what do you mean? Glass around the assembly where it meets the tube?
My plan is to have it rest on this shelf I put in because it has to be at a 60deg angle.

I used structural repair putty and I’m going to glass it in. It’s all poly based so it’s comparable w my resin and glass and gelcoat stuff too. All from totalboat.
And I researched and got a Dc to Dc charger. Basically when my main battery is getting charged, it sends charge to the thruster battery. Vetus said the 3512 is very efficient and doesn’t need a huge battery up front and will run awesome with a 34 with this dc to dc charger.

Thanks for the help and suggestions!
 

Attachments

  • E55B9216-DF7F-49AC-BA8C-32E79DA2C7C6.jpeg
    E55B9216-DF7F-49AC-BA8C-32E79DA2C7C6.jpeg
    1.9 MB · Views: 71
  • 34DEA316-7289-4CC9-81AB-A1E0143C3009.jpeg
    34DEA316-7289-4CC9-81AB-A1E0143C3009.jpeg
    1 MB · Views: 67
  • C78D3A54-C819-48AF-8E14-E9C6AD6B9FE9.jpeg
    C78D3A54-C819-48AF-8E14-E9C6AD6B9FE9.jpeg
    1.2 MB · Views: 68
  • 3069742C-A7EC-4A9E-B9BE-44B29B30637B.jpeg
    3069742C-A7EC-4A9E-B9BE-44B29B30637B.jpeg
    1.6 MB · Views: 69
  • 12619E23-A837-493A-B0FB-2E7FB9DBE497.jpeg
    12619E23-A837-493A-B0FB-2E7FB9DBE497.jpeg
    2.1 MB · Views: 51
Last edited:

Doctordrew01

Active Member
Joined
Dec 17, 2018
Messages
25
Reaction score
11
Points
3
Age
37
Model
Gulfstream
Ok. Cut the tube and sanded it inside and out.
Fiberglassed the shelf/support and once it hardens I’m going to gel coat it, then assemble the motor and rest it on the shelf and glass/putty the tube in.
shits getting real over here
 

Attachments

  • 24E251EF-E46B-46A2-8558-261199BC572F.jpeg
    24E251EF-E46B-46A2-8558-261199BC572F.jpeg
    2.1 MB · Views: 53
  • 60E45F6B-D637-49DE-848B-00756919DB0F.jpeg
    60E45F6B-D637-49DE-848B-00756919DB0F.jpeg
    1.5 MB · Views: 52
  • C1E4B061-A1B0-480A-9AE8-25E5ABC0B01C.jpeg
    C1E4B061-A1B0-480A-9AE8-25E5ABC0B01C.jpeg
    1.7 MB · Views: 51

Hookup1

GreatGrady Captain
Joined
Oct 16, 2007
Messages
2,546
Reaction score
709
Points
113
Age
69
Location
Cape May, NJ
Model
Islander
I would use epoxy and thickened epoxy to tab the tube in. Also epoxy to lay up the fiberglass. Epoxy bonds extremely well to old polyester and is a better choice for a high load repair like the thruster installation.

Polyester sticks well to polyester when its "green". Great for new boats. It may be fine but I didn't take any chances. See what others have to say.

Match the back tube flare up with a vertical line thru the tube. Blend in the strake.. Blend the leading edge of the tube with a nice smooth flare.

Otherwise I think everything looks good.
 
Last edited:
  • Like
Reactions: Doctordrew01

Doctordrew01

Active Member
Joined
Dec 17, 2018
Messages
25
Reaction score
11
Points
3
Age
37
Model
Gulfstream
I made one mistake. I drilled the holes in the center of the tube so the single prop is now offset to one side.. I’m going to re do this- offset to the port this time. Son of a bitch haha.

That’s what I planned to use to fill the gap before fiberglassing.
 

Hookup1

GreatGrady Captain
Joined
Oct 16, 2007
Messages
2,546
Reaction score
709
Points
113
Age
69
Location
Cape May, NJ
Model
Islander
I made one mistake. I drilled the holes in the center of the tube so the single prop is now offset to one side.. I’m going to re do this- offset to the port this time. Son of a bitch haha.

That’s what I planned to use to fill the gap before fiberglassing.
Yes it's best to balance the prop and transmission in the tunnel. Push the drive end to the edge of the tunnel and leave the prop inside as much as possible.

I'm familiar with Total Boat filler. My landlord in Florida rebuilt his transom with polyester. He has done it before. Not for me but you should be ok.