- Joined
- Feb 11, 2020
- Messages
- 456
- Reaction score
- 87
- Points
- 28
- Location
- Samish Island, WA
- Model
- Sailfish
I bought these:
 five-star-marine.myshopify.com
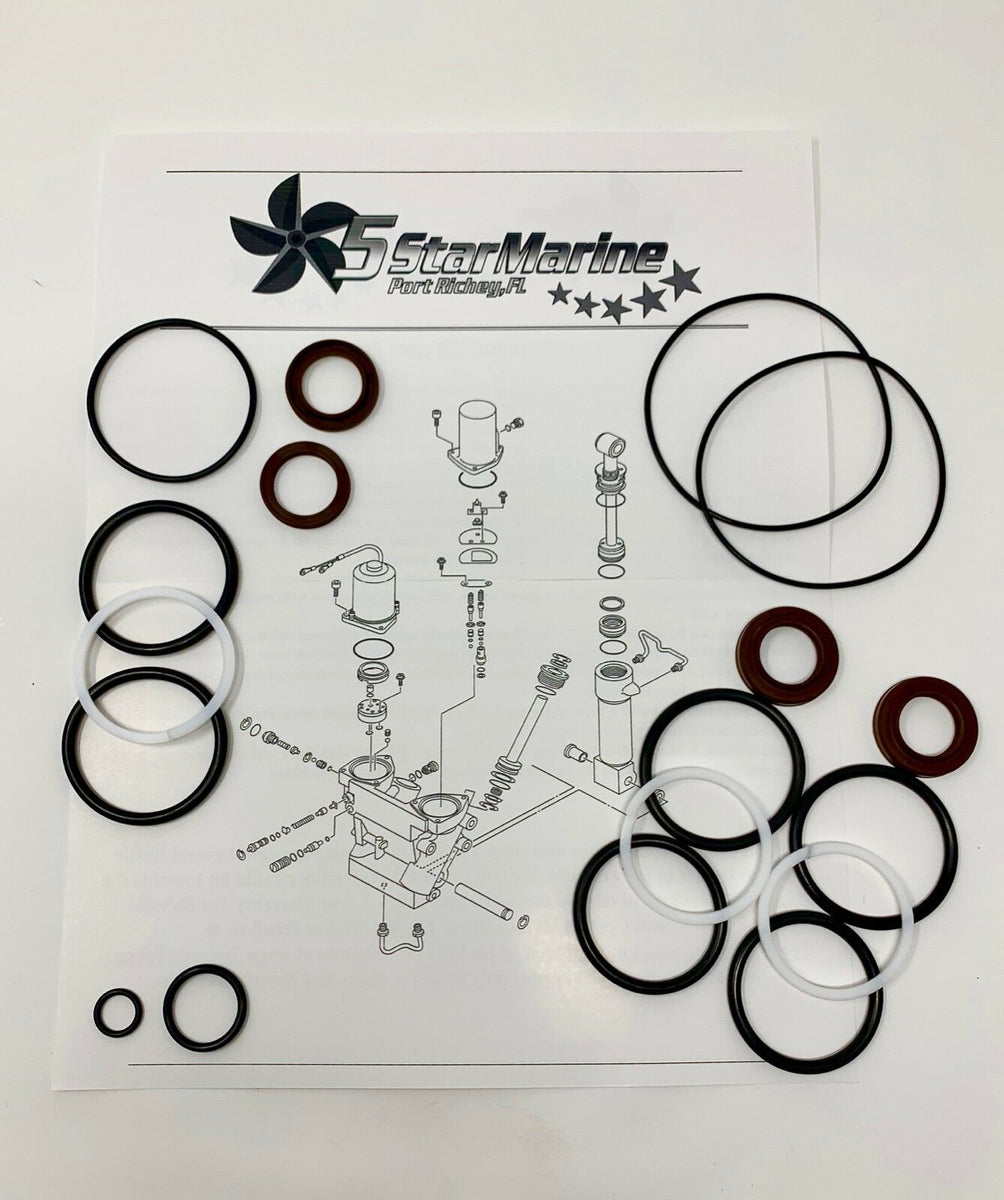
YAMAHA OUTBOARD V6 OX66 2 Stroke & 4 Stroke F200 F225 F250 F300 TRIM SEAL KIT FSM036
* All sales are final * We do not accept returns so be sure you are ordering the correct part when ordering. This kit fits all Yamaha V6 2 Stroke and 4 Stroke Motors (HPDI OX66 225 250 300) (Four Stroke F200 F225 F250 F300) Does Not Fit Yamaha 200-250 with short shaft All the rods seals in...
five-star-marine.myshopify.com
")