Upgrades for 09 season on my 265

gradyfish22

GreatGrady Captain
Joined
Dec 16, 2006
Messages
1,225
Reaction score
3
Points
0
Location
Port Monmouth, NJ
For the 2009 season there was a long list of upgrades:
Infinity 602M speakers
Raymarine E12122 Autopilot
Lee Center Rigger
3 VisionX XIL-80 LED Spreader lights
2 VisionX XIL-40 LED Spreader lights
1 Jabsco Halogen Spreader light on foredeck
Imtra Marine LED Rope lighting under gunnels
Polyplaner 10W External VHF speaker
Blue Seas 6 switch DC Panel
Remove Cell Phone and Amplifier
Replace Group 24 batteries with group 27's
Foot Kush installed at helm
Added nonskid tape on cabin steps
Added lure rack in cabin
Removed all caulk all original caulk and recaulked the whole boat

0227091502_0001.jpg

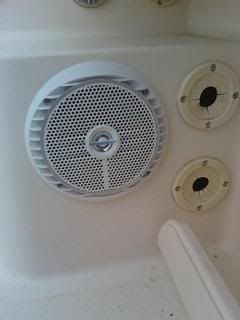
New Infinity 602M speakers to replace blown stock Kenwoods.

IMG_0157.jpg

Raymarine E12122 Autopilot KIT.

0310091607-1.jpg

Rudder Reference Sensor

IMG_0237.jpg

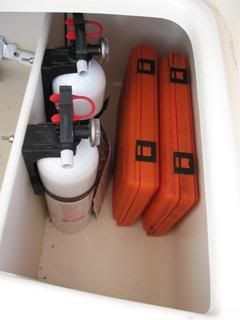
Type 1 AP pump on custom Shelf to allow easy access and removal if necessary.

IMG_0238.jpg

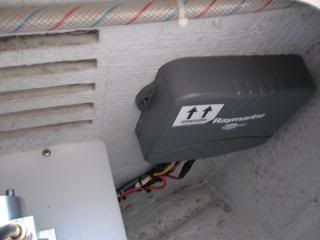
Autopilot S1G corepack installed under V berth.

IMG_0236.jpg

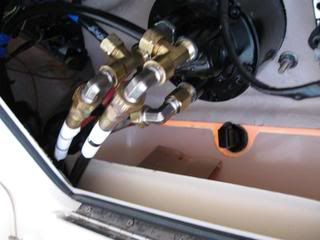
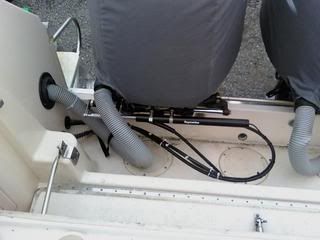
Hydraulic Lines Connected at the helm.

IMG_0205.jpg

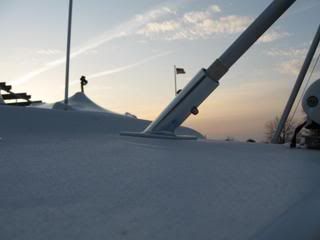
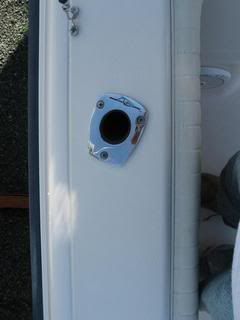
Lee 45 degree Center rigger mount.

IMG_0257.jpg

Center Rigger Installed.

IMG_0261.jpg

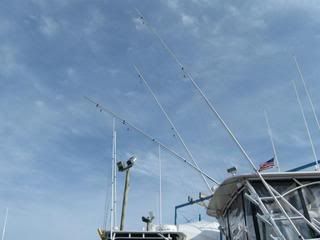
Double rigging for center rigger.

IMG_0251.jpg

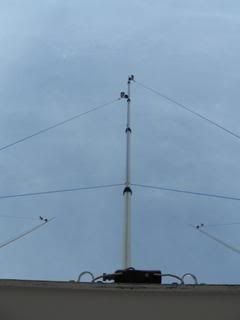
Double Rigged Center rigger.

IMG_0247.jpg

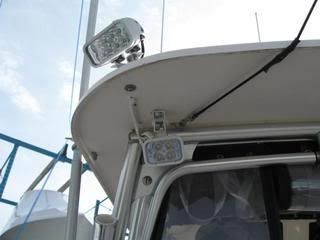
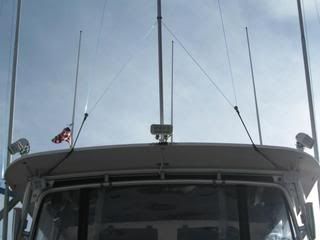
XIL-80 above and XIL-40 below on custom mounts.
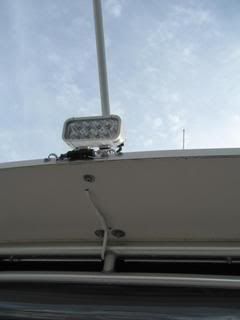
IMG_0249.jpg

XIL-80 Centerline

IMG_0277.jpg

Jabsco Halogen Spreader for foredeck. Will provide light for cleaning at the dock, aiding in anchoring, and checking on the generator when in use on the bow.

IMG_0252.jpg

Blue LEd Rope Lighting Installation.

0318091936.jpg

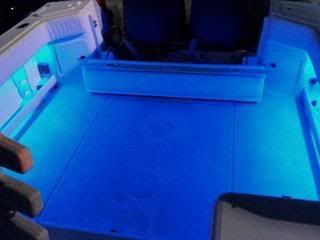
Blue LED Lights turned on.

IMG_0233.jpg

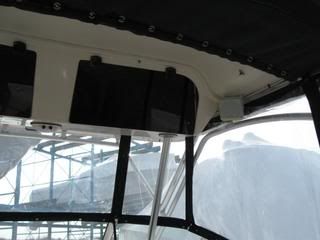
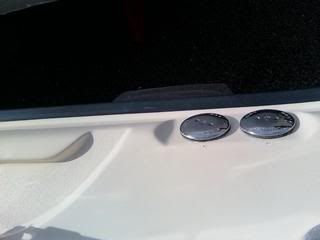
Polyplaner External VHF Speaker added at helm.

0308091450.jpg

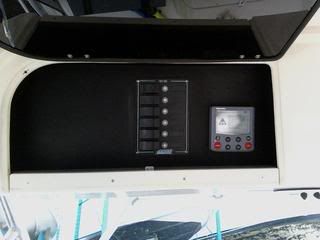
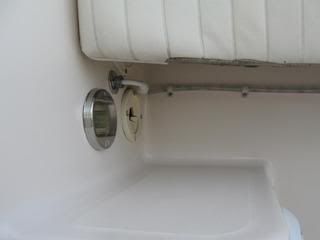
Removed the Cell phone and amplifier from the radio box and installed a 6 switch DC panel and the Raymarine ST6002 Control Head in its place.

IMG_0231.jpg

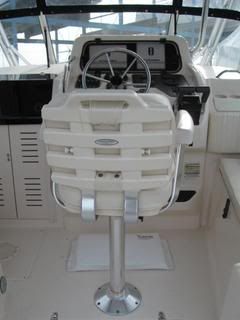
Added a foot kush at the helm for added comfort for the captain.

IMG_0234.jpg

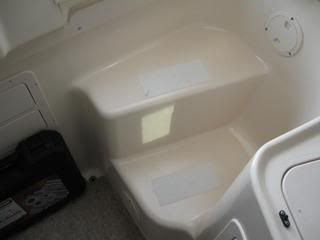
Added nonskid step tape in the cabin for added safety.

IMG_0235.jpg

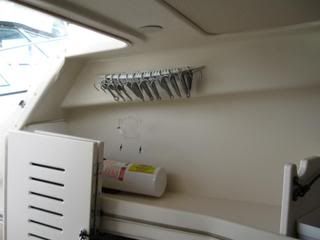
Lure rack added in the cabin for easy access to jigs, extra rigs, or snag hooks.
 

fishingFINattic

Well-Known Member
Joined
Dec 21, 2006
Messages
412
Reaction score
3
Points
0
Location
S.E. Ct
I love the LED rope lights and center rigger!
Did you do any additional support on the inside of the hard top for the center rigger?
Were did you get the rope lights?
Tim
 

gradyfish22

GreatGrady Captain
Joined
Dec 16, 2006
Messages
1,225
Reaction score
3
Points
0
Location
Port Monmouth, NJ
I mounted the center rigger so it straddles the hard top pipe work, this location means this is where the least amount of flex will occur on the headtop. I used large backing washers and 5200 to seal the holes, as well as a beed of 5200 under the whole base. I attached a line to the end of the OR and had someone pull on it to see if there was any flex and I saw none, it looked very solid since it is mounted directly over the hardtop pipework. You can see the washers in the picture of the center LED spreader light, there is a set on each side of the pipework.

Ron, yes I have been busy...figured I had the time to get it all done this spring so I might as well get it all done now and get a lot of things the way I want them.
 

MDRookie01

Active Member
Joined
Mar 8, 2009
Messages
34
Reaction score
0
Points
0
Wow, everything looks great! Nice work, you have been busy.. I espically like the XIL-80 above and XIL-40 below..
 

SlimJim

Well-Known Member
Joined
Jun 13, 2007
Messages
430
Reaction score
0
Points
0
awesome job. I love it. I have the same center rigger. I also put the tape down on the steps inside my cabin. How much were the spekers as I want to do a upgrade.
 

SlimJim

Well-Known Member
Joined
Jun 13, 2007
Messages
430
Reaction score
0
Points
0
A few more questions, why the 27's on the batterys from the 24's? And where do you get them? How much are they? Are the 27's bigger or did they fit okay in the small area?
 

gradyfish22

GreatGrady Captain
Joined
Dec 16, 2006
Messages
1,225
Reaction score
3
Points
0
Location
Port Monmouth, NJ
SlimJim,

I upgraded the 24's to 27's because my original 24's were pushing the CCA requirement of the engines, they were Exide's, and since I run a lot of electronics and the lights and overnight, it made sense that when replacing them to go to the biggest battery I could fit. Group 27's do fit, but they are tight. They fit going fwd and aft like the 24's, but the inboard tray will need to be modified and have about a 1" by 1" corner cut where there was a bulkhead at the transom. The battery itself fits, but the tray was a bit bigger requiring this mod. They are tricky to get in, requires tipping the battery on its side, not something I like to do, but I had to almost do that with the 24's anyways. I will take a picture of the 27's in the battery compartment tommorrow. The 27's are a lot more bang for the buck both in CCA and RC.

The speakers run $160 in the stores for a pair, but I got them off ebay for about $100 for the pair from a dealer in Texas, I can try and find the name and I will fwd that to you. They fit perfectly in the hole, but the mounting holes will require drilling, these speakers place the mounting screws about 1/4" outside the originals, but that is easy to alter. They sound much better then the stock speakers ever did. I also liked installing these speakers because Infinity has a built in lip to accept a bead of caulk to seal them in nicely and make for a clean look.

MDRookie01
The spreader's were a pretty penny...but I went from 23 amps to 8 amps total and I increased my lumens of light almost 30% at the same time. I had to reduce my amp draw from the lighting so my HondaEU2000i could keep my batteries charged when offshore, and adding more light is alwasy good when fishing offshore so that was a plus as well. The 40's and 80's are wired to seperate switches so I can run just the 40's inshore or at the dock to wash, and will run all 5 offshore at the canyon. The 80's will light around the boat and the 40's will light the cockpit. I did have to add custom mounts to get the light aimed where I wanted, the stock mount did not have enough angle adjustment to aim the light where I wanted it and to still be able to use the same mounting holes off the hardtop from the lights I was replacing.
 

SlimJim

Well-Known Member
Joined
Jun 13, 2007
Messages
430
Reaction score
0
Points
0
thanks for the info, I want to get 27's as well, I will try and find them. Thanks again for the great info , it really helps. I wish you the best! You have the best looking 265 I have seen, I really love that blue hull.
 

jekyl

GreatGrady Captain
Joined
Sep 15, 2007
Messages
542
Reaction score
0
Points
0
Age
70
Location
Townsville Australia
Awesome mods tom, Where is the a/p pump situated. Mine is out at the moment and its a bugger to get to.
I want to get those leds. I have been following your choices closely.It all looks like it will work great.
How do you think the infinity's will cope with the salt water in the cockpit. I have looked at that position for my second pair and just can't bring myself to do it.....
 

Bill_N

Well-Known Member
Joined
Mar 14, 2008
Messages
252
Reaction score
1
Points
0
Location
Ct River Valley
Nice work! Great ideas for lighting too. I will be adding an external VHF speaker this year and upgrading electronics. Other than that I'm making sure everything is right mechanically. Your boat looks great!
 

gradyfish22

GreatGrady Captain
Joined
Dec 16, 2006
Messages
1,225
Reaction score
3
Points
0
Location
Port Monmouth, NJ
Thanks for the compliments guys!!

Jekyl,
My AP pump is located under the v berth on the stbd side, it was a bit of a run, I believe the runs were 18ft, more then I wanted, but I wanted a location I could reach easily for servicing down the road. Another option would be to place it under the head sink, there is enough room and you have to run it through that compartment to get it to the V berth anyways, easily accessible since you just open a door and there it is. I actually used a high end cutting board from a local grocery store, as stiff if not stiffer then starboard, and the sheet cost me $7 as opposed to $35 at WM. I cut it to size, and used th remaining length to cut 2 wedges to hold the board in place. I screwed the wedges into the bulkheads and epoxied them in place so they are permanent, and then I screwed the board with the pump mounted on it into that wedge from above. Now, I just unscrew the 4 screws and the board and pump can come out, there is 0 flex and the install looks clean and it can be accessed easily, even while underway.

The only other location I found that would fit the pump is under the stbd bench seat, you can get to it from above through the hatch, but would have a tough time servicing it through that hatch, you can also get to it from the head, the panel behind the toilet access that area but also would be cramped to work in, and removing it would be a pain, although this would be the closest run it would be the hardest to get to for service or a quick fix. I really wish there was a location closer to the helm, there seemed to be room under the helm chair, but getting the pump in there would have required me pulling up that access floor board at the helm and would leave me little to no access to service it short of removing the floor, so I eliminated that quickly. If there was access from the cabin I might have ran it there.

As far as the LED's, I will have pictures of them on as soon as the boat splashes, I hoped to have them up sooner but there is a huge overhead spot light on a telephone pole above my boat where it is right now so it is tough to take good pictures to show, but you can clearly see where they light in person. There is a considerable difference in light between the 40's, and 80's, the 40's would be great as a replacement for just the cockpit, if you want to light the cockpit and some water around the boat, the 80's are hands down the way to go.
 

RJTFD

Well-Known Member
Joined
Jan 29, 2006
Messages
113
Reaction score
2
Points
18
Age
56
Location
Staten Island,NY
Gradyfish22,
I've seen you on the water a few times last season and your boat is defenitly one of the nicest 265 I've seen.
I have a 232 can I just replace my origional spreader lights with the 2 VisionX XIL-40 LED Spreader lights or is there some modification in wiring that needs to be done because they are led's?
 

gradyfish22

GreatGrady Captain
Joined
Dec 16, 2006
Messages
1,225
Reaction score
3
Points
0
Location
Port Monmouth, NJ
No change to the wiring, you actually could run them off thinner guage wir since they draw a lot less, but no need to switch what is there. I ran my 40's off the stock Grady switch on my dome light and ran new wiring and a new switch for the 80's. These LED's have all the ballast and components in the housing, leaving you with 2 wires to deal with like any other light. Only tricky part was making a new mount to angle them where I wanted while using the mounting locations I previously had from my old lights.
 

HMBJack

Well-Known Member
Joined
Dec 11, 2005
Messages
775
Reaction score
126
Points
43
Location
Half Moon Bay, CA.
Nice, clean, work Tom. You're hired! Love the blue lighting and LED spreaders. Please also see my PM Re: Tabs. Thanks, Jack
 

RJTFD

Well-Known Member
Joined
Jan 29, 2006
Messages
113
Reaction score
2
Points
18
Age
56
Location
Staten Island,NY
Thanks for the reply
I'll probably get around to it this season I just installed a stereo and four speakers and it came out real good nice and neat.Next is the led's
I'm in the water now some other minor things first.
See you out there.
 

gradyfish22

GreatGrady Captain
Joined
Dec 16, 2006
Messages
1,225
Reaction score
3
Points
0
Location
Port Monmouth, NJ
RJTFD
I will be splashed April 29, that is the firast day my marina will let us in. Plan to get the lines tied in about an hour and hopefully be fishing by 9:30am...weather permitting. I am usually on ch 69 S.T. Barb II, if you see me out there give me a shout. Heard the fishing is pisking up already. I also attached a picture of my safety equipment in the beach seat.


Here are some more upgrades. Old caulk removed and new caulk put down, and a streak guard installed to prevent streaks down the hull.

IMG_0287.jpg


IMG_0286.jpg


I removed the original caulk both on the interior and exterior of the boat and redid it with GE Silicone Sealant II(red label) in almond, the color matches perfect, actually better then the stuff Grady used originally.

0418091555.jpg


0418091555c.jpg


Used 30mil Clear Vinyl. Used SS screws to attach from below and ran a beed or silicone cauk to keep water from running down the back side. This will keep the black streaks off the hull.

IMG_0290.jpg

2 Extinguishers are mounted under the Stbd bench seat as well as hand held flare kit and a flare gun, along with extra gun cartridges and glow sticks and a mirror. There is also an extinguisher at the enterance of the cabin.
 

RJTFD

Well-Known Member
Joined
Jan 29, 2006
Messages
113
Reaction score
2
Points
18
Age
56
Location
Staten Island,NY
Good Luck and a good season!
If I see you out there I'll give you a shout if you here the vessel FrankDaniel it is from me .
Good luck boat looks great