Winter tinkering progress

I used the EasyPoxy (by Pettit) brand of paint and non-skid when I did my floor. Like Mike's, it's holding up well and I'm very happy with the "non-skid". I've got two or three seasons on it right now and it's holding up well. Whenever it needs it, it's simple enough to lay some more down.

Crap, Mike. I might have to re-do my paint job earlier than expected. I was in a rush when I did it and I didn't mask off for the "white" area (although I did mask so there was no non-skid there). I had just planned on coming back sometime and painting the edging white. After seeing yours... I might have to do it sooner! It looks really nice. :mrgreen:
 
DennisG01 said:
If you don't do it this year, you'll be one year older when you do!

I am on the second season with my sled. With everything I have done to it between last year and this year I am already much older. Still have a ton to do before launching. My "tinkering" was a 2 page list.
 
fellinger said:
I am on the second season with my sled. With everything I have done to it between last year and this year I am already much older. Still have a ton to do before launching. My "tinkering" was a 2 page list.

It's funny how our tinkering list never really seems to go away. You finish up the list, then you turn the page and... crap! Where'd all those new things come from?!? But you know... I wouldn't want it any other way. :)

One of my favorite quotes...

“Believe me, my young friend, there is nothing - absolutely nothing - half so much worth doing as simply messing about in boats.”
― Kenneth Grahame, The Wind in the Willows
 
Thanks Mike. So the 1/4" starboard is sturdy enough on its own for the panel. No need for a plywood underlay?
 
Hgli said:
Thanks Mike. So the 1/4" starboard is sturdy enough on its own for the panel. No need for a plywood underlay?
None what so ever. This stuff is so strong that a 3/4" sheet has been used to make swim platforms. The Starboard cuts and works like wood. The difference is when you over heat wood you burn or blacken it and with the Starboard, it melts. Adding water to wood isn't practical but you can with plastic to cool as you cut. Just keep in mind that water and electric don't mix so be careful. I used a thin scroll saw blade in my bandsaw which was very controllable and had no melting issues. Cutting the holes was another matter as holesaws will heat up fast. A drill press is a huge help. Go slow and mist with water and you'll get a clean cut. Even if its not perfect the gauges overlap the edge so it won't show. You'll really like working with it.
Black and white Starboard can be purchased cheaply from ebay. The other colors can be hard to find but I've since google'd it, wanting to find it in the color sanshade to match my deck, and I turned this site up.
http://www.tapplastics.com/product/plas ... rboard/526
They even sell the Starboard with the diamond pattern that the Grady deck has!
That'll stir your creative mind! :wink:
Mike.
I swiped the image from their site so its huge, right click on the image, then click view image to see it better.
starboard_diamond-xl.jpg
 
Ah. now you've got my creative juices flowing. I'm gonna pull the cover off the boat and take out the dash for measurements and start designing the new layout this weekend.

Goodbye old panel...
 

Attachments

  • IMG_20151114_1214375852.jpg
    IMG_20151114_1214375852.jpg
    142.2 KB · Views: 1,628
Two things, I recommended making a mockup panel first out of a cheap project board from an arts and crafts store. This way you'll be able to better visualize the layout before you make the final cut in the starboard. Make as many mockups as it takes to get it right.

Second I see all your gauges are the old OMC except for the volt meter. If you see my first pics I have a matching retro OMC volt meter.
I was going to put that up on ebay but if you want to use the old style gauges in your new panel I'll save it for you.
That way it'd be a completely matched set and being retro it could be very cool. :wink: Save you a bunch too.
Mike.
DSCN7754_zpsr5rysjkd.jpg
 
Thank you for the kind offer Mike, but I am going to go all new gauges. My son wants white gauges, but I am not convinced. So we've got some design negotiations to hammer out too.

I was most definitely going to do mockups in cardboard first.
 
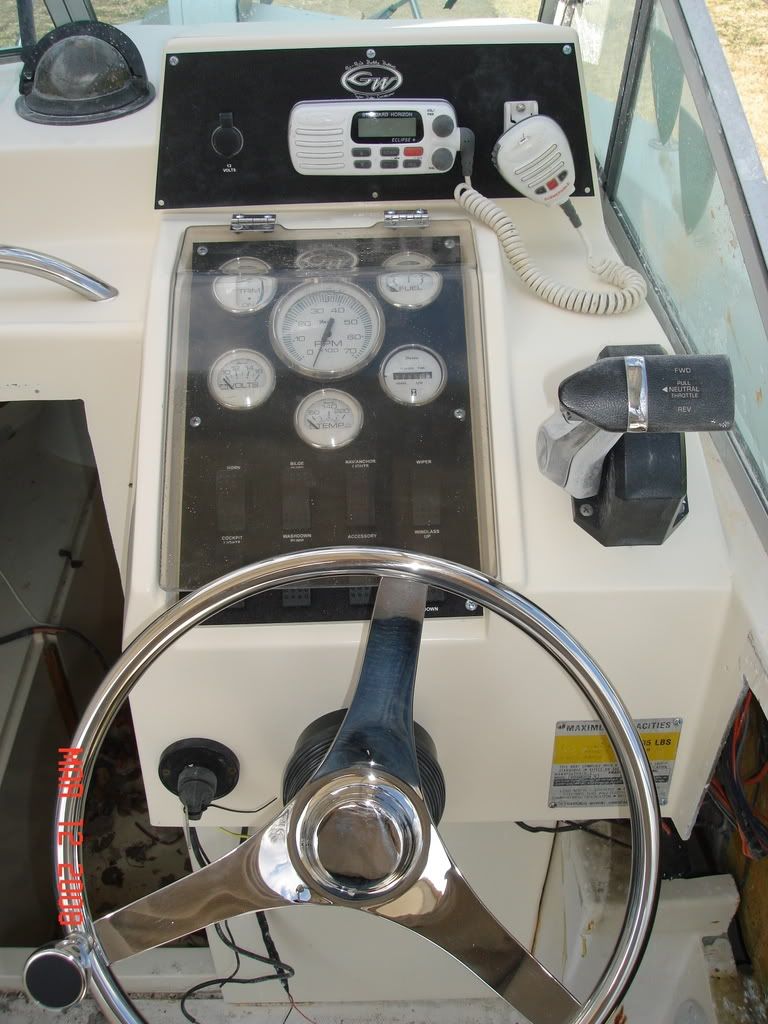
I agree with your son on the white gauges. It is what I would have done and it looks great but I was locked in with the style of the black Suzuki gauges.
The Suzuki gauges are like the Yamaha gauges showing the oil levels, warning lamps, etc... and it uses the Suzuki harness that is a hopelessly complicated mess of wires tying all the factory gauges together. When I reinstalled the dash I was more than a little anxious about hooking the right wires to the right connections the number of which was seemingly ridiculous. There was no way I was going to even think of attempting to make a full set of aftermarket gauges work with that motor. So I just replaced the only two non-Suzuki gauges with VDO night series that were the closest match. They don't even hook up the exact same way the older gauges did, actually using less connections but its working (knock wood :lol: )
I had also thought about using white starboard for the dash but figured that it would reflect back sun glare around the gauges.
The gray trim rings were my solution so the black gauges wouldn't visually melt in with the black starboard dash.

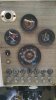
Here is what another owner did which is what you may want to do.

013.jpg


You'll notice that on the white panel there are six flat head screws securing it. To me that is kind of crude (sorry whoever's panel this is), I might have gone with an oval head screw with a finish washer.

oval%20head%20with%20finish%20washer_zpsuxp7h8iy.jpg


Before I installed my panel in the boat I laid it on a tub and put all the screws in place to confirm a hunch I had, which was that the panel was busy enough and adding all the stainless hardware would just pull your eye away from the gauges. It also looked cluttered.
So I went with stainless screws with black plastic button covers blending them in with the dash.
You can get them at Home Depot.

f1775872-9abd-4ffb-976a-b0dd00cd5767_145.jpg


Here it is trial fitted, the little tab was trimmed when it was installed.

button%20cover_zpshhqdb0lv.jpg


Compare the button covers below to the screws above.

photopb_zps1oqbxygm.jpg


The Grady White dash plaque can be had on E-Bay.
(again the one on my dash wasn't permanently attached yet so that's why its a little crooked).
I've since affixed it to the panel and yes it adheres to the Starboard like a rock. (clean the panel face first to make sure its free of finger oil etc...)
Looking at the other owners photo you can't help notice the roached out compass. Mine looked like that too but it can be restored.
If you take it out, take the shield off, then with 3M final glaze or even Finesse-it sit down in front of the TV and mindlessly hand buff the plastic with a soft cloth.
It will take a while but it'll come back as good as new!
Mike.
 
Spent several days doing some less than glorious work un-gacking that birds nest of wires in the bilge.
I the process I found and repaired a full 1 volt drop from the battery to the helm fuse panel which was caused by virtually every ground wire being destroyed by corrosion. That photo posted earlier with five grounds spliced into the 10 gauge common ground wire was a major headache. The corrosion ran the full length of that wire, 16' worth. All of the accessory grounds including the fuel fill and tank wires were also shot.
I ended up making my own bussbar which I bolted the ground wires to which included the second battery and engine ground wire which along with a few more wires had been stacked on the battery post and held by the wing nut (which we know never loosens :roll: ).
The bussbar is stainless steel with stainless hardware. Nylon locknuts hold each connection including the battery post. Even if the post holding the bar loosens the second battery will provide ground. On the bilge pump I made a bracket which it is bolted to and the bracket is secured to the transom. It is aluminum which I sprayed with a clear plastic coating.
That will make it a little easier to pull out when I want to up grade.
I also conned those busted up flimsy battery trays for new Seachoice models that are a much better design and will hold the batteries like a rock.
Later on I will replace the factory fuse panel under the helm which will be another adventure in prior owner wiring misadventures.

Off on the left is the wiring for the washdown pump to be installed.
organized%20bilge_zpssr5ota7t.jpg


DSCN8043_zpsqgfabu7o.jpg


My concern with batteries moving is primarily during trailering. These I believe will do the job.
DSCN8040_zpsdwnl33ak.jpg


DSCN8037_zps7r8googl.jpg


Mike.
 
Looking nice! My boat was a rat's nest, too. Just about everything was connected right to the battery. I added a separate bus bar, for similar reasons that you did, as well. Check out a product called "Tef-Gel". It's expensive, but I have yet to find it's equal when it comes to keeping corrosion away from electrical connections. It also does NOT interfere with the actual electrical connection like something like dielectric grease can.

Mike, I can't really tell from the picture, but is there any chance that the bus bar can swing and touch the positive post if it loosens up?
 
Mike, I can't really tell from the picture, but is there any chance that the bus bar can swing and touch the positive post if it loosens up?
Nope, though its a 6" bar, its 6" from post to post on the battery so I have it mounted to the second hole in. If it does swing the short end of the bar hits the lead post of the battery. Even if it could swing all the way around it'd miss it by over an inch. This is another reason I went with stainless lock nuts on the battery connections.They lock down tight and don't loosen up.
Another thing is as this mounted under the battery switch I can't help but check on it a minimum of two times every trip.
When I remove the battery there are just two connections. The gang ground connection stays intact.
I will pick up some Tef-gel. I looked it up and it looks good.
I have plans to replace the fuse panel under the helm with a new unit from Blue Sea. The factory panel is beat up and connections are questionable. Again the crimp connections for the accessories made by the prior owners are as bad as it gets.
When I replaced the 10 gauge ground wire that had been corroded, I identified the connection at the helm with a continuity test. Disconnecting the old wire made a ground issue with wipers, nav lamps, and the deck lamps (?). So for now I hooked it back in.
With the new ground hooked I at least have full voltage at the helm again. I have to assume that somewhere behind the side panel is another mass splice into the old ground wire like I had found in the bilge. That connection had a commercial crimp and shrink tube over that 7 wire connection.
It wasn't Pep-boys hardware or a marina repair but it was doomed to corrode. With the probability that there is another mass ground connection up front and with the type or crimp used I'm thinking this is a Grady installed hook up.
This was in the bilge area.
photo_2bpb_zps7hlny6p4.jpg


I have the dash and bilge sorted out now, when I get the boat back home I'll have to finish the job under the helm.
The fuel fill and tank are now properly grounded and the bilge pump is 100% again so I can get some trips in now without compromising safety.
Mike.
 
I kinda figured you would have taken the length of that SS bar into account, but just in case I didn't want there to be a "Oh crap, I didn't even think of that" moment. :-| As sometimes the simplest things can escape even the best of us!

Wiring can be a complete and utter pain the butt. I've found that it can sometimes be quicker to not even try to figure things out. Especially on a relatively simple system with good access to run new wires.
 
The ground spice in the bilge is OEM, I found mine on my 1992 like that the other day. Seemed to be holding up and wrapped it up again to seal it off.
 
Mwills98 said:
The ground spice in the bilge is OEM, I found mine on my 1992 like that the other day. Seemed to be holding up and wrapped it up again to seal it off.
You might want to check the voltage at the battery and then again at the fuse block at the helm. On mine the ground wire was so corroded from that questionable connection that the corrosion ran the full length of the wire under the jacket and as such there was a full one volt drop at the helm from the battery.
A new wire with no splices provided 100% of battery voltage at the helm.
Mike