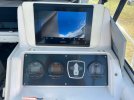

Dash conversion, Sailfish 272

TheBlackPig

Member
Joined
Sep 25, 2016
Messages
12
Reaction score
5
Points
2
Model
Sailfish
Hi fellow Grady Lovers.

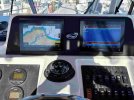
I’m in the process of making a new fibreglass dash console add on for my Sailfish 272, 1997. I want to bring this ol’ girl up to scratch with all new electronics. Has anyone out there ever done this on this model before? I’d love to hear your stories and how you tackled the build. Hopefully share some pictures. I can upload some to show where im at at the moment if anyone’s interested. Two 13 inch screens side by side is the order of the day. And the old flapdoor dash console is just waay too small for this. So…lets get building!
 
I just did 2 10 inch Garmins and they barely fit. I opted not to cut any fiberglass. They are mounted on black acrylic and are much easier to see and control mounted forward. 28 Sailfish not the 27 but they are probably similar.
 

Attachments

  • Project 4.jpg
    Project 4.jpg
    103.8 KB · Views: 14
  • Like
Reactions: TheBlackPig
I just did 2 10 inch Garmins and they barely fit. I opted not to cut any fiberglass. They are mounted on black acrylic and are much easier to see and control mounted forward. 28 Sailfish not the 27 but they are probably similar.
Looks great Legend! Exactly what I had in mind, I just thought it it would be a bit underwhelming with two 10 inch screens if going all out on electronic upgrades. I came to the exact same conclusion, 2 x 10” is max for the flapdoor dash. So I would need to rebuild the dash. Which at first felt daunting as I have never really made much out of fibreglass. I have watched a lot of Boatworks Today and Fishbumb tv over the years though, and im a builder by trade, so, hopefully, I can pull it off.
 
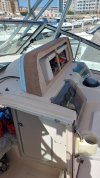
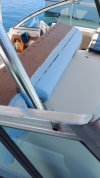
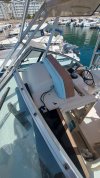
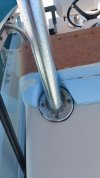
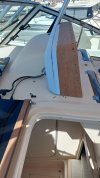
Here are some pics of my mockup plug.
 

Attachments

  • 20260807_164052.jpg
    20260807_164052.jpg
    1.3 MB · Views: 29
  • 20260807_164002.jpg
    20260807_164002.jpg
    1.3 MB · Views: 28
  • 20260807_164030.jpg
    20260807_164030.jpg
    1.3 MB · Views: 25
  • 20260807_163936.jpg
    20260807_163936.jpg
    1.5 MB · Views: 26
  • 20260807_163922.jpg
    20260807_163922.jpg
    1.1 MB · Views: 25
  • 20260807_164047.jpg
    20260807_164047.jpg
    1.3 MB · Views: 28
I love using foamboard for templates - started using that about 20 years ago as a "Hmmm, I wonder if this would work?" kind of thing :cool:

I even used foamboard for the core of a floor hatch that I rebuilt!

Been thinking of doing something somewhat similar with my '82 - interested to see your steps along the way. I think I may have to cut a recess into the dash, first, though - otherwise the electronics would be too high.

Thanks for posting this!
 
  • Like
Reactions: TheBlackPig
Thanks for the interest and encouraging comments! Ill post some more pics as I go along. Yea, definitely gonna be interesting to see how this turns out when its all said n done!
 
I love using foamboard for templates - started using that about 20 years ago as a "Hmmm, I wonder if this would work?" kind of thing :cool:

I even used foamboard for the core of a floor hatch that I rebuilt!

Been thinking of doing something somewhat similar with my '82 - interested to see your steps along the way. I think I may have to cut a recess into the dash, first, though - otherwise the electronics would be too high.

Thanks for posting this!
Indeed, the foam board made it super easy to get the shape just so. The front part was made using 2 x 6mm wetted out marine ply with lots of relief grooves cut into them, then clamped into a custom mould, shaped closely after the existing dash console. The original console will have to be cut back by some 90mm to allow depth space for the new screens. Not for the faint hearted! :-)
 
Looks great Legend! Exactly what I had in mind, I just thought it it would be a bit underwhelming with two 10 inch screens if going all out on electronic upgrades. I came to the exact same conclusion, 2 x 10” is max for the flapdoor dash. So I would need to rebuild the dash. Which at first felt daunting as I have never really made much out of fibreglass. I have watched a lot of Boatworks Today and Fishbumb tv over the years though, and im a builder by trade, so, hopefully, I can pull it off.
Good lucK - Post some pics so we can watch the progress
 
That's going to look really nice when you're all done. Are you planning on trying to match the existing gelcoat... or maybe a slight contracting color... or maybe wrap in vinyl (black, for example)?

The forming you did around the hardtop support post looks really nice. One quick question... does that hardtop mount have 3 or 4 screws? If 4... can you access it without removing the new dash pod? Although I suppose that removing the pod will actually be pretty simple.

90mm... is that enough? Meaning, you might as well take as much as you can, you know? It'll just give you more working room... or even some hidden storage if you put the MFD mounting surface on a hidden hinge.
 
With those Garmin 90xx displays with 4k resolution I would be looking at making room for larger than 13” displays. Maybe even going to a single 19”. 4k makes the combo screens more practical. You get 4 times the resolution of the 86xx screen.

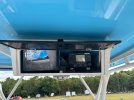
I’m setup with a 8612 at the helm and a 8610 in the overhead. I would love to go 4k but it is impossible to fit the 19” in my Islander helm. The new 13” will probably fit. Maybe my Winter project.

8610 Overhead Box.jpeg 8612 and Newire Panel .jpeg
 
Last edited:
With those Garmin 90xx displays with 4k resolution I would be looking at making room for larger than 13” displays. Maybe even going to a single 19”. 4k makes the combo screens more practical. You get 4 times the resolution of the 86xx screen.

I’m setup with a 8612 at the helm and a 8610 in the overhead. I would love to go 4k but it is impossible to fit the 19” in my Islander helm. The new 13” will probably fit. Maybe my Winter project.

View attachment 39936 View attachment 39937
Thats the intention: 2 x GPSMAP 9013xsv. They’re 4k. More than happy with 13” from what im used to looking at, lol. Old Furuno 667fcv and Raymarine e80 plotter/radar. Useful but,, This is going to be fishing at a whole new level for me for sure.
 
That's going to look really nice when you're all done. Are you planning on trying to match the existing gelcoat... or maybe a slight contracting color... or maybe wrap in vinyl (black, for example)?

The forming you did around the hardtop support post looks really nice. One quick question... does that hardtop mount have 3 or 4 screws? If 4... can you access it without removing the new dash pod? Although I suppose that removing the pod will actually be pretty simple.

90mm... is that enough? Meaning, you might as well take as much as you can, you know? It'll just give you more working room... or even some hidden storage if you put the MFD mounting surface on a hidden hinge.
Yep,gelcoat match. Screws all accessible. 90mm gives me the depth required for the mfd’s whilst retaining max of the old pod.

(However, at the visualisation stage, thoughts of a whole new pod similar to the original, but larger, was also on the table. But the overhead support post would need to be removed, cut down and rewelded to make room for a larger pod. All in all more work but potentially a more integrated/factory finished look. But hence the mockup, to see how a simpler add on console would look. And once colourmatched, I think the add on will look acceptable from an integrated look standpoint.)

The mounting surface will be a fixed black gloss acrylic panel much like Legend’s. Im in contact with Boat Outfitters about this.
 
I think it's going to look great - the shape you have looks very natural/blends right in.

I guess what I meant about the 90mm was... why worry about keeping as much of the original pod as possible? If you cut it at all, might as well cut as much as you can... what are 'ya saving it for? Posterity sake? :)

Your e80 is old? Ha! I still have a c120 sitting on my dash! Although it just started acting up - I may need to take it apart and check the screen connector.
 
  • Like
Reactions: TheBlackPig
Oh... we just had a Sea Ray gel tech come to our shop for a warranty repair - he brought a cool little tool that Spectrum Gel has (I'm sure they're not the only ones). It's a 4"x1-1/2" tube that is, essentially, the same thing "paint matcher" at a paint store. He took multiple measurements around the repair area and it averaged those together to create a formula. I think the price is probably not realistic for a one-off repair like yours - and you'll stll get, at least, close with off-the-shelf color-matched gel. But just mentioning it, in case :)

Have you thought about color-matched paint, instead? I did that on one of my boats and it came out great. This way you could build the pod with standard, white gel - then paint to match. You would just need to take a piece of that old pod to the autobody paint suppy shop and they'll match the color and mix up paint for you.
 
Oh... we just had a Sea Ray gel tech come to our shop for a warranty repair - he brought a cool little tool that Spectrum Gel has (I'm sure they're not the only ones). It's a 4"x1-1/2" tube that is, essentially, the same thing "paint matcher" at a paint store. He took multiple measurements around the repair area and it averaged those together to create a formula. I think the price is probably not realistic for a one-off repair like yours - and you'll stll get, at least, close with off-the-shelf color-matched gel. But just mentioning it, in case :)

Have you thought about color-matched paint, instead? I did that on one of my boats and it came out great. This way you could build the pod with standard, white gel - then paint to match. You would just need to take a piece of that old pod to the autobody paint suppy shop and they'll match the color and mix up paint for you.
Sure, thats always an option. I prefer the colour matched gelcoat though. Done a few small repairs on my deck and have to admit it threw me off. For some reason I couldn’t get enough red in the pot, which resulted in pink repairs. :pSo just one of those days where the light was, lets say less than optimal for colour matching. I have since acquired a little “helper”, the Scangrip Sunmatch 4. It’s a paint correction light used in the automotive industry, but great for gelcoat also. I hope this tool can help me dial it in perfectly.
 
Last edited: