Updating 1988 242G

DennisG01

GreatGrady Captain
Joined
Sep 1, 2013
Messages
7,118
Reaction score
1,312
Points
113
Location
Allentown, PA & Friendship, ME
Model
Offshore
No, you were fine - no worries!

In case I wasn't clear, though... Epoxy CAN work with both mat and cloth - it just has to be labelled as epoxy-friendly as the binder for the fibers is different. But, again, there's absolutely nothing wrong with vinyl (or even poly from this standpoint).

Everybody works a little different - some use not enough, some use too much. But, yes, I think a gallon of resin should be fine.

At this point, I'm betting you've watched MORE than enough how-to's - it's actually pretty straight forward once you start messing around with it.

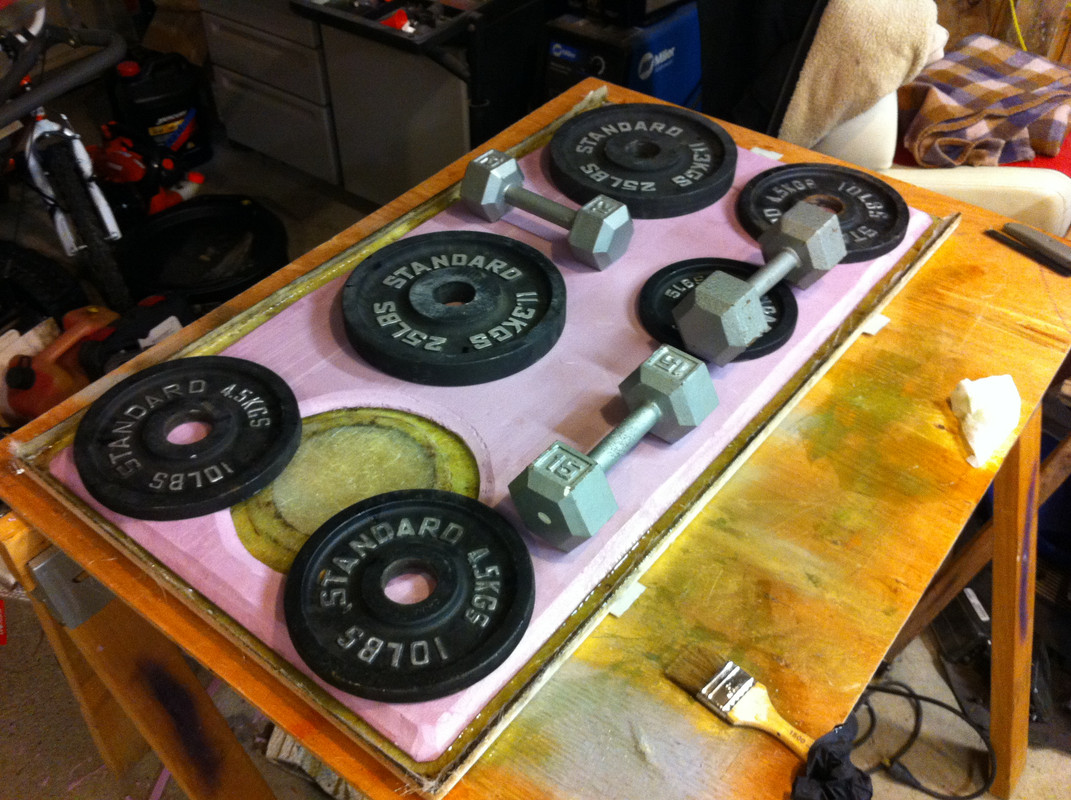
Cut all of your glass into the proper size AHEAD of time and label it. In other words, do a "dry run", Also, chamfer the edges of the ply so the glass lays down better.

To better explain what I meant about the ply NOT affecting how the hatch lays on the deck... the ply does NOT need to go to the edges - take a look at mine:

IMG-4070.jpg
 

Captglasshole

Well-Known Member
Joined
Sep 11, 2023
Messages
68
Reaction score
42
Points
18
Age
41
Model
Offshore
Makes sense and prob better that the ply doesn’t go all the way to the edge that way when you screw the panel down you aren’t screwing into wood compromising it by potentially allowing water to get in. Kind of thinking I should have ordered more than a quart of Cabosil now haha
 

DennisG01

GreatGrady Captain
Joined
Sep 1, 2013
Messages
7,118
Reaction score
1,312
Points
113
Location
Allentown, PA & Friendship, ME
Model
Offshore
Yup there's no strength lost by not taking the ply to the edge.

I don't think I used any filler when I rebuilt my hatches. What were you planning on using it for?
 

Captglasshole

Well-Known Member
Joined
Sep 11, 2023
Messages
68
Reaction score
42
Points
18
Age
41
Model
Offshore
Yup there's no strength lost by not taking the ply to the edge.

I don't think I used any filler when I rebuilt my hatches. What were you planning on using it for?
My thought was if I don’t take the core all the way to the edge wouldn’t I need the cabosil to make some peanut butter to fill in that gap between the core and the edge of the panel?

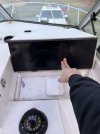
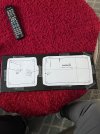
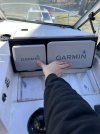
Also, I got bored a little while ago and found an old piece of 1/2” acrylic I had laying around. I need to clean up my edges but may do some flush mounting of my electronics. I hate the box they sit in now. I’m 6’3” and I have to bend down to see my electronics if I’m standing with the way the cover panel opens up.
 

Attachments

  • IMG_3529.jpeg
    IMG_3529.jpeg
    1.6 MB · Views: 15
  • IMG_3530.jpeg
    IMG_3530.jpeg
    2 MB · Views: 16

DennisG01

GreatGrady Captain
Joined
Sep 1, 2013
Messages
7,118
Reaction score
1,312
Points
113
Location
Allentown, PA & Friendship, ME
Model
Offshore
My thought was if I don’t take the core all the way to the edge wouldn’t I need the cabosil to make some peanut butter to fill in that gap between the core and the edge of the panel?
I guess it sort of depends on how your hatch is made. I'm assuming that it's similar to mine in that the core sits "proud" and you can visually see exactly where the core is. But is your hatch underside perfectly flat? A few pics may help determine if we're talking about two different build styles.
 

Captglasshole

Well-Known Member
Joined
Sep 11, 2023
Messages
68
Reaction score
42
Points
18
Age
41
Model
Offshore
Yeah once I pull the hatch I’ll see what I’m working with. This is a guy I follow on YouTube and he takes his wood all the way out on his Grady. But once I pull it I will know more like you said.


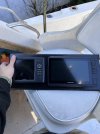
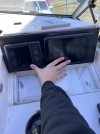
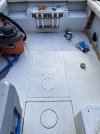
Other updates, I wired up a backup bilge pump. Just gotta pick up some more 5200 to mount the starboard I have it mounted on to the bilge. Also cut out the holes for the electronics, I’m just trying to figure out a way to get the acrylic mounted flush so I can waterproof it. But a quick dry fit and it looks halfway decent.
 

Attachments

  • IMG_3539.jpeg
    IMG_3539.jpeg
    1.8 MB · Views: 13
  • IMG_3537.jpeg
    IMG_3537.jpeg
    1.4 MB · Views: 13
  • IMG_3536.jpeg
    IMG_3536.jpeg
    1.5 MB · Views: 13

DennisG01

GreatGrady Captain
Joined
Sep 1, 2013
Messages
7,118
Reaction score
1,312
Points
113
Location
Allentown, PA & Friendship, ME
Model
Offshore
I didn't watch that video - but as long as the top/side of the hatch is thick enough, there's really no reason to go all the way to the side. It's easier to just lay the ply in, about an inch or two shy of the edges and then lay the 1708 on top. The 1708 will end up making the top of the hatch thicker, still. I don't see any advantage to going to the edges - and it's not easier, either.

I did notice he used large pieces of ply... did he talk about how he avoided air pockets? I'd say that it's pretty darn hard to avoid them with a sheet of plywood that large... even half that size.
 

Captglasshole

Well-Known Member
Joined
Sep 11, 2023
Messages
68
Reaction score
42
Points
18
Age
41
Model
Offshore
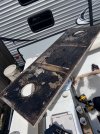
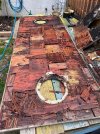
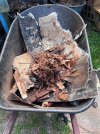
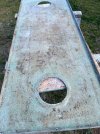
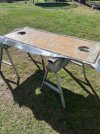
All my fiberglass stuff is in, just waiting on the weather to warm up a bit so my resin is able to do its thing. I took advantage of the nice day yesterday and pulled the rear panel. Turns out I have a freshwater tank under there. Looks like at some point it may have had the aux fuel tank because the fill/vent hoses are run to the opening. Got the panel all cleaned up. I'm gonna go at it one more time with the grinder, I went through all my big dewalt batteries yesterday getting it to this point. But overall, she's ready for a new core.
 

Attachments

  • Hatch1.jpg
    Hatch1.jpg
    880.1 KB · Views: 17
  • Hatch3.jpg
    Hatch3.jpg
    815.2 KB · Views: 17
  • Hatch7.jpg
    Hatch7.jpg
    1.1 MB · Views: 17
  • Hatch9.jpg
    Hatch9.jpg
    1.2 MB · Views: 17
  • Hatch10.jpg
    Hatch10.jpg
    1.1 MB · Views: 16

DennisG01

GreatGrady Captain
Joined
Sep 1, 2013
Messages
7,118
Reaction score
1,312
Points
113
Location
Allentown, PA & Friendship, ME
Model
Offshore
Looking good!

Not sure what tools you are using, but if you have more panels to do... An oscillating tool with a cutoff blade or even a scraper blade got rid of most of the old wood very quickly. I found a flapper wheel (something like a 60 grit) was the best/quickest at removing stuck-on wood.
 
  • Like
Reactions: Captglasshole

Captglasshole

Well-Known Member
Joined
Sep 11, 2023
Messages
68
Reaction score
42
Points
18
Age
41
Model
Offshore
Most of the wood came up with the pry bar on this panel. My grinder with a 60 grit made quick work of anything still stuck on there. The forward panel has some soft spots but is nowhere near as spongy as this one. That one may give me some issues getting the old core up. I will take your advice when the time comes and break out my Dewalt oscillating tool with the wood attachment.
 
Last edited:

Captglasshole

Well-Known Member
Joined
Sep 11, 2023
Messages
68
Reaction score
42
Points
18
Age
41
Model
Offshore
Well, she is in. I took DennisG's advice and didn't take the core all the way to the edge. I also mixed up a batch of peanut butter and put it anywhere a screw would penetrate to hopefully avoid any potential water intrusion into the panel. I got it back in the boat and bedded in with 3m 4000UV. My kids are happy to have the panel back in the boat again so they are allowed to play on the boat in the driveway again :cool: My TotalBoat TotalTread comes in today. I was debating on colors and went with the sand beige. I'll pick up some wet edge in white as well to give it a nice clean contrast to the beige. Next project will be sanding the deck down and applying that since the nonskid is pretty much nonexistent at this point. Worried someone is going to slip and hurt themselves. The deck is pretty slick when it gets a little moisture on it. GW Panel.jpgGW Deck.jpg
 

DennisG01

GreatGrady Captain
Joined
Sep 1, 2013
Messages
7,118
Reaction score
1,312
Points
113
Location
Allentown, PA & Friendship, ME
Model
Offshore
Looks good!

Laying that big sheet of ply in place in one shot, you likely have some air bubbles (it's almost impossible to avoid when doing it in one, big, stiff piece)... but it'll still be fine.

I did the same thing with my boat - the floor was actually more "skid" than "non-skid". You don't need to go crazy with the sanding - just make sure you're getting rid of that top layer that is oxidized and chalky feeling. I used lots of water and red scouring pads. Maybe it took me an hour.
 
  • Like
Reactions: Captglasshole

Captglasshole

Well-Known Member
Joined
Sep 11, 2023
Messages
68
Reaction score
42
Points
18
Age
41
Model
Offshore
Looks good!

Laying that big sheet of ply in place in one shot, you likely have some air bubbles (it's almost impossible to avoid when doing it in one, big, stiff piece)... but it'll still be fine.

I did the same thing with my boat - the floor was actually more "skid" than "non-skid". You don't need to go crazy with the sanding - just make sure you're getting rid of that top layer that is oxidized and chalky feeling. I used lots of water and red scouring pads. Maybe it took me an hour.
Yeah.....I found that out the hard way. I made a bonehead mistake when I bedded the core down too. I used my big RTIC 145 with my generator on top. I didn't think about the cooler having the Rubber Feet so there was minimal pressure in the middle. If you look close in the pic, I had to drill a few holes and inject some resin in there to fill in the void. It's rock solid now. I will use some marinetex in the holes (mostly filled to the surface with resin already) and sand flush with the rest of the panel before I put down the totaltread. I appreciate your advice as I continue to work on the old girl :)
 

DennisG01

GreatGrady Captain
Joined
Sep 1, 2013
Messages
7,118
Reaction score
1,312
Points
113
Location
Allentown, PA & Friendship, ME
Model
Offshore
The nice thing about painting is that you can do anything you want underneath!

Caulk and paint hide what ain't :) That's an old saying a buddy of mine taught me decades ago... and it's still true!
 
  • Like
Reactions: Captglasshole

Captglasshole

Well-Known Member
Joined
Sep 11, 2023
Messages
68
Reaction score
42
Points
18
Age
41
Model
Offshore
Got out yesterday for the first trip of the year with the kiddo's. Nice to have a solid floor to walk on. I did the oil change/gear oil change last week so I was glad to see the engine didn't miss a beat. Always a little nervous about that on the first trip of the year. No fish but was a long shot anyway given the windy conditions and dirty water. All my paint supplies are in, just need some time to get it knocked out!
 

downtown

Well-Known Member
Joined
Jan 14, 2006
Messages
162
Reaction score
0
Points
16
Cool boat. Enclosed transom is nice. I was skeptical when I started reading your saga, but you’re doing all the right things and you’re handy. Congrats and tight lines.
 

Captglasshole

Well-Known Member
Joined
Sep 11, 2023
Messages
68
Reaction score
42
Points
18
Age
41
Model
Offshore
Cool boat. Enclosed transom is nice. I was skeptical when I started reading your saga, but you’re doing all the right things and you’re handy. Congrats and tight lines.
Yeah, one of my previous boats was a mako that had a notched transom. Always made me nervous when that splashwell would fill up. Had a dusky after that. Decided I was never going back to an open transom again after realizing how much safer I felt with my kids on board with a bracket. Appreciate the positive words, I'm a guidance counselor by trade, have to be handy for what these shops are charging these days haha
 
  • Like
Reactions: PointedRose

Captglasshole

Well-Known Member
Joined
Sep 11, 2023
Messages
68
Reaction score
42
Points
18
Age
41
Model
Offshore
Moved the boat down to my parents house on the lift. Been using it pretty frequently this spring. The floor has gotten pretty dangerous when wet due to the factory nonskid worn down to nothing. Went with TotalBoat TotalTread in beige. Did the dash area in TotalBoat Wet edge in off white. Pics don’t do it justice. Trimmed out the nonskid with the wet edge as well. Very happy with the results and it’s a lot safer now.IMG_4218.jpegIMG_4224.jpegIMG_4221.jpegIMG_4217.jpeg
 

Captglasshole

Well-Known Member
Joined
Sep 11, 2023
Messages
68
Reaction score
42
Points
18
Age
41
Model
Offshore
I'm taking some friends out today so I’m going to bring my wood conditioning oil that I use on my homemade cutting boards and see what that does to it. But does anybody have any tips/tricks/advice on bringing the wood trim and cabin doors back to life?
 
Last edited: