1970 C-Craft P.O.S. project

gw204

Well-Known Member
Joined
Jan 31, 2005
Messages
2,481
Reaction score
22
Points
38
Location
St. Leonard, MD
You guys are going to think I'm crazy for doing this, but I've bought another project. :bang

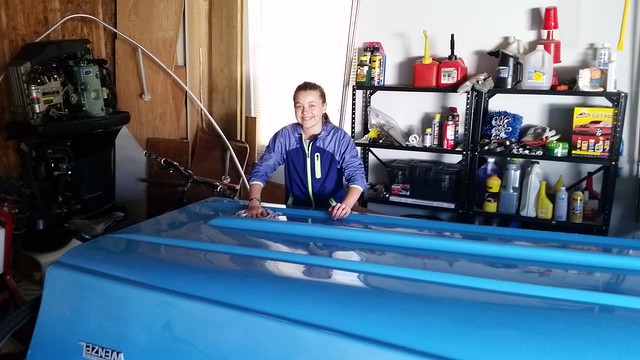
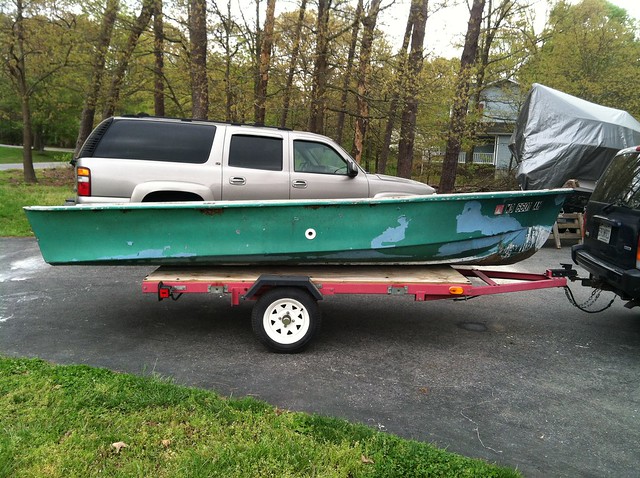
Since my kids are always asking if they can help me when I'm working on my Mako or Grady projects...and I don't let them because I'm super particular about how things are done...I picked up this little 14' skiff to serve as a kids 'n Dad project. According to the title it is a 1970 14' C-Craft and it came complete with a bad transom, beat up/holed strakes on the bottom, flaking hull paint and a whopping 20 maximum hp rating. I didn't feel right telling the elderly gentleman it was worth nothing, so I offered him $20, which he happily accepted and I and hauled it away.

14115132305_f739fe5389_z.jpg


13928511077_98b7c1ffb1_z.jpg


13928517919_72604918bb_z.jpg


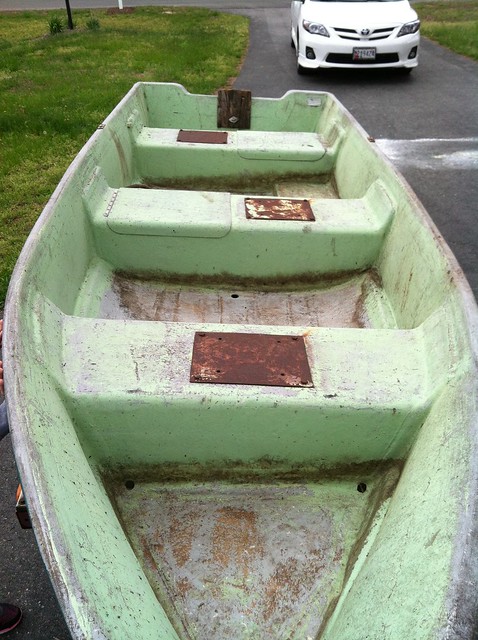
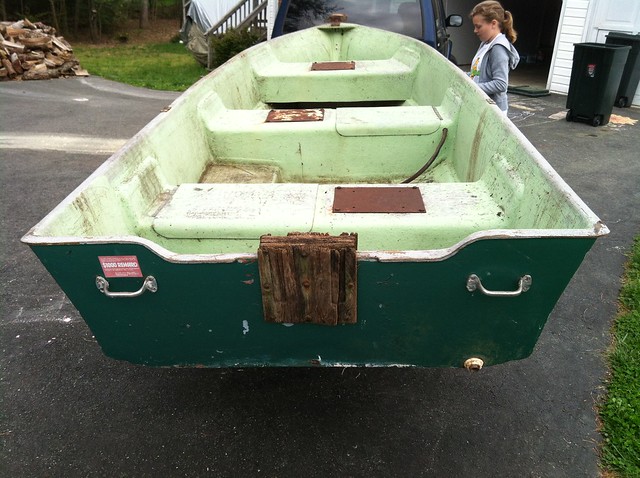
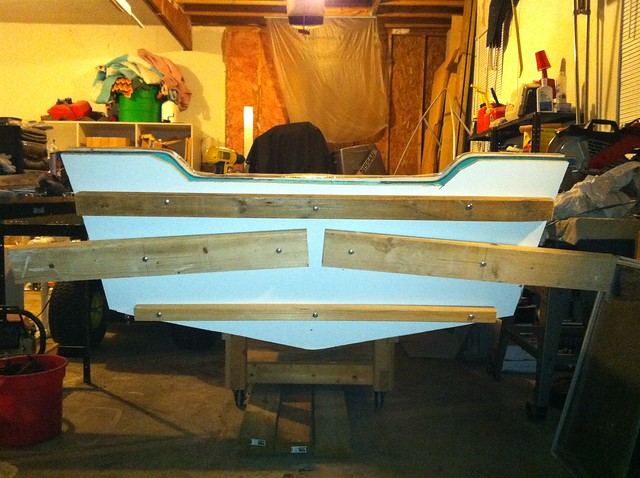
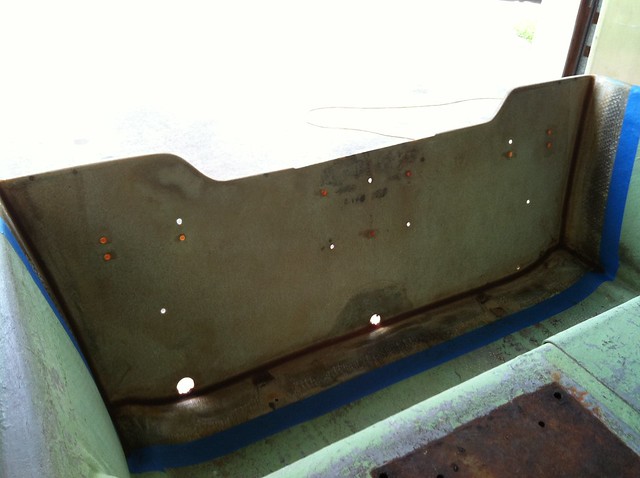
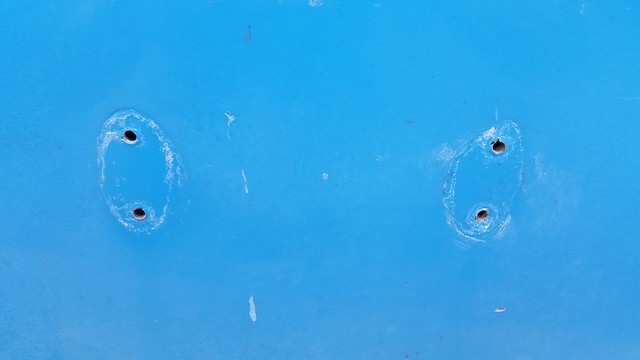
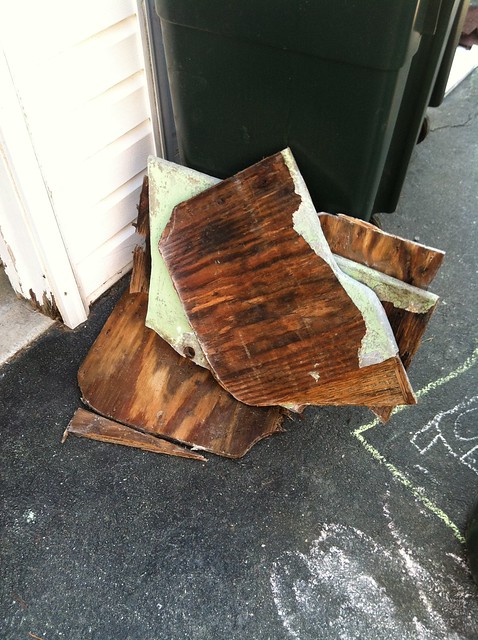
The first thing I am going to address is the transom. After my daughter and I pulled what little hardware it had off, we powerwashed it and I tore the transom out. The core was made up of two pieces of 5/8" held together with nails and some resin, the outer skin is a bit over 1/16" and the inner skin looks to have been a single layer of heavy mat with extra tabbing along the sides and bottom. Glass thickness where the transom was tabbed to the hull averaged an 1/8" on the sides and between 3/16" and 1/4" along the bottom.

13928554638_51ae9086c0_z.jpg


14092010516_b4b9449a41_z.jpg


14111894481_6f1da26829_z.jpg


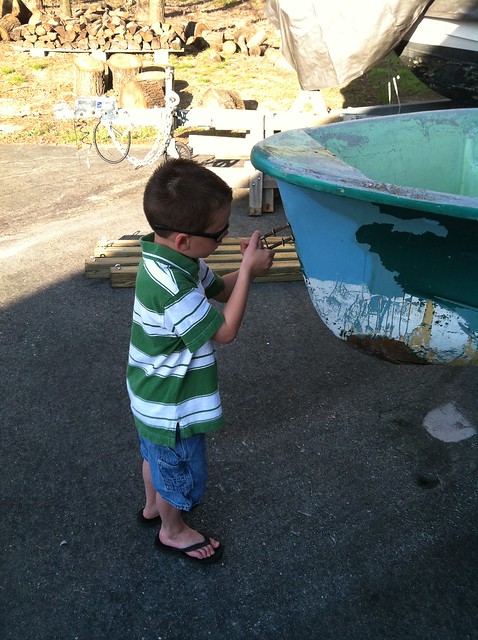
My son checking to make sure the bow eye still fits...

14115173445_8f3801b84a_z.jpg


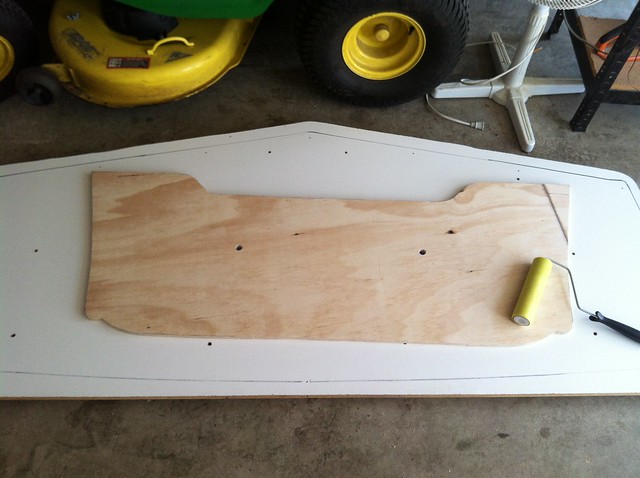
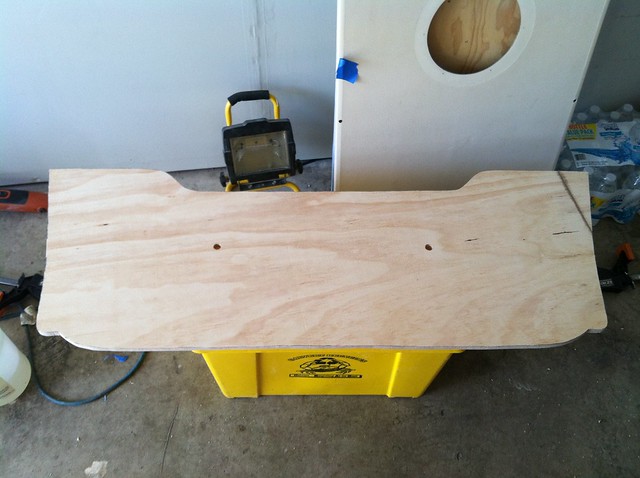
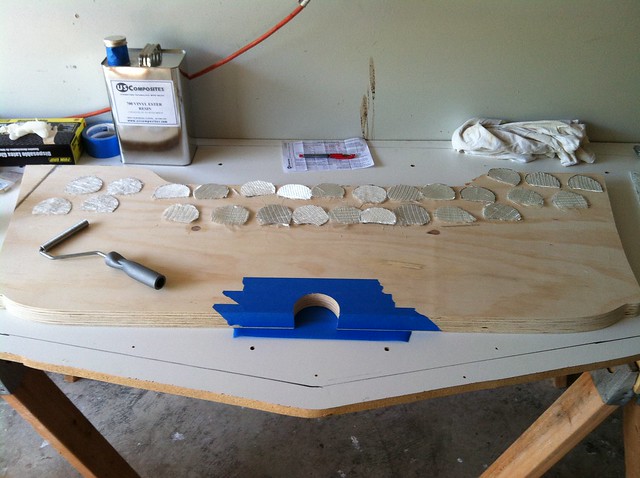
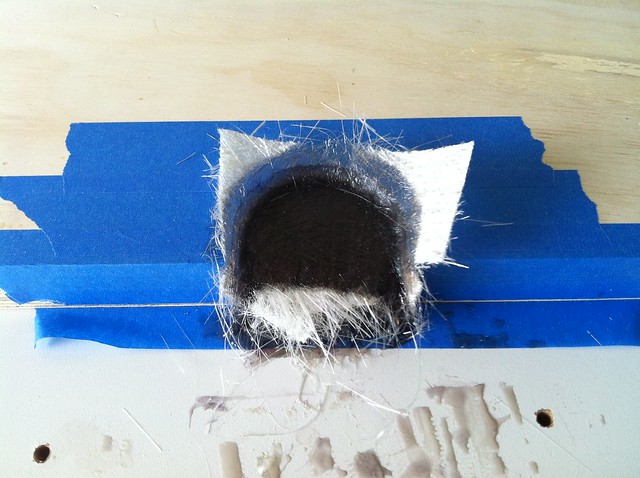
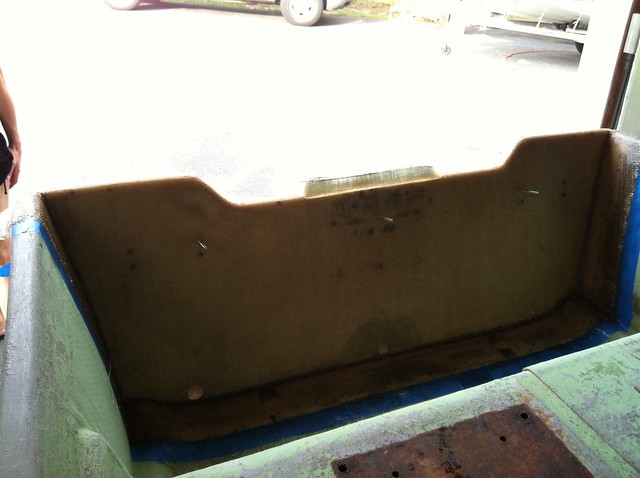
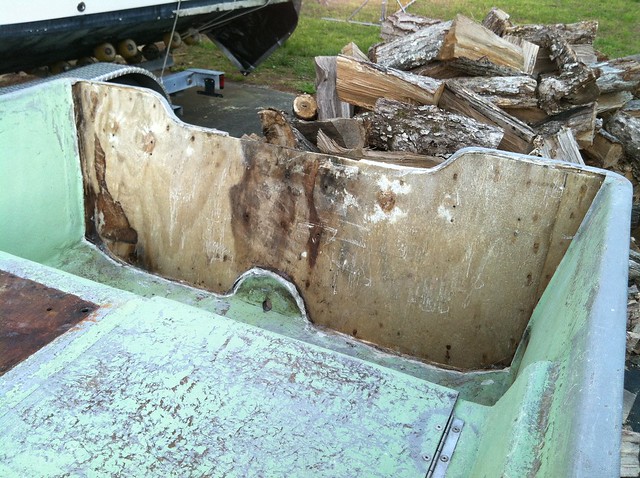
Transom grinding started. I've only gone around the permiter so far and burned out the 3/4" of solid glass that was surrounding the drain. I've been doing this in between rain showers and work on the Grady, so progress has been slow. I've done a template for the core and will transfer it to some carboard for fine tuning. Then I'll lay it out on the core pieces and cut them to size. Going with regular 5/8" AC exterior pine ply for this project in order to keep the budget in check. I was able to pick up a half sheet from a local lumber yard for under $20. As long as I keep all the penetrations sealed well, it should last just fine. It's actually pretty nice stuff. 7 ply...

13998654377_5629ea4be2_z.jpg


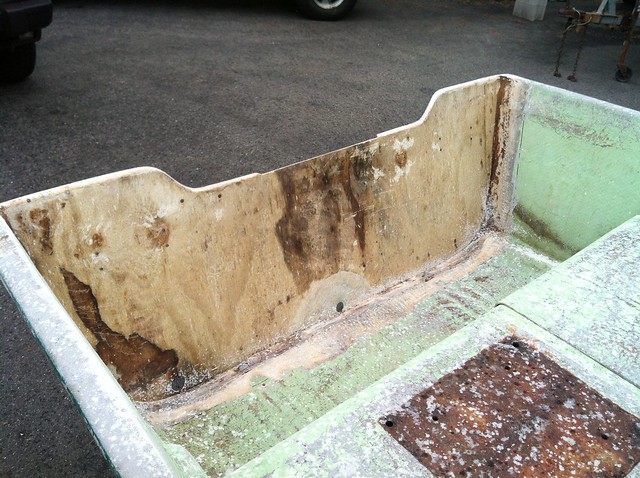
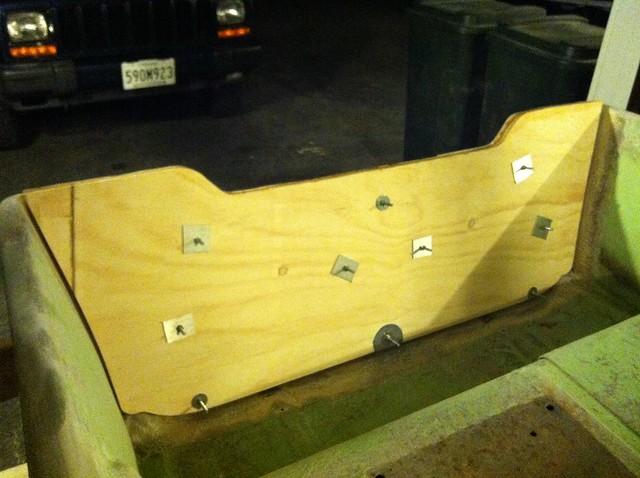
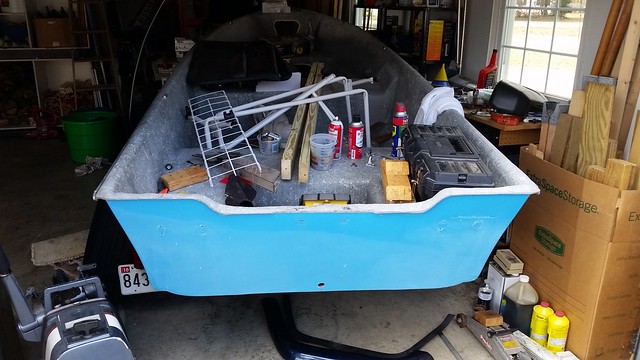
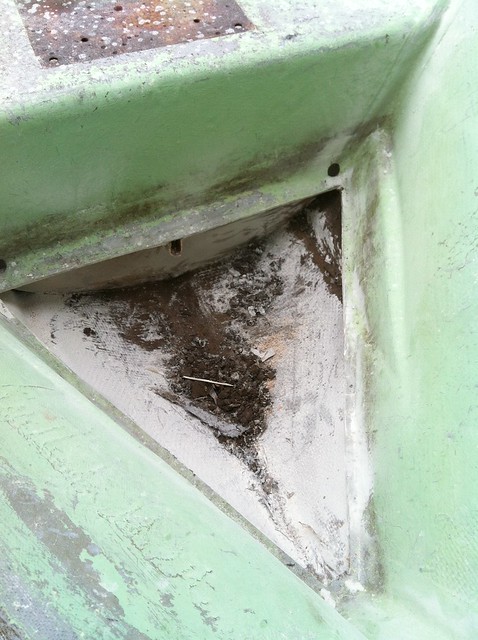
Cut the floor out of the bow so I could access the inside of the hull to make a repair. The mud that was in here has been removed. :(

14182662072_fe57eb618c_z.jpg


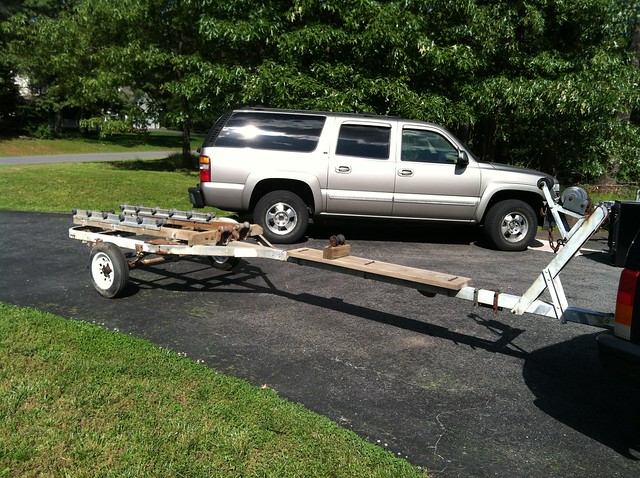
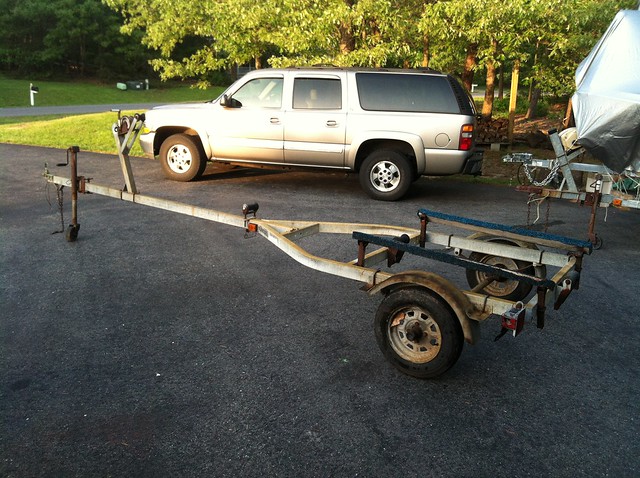
Picked up this little trailer for $100. It needs new bunks and brackets, lights, wiring, etc. I have a neighbor who is also giving me an old trailer that he just replaced and I should be able to source most of the parts I need from it.

13998600979_11b6990600_z.jpg


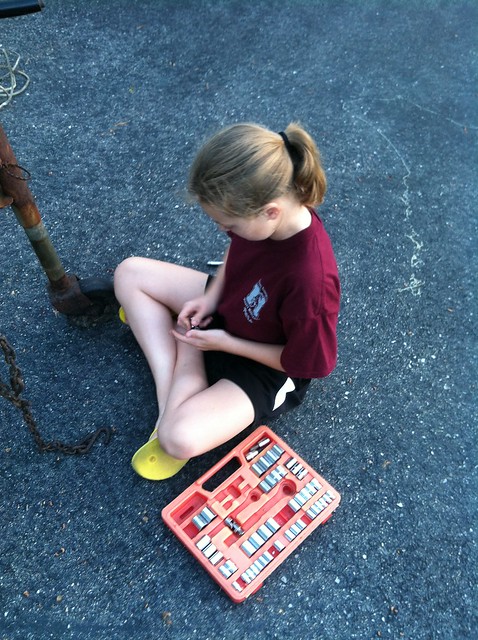
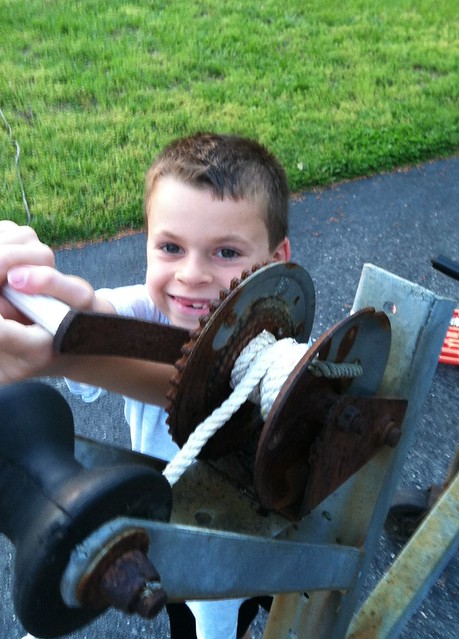
We did most of the demo last night. I tore off the bunks as I didn't want my kids messing around with the rusty parts. They took care of the tail lights, coupler, winch rope and wiring (with a little help from Dad here and there). Here are my little helpers preparing to remove the bent up coupler and unwinding the old rope from the winch.

14182660782_75ed736ff3_z.jpg


13998621888_43535799cc_z.jpg


So far, we are having a blast with this little boat...and I'm actually doing pretty well with sharing the work. :)
 

gw204

Well-Known Member
Joined
Jan 31, 2005
Messages
2,481
Reaction score
22
Points
38
Location
St. Leonard, MD
Oh...one more thing. I've nicknamed this project "P.O.S."

It's stands for "Pretty Old Skiff"...I swear. :lol:
 

IBeGrady'd

Active Member
Joined
Jul 12, 2012
Messages
42
Reaction score
0
Points
0
GREAT reality show. Who needs the Kardashians? :goodjob
 

gw204

Well-Known Member
Joined
Jan 31, 2005
Messages
2,481
Reaction score
22
Points
38
Location
St. Leonard, MD
Got the transom core pieces glued up over the weekend. On Saturday I gut both pieces from a half sheet of 5/8" ply. The sheet wasn't quite wide enought to get the full width so I had to take some of the scraps and add a small piece to one corner of each. You can see the seams in the pics below. I oriented the pieces so they would be on opposite sides of the transom. Once the filler pieces were bonded on and cut to size, I bored two holes approx 11/16" in diameter in each layer. These were so I could insert a 11/16" dowel into each to prevent the pieces from sliding once I applied the epoxy and weighted them down. That part worked great!

Here we are ready to start coating.

14034717318_ea3d682703_z.jpg


14241549253_0c796e9861_z.jpg


I ended up not using the roller shown in the first photo since I wanted to keep waste to a minumim. Instead I used a simple plastic spreader to move the unthicked resin around. Once two coats were applied, I mixed up some more epoxy and thicked it with wood flour. Ran out of wood flour so I added some cabosil to get the consistency I wanted. Turns out I grossly overestimated the amount of thickened epoxy needed to glue the sheets together. So much for minimizing waste... :roll:

Dropped one sheet on top of the other and weighted things down with 12 cinder blocks. As things settled, I removed three, and then three more. That wasn't really my plan, it just seemed like I didn't have enough weight on there at first. As a lot of glue started to seep from the edges I got paranoid that I had too much and blocks started coming off. I suck at doing transoms... Once of these days I'll do one without screwing part of it up.

14034789897_8f0dcb1d05_z.jpg


The wasted epoxy and wood flour pissed me off, but it was some old stuff that I wanted to use up. Got it when the floor panels in my old Sailfish so it's been around for probably 5 years. I'm more upset that I had to add cabosil and more squeezed from between the core pieces than I wanted. I'm sure it will be fine though. If not, I still only have $20 in the boat and $18 in the transom. lol.
 

gw204

Well-Known Member
Joined
Jan 31, 2005
Messages
2,481
Reaction score
22
Points
38
Location
St. Leonard, MD
Pulled the blocks off of the transom last night. It's solid as a rock and very light weight. I'm pleased with the outcome at this point.

Just placed an order with Merton's for some supplies that I need to get it installed in the boat. 3/4 oz. mat, wood flour, mixing cups, etc. That stuff should be here prior to the weekend so I am hoping that by the end of the holiday I can get the outer skin beefed up and the core set in place. My plan is to put down an additional layer of 1808, 1708 and 3/4 oz mat on the outer skin and set the transom against that. Once everything is cured, I will lay up a new inner skin consisting of the same.

One thing I haven't mentioned is that my brother and I had a boat almost just like this when we were kid. 1980-something 14' Wenzel. I recognized the hull when I saw the ad and was immediately drawn to the boat. I figured that the molds had probably changed hands a few times before becoming Wenzel. Looks like I may be wrong and Wenzel was around at lot earlier than I thought. Not sure where the name C-Craft came from as I found this tucked up under the rolled edge last night...

14249990433_b07380a325_z.jpg


It goes on to say "Fiberglass Model 1400".

At this point, I'm pretty well convinced that it did come from the same mold(s) that my old boat did...and my kids will be running around in something directly tied to my childhood. That's cool! :D
 

gw204

Well-Known Member
Joined
Jan 31, 2005
Messages
2,481
Reaction score
22
Points
38
Location
St. Leonard, MD
I've looked over that guys thread a few times now. That boat is exactly like the one I had as a kid. I actually prefer the layout in the one I have now to that one though. While I'm sure the box seating in the stern adds a bunch of strength, it eats up a ton of room and adds weight. I think that the heavier layup on my transom will accomplish the same thing. That being said, I can just put some bracing in the corners if needed though (and I'm considering it anyway)...which would serve as a good spot for some rod holders. On the flip side, that area is probably filled with foam due to CG regulations in place at the time of the build. No foam in mine, so if it goes under, it's going straight to the bottom. :( I will correct that eventually. Probable when the seats come out so I can add a layer of two of glass to the hull.

I don't like how the transom was done on that boat. The outer skin on mine is very thin and it appears the same on that rig. Not sure I would be confident in that small area where the new glass bonds to the existing. He put on a 4-stroke 15 though. I don't think that motor will have the same ooommppfff that the 2-stroke 20 I'm planning to use will. :)


Started fine tuning the fit of the new core last night...
 

gw204

Well-Known Member
Joined
Jan 31, 2005
Messages
2,481
Reaction score
22
Points
38
Location
St. Leonard, MD
As with all of my boat projects lately, this weekend's work was not without it's mihaps... :x

On Friday I bored a 3" hole around the center drain so I could backfill and seal off the wood core from any possible water penetration. Then I taped around the area to keep from getting resin where I didn't want it and cut some strips of mat and a bunch of 1708/1808 discs to fill the hole.

14282499485_e6e1b2e58e_z.jpg


It took 26 layers (4 mat, 22 stitchmat) to completely fill the hole.

14095845908_f6414a67fa_z.jpg


Saturday I ground the plug flush and then preceeded to test fit the core and all the bracing I needed to install it. The white panel is some leftover waxed melamine from when I did the transom in the Mako. It's purpose was to just keep the outer skin nice and flat when I bolted everything up.

14095829139_8e84252bd2_z.jpg


It was about 11 PM when I drilled the holes through the core and I got them a little off center. Not a big deal though, I just elongated them to get things situated how I wanted.

14095845368_1dff9bdc95_z.jpg


Sunday was cookout day at my parents house. Took my little guy for a ride on Dad's 22' Sea Hunt.

14096034728_21f510f3e8_z.jpg


Yesterday I got to work on the p.o.s. project. Did my final grind on the outer skin and then had to run to Ace for a notched trowel. I also meant to look for an empty caulking tube to use when making fillets but I completely forgot. Maybe next time I'll make a list... :roll:

Started off by running a fillet around the perimeter.

14096034268_e044d0b917_z.jpg


Then I layed down a layer of 3/4 oz. mat, a layer of 1708, a layer of 1808 and opened up the holes for the bracing bolts. Everything had (notice I said HAD) gone really well to this point and I was happy with the outcome. My fillets set up just enough, there were no bubbles in the glass, the foam roller I used (as opposed to a standard hair) one kept waste to a minimum and I had no premature kick offs.

14282683085_0cb014df63_z.jpg


Then I tried to install the core. I laid down some thickened resin (probably a little too thick) with a notched trowel and inserted to top brace. My wife held the bolts from coming out while I set the core in. That part went fine. I didn't run into problems until I went to place other braces. The wouldn't go into place. I tried sliding the core around but the fact that I didn't have a good way to grab on to it and the suction created by the thickened resin made that very difficult. So, I tried some force to get the bolts to find their holes. That popped to core off the skin and then the top brace fell out. My immediate fear was that I may have also separated some of the new layers of glass. I should have removed the core to check at that point, but I didn't. I got everything wrestled into place and tightened the bolts down. I then ran a fillet around the perimeter and tried squeezing the thickened resin into a the gap by filling up a freezer bag and cutting a small hole in the corner. Caulking tube would have worked much better... I finally finished up about 7:45 and walked away in frustration without cleaning any of my aluminum rollers.

I'll pull the braces today or tomorrow and sound the transom for voids. I'm very tempted to cut the damn thing off and do it over though.

Here's how I should have done it. Mounted the melamine to the outer skin more securely, then built up the outer skin. After the layer of 1808, put down another layer of 3/4 oz. mat and let all of that cure. Grind then install the core to a solid outer skin. That's what I get for trying to do too much at once. Hindsight...
 

Megabyte

Well-Known Member
Joined
Mar 3, 2005
Messages
55
Reaction score
0
Points
0
Location
Annapolis, Md
I think it'll be fine.
Remember what kind of project this is, who it is for, and what will be hanging on the back.
All those things add up to a win.

Next time you have a cookout, grab one of those ketchup or mustard squeeze bottles (the kind you'd see in a diner).
They would work for fillets. :wink:
 

gw204

Well-Known Member
Joined
Jan 31, 2005
Messages
2,481
Reaction score
22
Points
38
Location
St. Leonard, MD
Pulled the braces last night and sounded the transom. Things seems OK. I'm going to leave it alone for now so I can get it on the water, but it might get done again in the future though. I can't stand knowing that I could have done it better...
 

gw204

Well-Known Member
Joined
Jan 31, 2005
Messages
2,481
Reaction score
22
Points
38
Location
St. Leonard, MD
Yes, this one is going to get bunks. I generally prefer rollers, but because of the light layup of this boat I think the bunks will work better and keep the hull straight.
 

gw204

Well-Known Member
Joined
Jan 31, 2005
Messages
2,481
Reaction score
22
Points
38
Location
St. Leonard, MD
And now for my confession... I scrapped the original boat and bought the 1980 Wenzel you see in the pic above.

I was never completely happy with how the transom on the first boat turned out. So, I cut it out a second time. Then I started seeing a bunch of Wenzels on Craigslist over the past few months and came to the realization that it would be much easier and cheaper to just buy something in better shape. :) The transom has a little give, but the rest of the boat is in excellent shape. I figure I can reinforce the transom with an aluminum plate and get a year or two out of it.

The trailer required a bit of work in order to get it ready for a 4 hour pull. When I originally got it, the coupler was installed incorrectly. It was for a 2-1/2" wide tongue whereas mine is 2". So, I took an old 1/4" thick axle u-bolt plate, made up a spacer for each side and bolted it back on correctly. Eventually I'll replace it with a proper one, but I was all about quick fixes for this trip. Then I pulled the lights off of the trailer under the Grady project and transferred them to the skiff's trailer. Next I mounted 4 bunk brackets I had sourced from my parts trailer and built new bunks using a scrap PT 2x4 that I pulled off of a playhouse I'm demo'ing. It got covered with some carpet left over from a trailer refurb from several years ago. Last thing to deal with was the axle. One hub was running rough so I pulled down both sides for inspection. One looked fine, the other had a toasted outer bearing. I knocked that out and replaced it with a "new" bearing and race from the parts trailer. After cleaning the old grease from everything, I repacked the bearings and stuck the hubs back on with new seals. I even disassembled the old bearing buddies, cleaned them up and reinstalled them. I thought they were going to be toast but I was able to salvage them. The tires were pretty dry rotted so I took the good wheels off of my dump trailer for the trip.

The only new parts I had to buy were cotter pins for the axle nuts and two new seals. Total investment was about $4.00 and that's only cause I got 2 spare pins. Eventually I'll go through it again and thoroughly rebuild and adjust it properly.

The motor is an '86 (I think) Yamaha 25. The boat is only rated for 20, but I couldn't pass it up for $150. The previous owner said it was "locked up" and needed a rebuild. Turns over fine for me. Hasn't run in like 8 years so I need to do all the PM stuff before attempting to fire it up.
 

Capt Bill

GreatGrady Captain
Joined
Mar 23, 2005
Messages
805
Reaction score
45
Points
28
Location
First State
Model
Sailfish
I just found this thread, Brian, and can't believe how fast the kids are growing up. Wow. And what a great project to do with the helpers. Good stuff; they will never forget.
 

gw204

Well-Known Member
Joined
Jan 31, 2005
Messages
2,481
Reaction score
22
Points
38
Location
St. Leonard, MD
Update on the new skiff...

Stuck it in the garage over the winter to keep it nice and dry. That proved to be a mistake as I started using it as a "catch-all" for miscellanous junk. :(

16657246370_739bf6eca0_z.jpg


Pulled the stern handles for rebedding (and found no evidence of any sealant...ever). The wood core of the transom is in surprisingly good shape though and I still don't see any immediate need to recore yet. I know it's coming though. So, I overdrilled the holes and have let them sit open for serveral weeks to ensure they are nice and dry. I will eventually fill them in with thickened epoxy and then install new SS handles.

16818747686_41e3cc8ce9_z.jpg


Got the boat flipped over and set it up on a few cinder blocks. There are a few gelcoat repairs to be done on the bottom and this set it at a good working height. Yesterday, my daughter started wiping things down and I dug into the old 25 Yamaha again. Overall, the hull is in excellent condition and I think will shine up to like new with a little elbow grease.

16866939910_d76ea4d198_z.jpg


A few weeks ago, I tried to drop the lower unit on the motor. All 4 mounting bolts came out without issue, but I couldn't get the coupling to break loose from the shift shaft. This time I put some heat on it and got it to turn. After I dropped the lower again, I found out the couple spun because the shift rod had snapped off. DOH!!! :roll: Looks like I lost about 1/2" of thread. There is still quite a bit left and I think I can get by with a longer coupling. So, no big deal...yet.

Anyway, pulled the water pump cover. It was touch and go with one of the bolts, but I got them all out successfully. Impeller looked ok, but there was tons of crud in there. I still need to get smart on how this pump is layed out so I can decided what parts I need to/should replace.

16868257219_4a4723198c_z.jpg


Finished up by pulling compression numbers. I've never done this on a pull-start motor before, so I wasn't sure how many tugs to give it. Figured three would do it.

Cylinder 1.

16868266119_abb78c3600_z.jpg


Cylinder 2.

17028494146_5b43d9a93e_z.jpg


Nice. Not bad for a $150 motor that the seller said was locked up. :D I still need to finalize my plan, but so far I'm looking at this:

1. Rebuild the fuel pump and carb.
2. Replace cracked fuel filter housing.
3. Change lower unit oil.
4. Replace one broken linkage arm.
5. New thermostat and gasket.
6. New prop.
7. Rattle can paint job once I get it up and running smoothly.