- Joined
- Jun 16, 2015
- Messages
- 392
- Reaction score
- 222
- Points
- 43
- Location
- Brisbane, Australia
- Model
- Seafarer
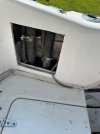
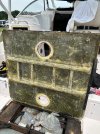
I have the tank in. The fuel and vent hoses are pre-rigged. They are still soft.
I’ve drilled the holes for the Perko filler.
I have been able to pull the pipes through. That was tight. So there is no way the hose clamps for the filler and vent hoses can be installed above the gunnel and then pulled through.
Tightening the clamps from below the gunnel is going to be a bit of a challenge.
Any tips?
I noticed something a bit strange about how the hose from the pickup on the main tank is routed.
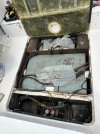
The fuel filter is in the starboard corner under the transom seats.
The fuel hose goes to the port side, in under the transom seats then back across to the starboard side, up the side of the boat, then finally to the starboard side port of the filter. Seems like a waste of fuel hose.


