Front anchor eyelet problem on 226 Seafarer

SirGrady226

Well-Known Member
Joined
Nov 7, 2017
Messages
229
Reaction score
95
Points
28
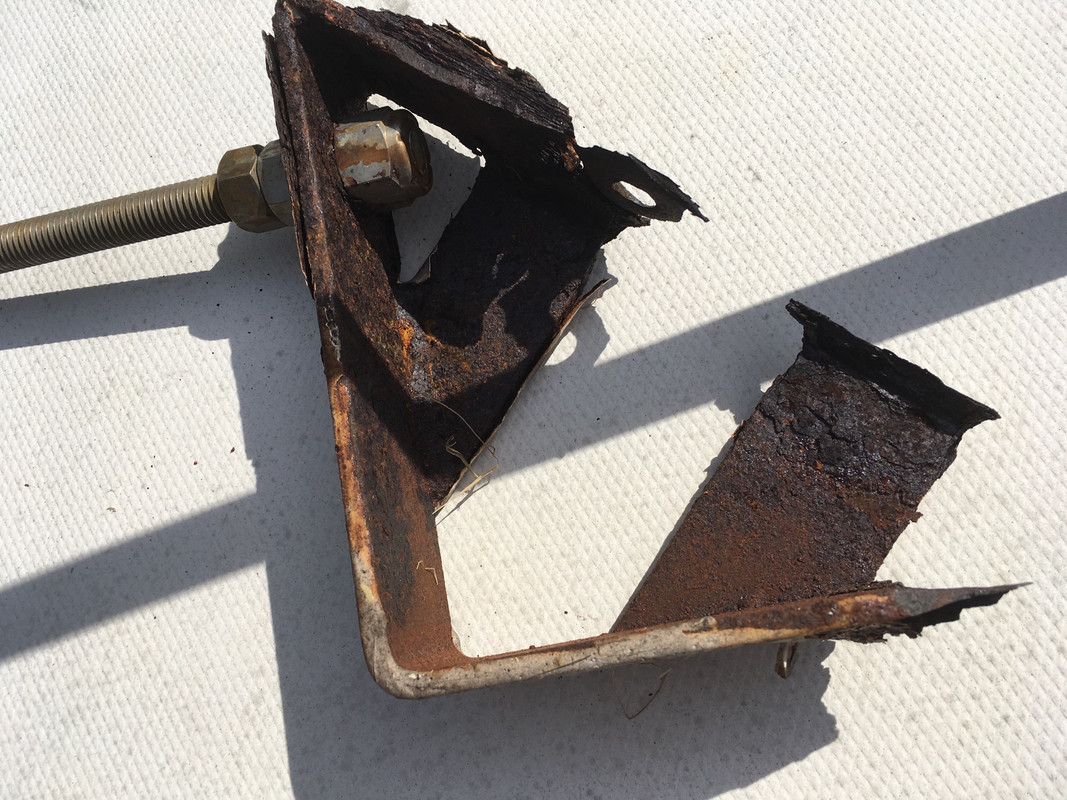
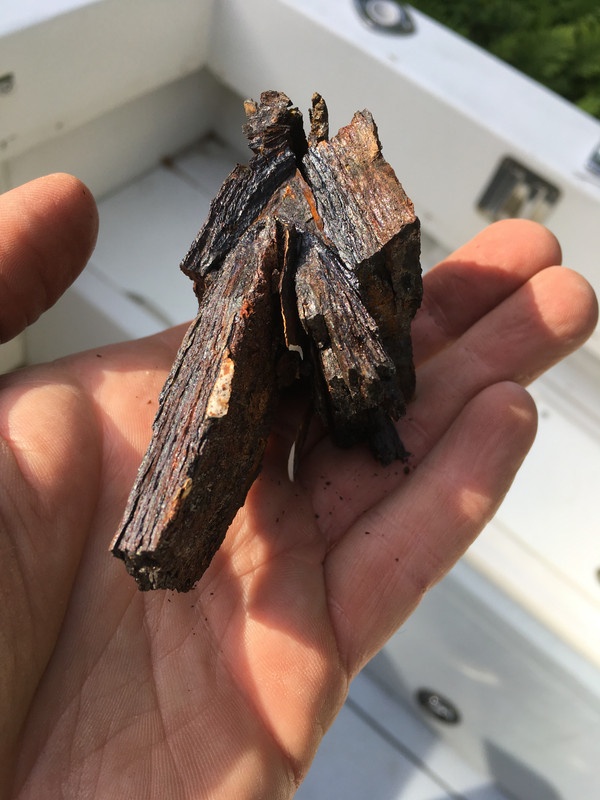
I remember after bringing this boat home and cleaning out the cabin storage compartments, I found a big pile of rusted steel in the forward compartment. I couldn't for the life of me figure out why it was there, or what it used to be. Looked like chunks of rusted out leaf springs. Well, while cleaning the front deck area, I noticed the anchor eyelet move when I went across it with the scrub brush. Turns out it's hooked to a long piece of all thread that's supposed to bolt to a big piece of steel for strength, there's nothing left of it to know what to replace it with. :( I'm hoping someone has a picture of what it's supposed to look like, it would be nice if it can be an easy fix.
 

SirGrady226

Well-Known Member
Joined
Nov 7, 2017
Messages
229
Reaction score
95
Points
28
I imagine a previous owner stored a wet with salt water anchor rope up there, this caused the bare steel bracket to quickly rust away. I really need to solve this problem before using the boat, I won't be able to safely anchor up or use the eyelets without causing damage to the fiberglass. I'm hoping someone can take a picture of the bracket in place, and possibly give me measurements.
 

SirGrady226

Well-Known Member
Joined
Nov 7, 2017
Messages
229
Reaction score
95
Points
28
Just got off the phone with Grady White about the bare steel bow eyelet bracket that ties the top and front eyelets together. I was told they have no replacement or specs for me to use in order to have another built. Needless to say, I'm pretty disappointed, I have nothing left to use as a template that would allow me to fabricate another. I'm hoping this forum can help, need pictures and measurements of an original.
 

SirGrady226

Well-Known Member
Joined
Nov 7, 2017
Messages
229
Reaction score
95
Points
28
Many thanks to all that have helped, my local welder that built my tank is making the bow bracket out of stainless steel. Funny after talking to Grady White, they were no help over the phone. But later they emailed me the drawing from the archives. So I will post it for others to refer to in the future.

20180619_205048.jpg
 
Last edited:
  • Like
Reactions: FirstTimeGrady

SirGrady226

Well-Known Member
Joined
Nov 7, 2017
Messages
229
Reaction score
95
Points
28
My welder really did a nice job fabricating the bracket, top grade stainless steel insures it is there to stay. Man, what a pain in the *%# installing it though. Those small areas just aren't made for my big hands and forearms, but I managed somehow.

20180622_142023.jpg
 
Last edited:
  • Like
Reactions: PointedRose

Finest Kind

Well-Known Member
Joined
Jul 11, 2005
Messages
451
Reaction score
64
Points
28
Location
Hallandale, Fl
SirGrady226 said:
Many thanks to all that have helped, my local welder that built my tank is making the bow bracket out of stainless steel. Funny after talking to Grady White, they were no help over the phone. But later they emailed me the drawing from the archives. So I will post it for others to refer to in the future.

My 30 year old bracket needs replacing too. What I did in the meantime is affix a wire tie through the weaves of the rode approx 10 feet from the very end of the anchor line...so I know that when I see this tie come up through the anchor locker I need to STOP letting out line and tie off to the cleat because if I let out all the line the bracket probably will not hold the boat in any kind of seas now that it is so corroded.

Thanks for posting, but when trying to print out the drawing you posted it is very blurry and faint...practically illegible...but I see on the other post below that you do have a clear printout with legible measurements (under the new bracket).

Can you please re-post a clear pic of your printout or the original attachment Grady sent you?
Thanks!
 

SirGrady226

Well-Known Member
Joined
Nov 7, 2017
Messages
229
Reaction score
95
Points
28
Finest Kind said:
SirGrady226 said:
Many thanks to all that have helped, my local welder that built my tank is making the bow bracket out of stainless steel. Funny after talking to Grady White, they were no help over the phone. But later they emailed me the drawing from the archives. So I will post it for others to refer to in the future.

My 30 year old bracket needs replacing too. What I did in the meantime is affix a wire tie through the weaves of the rode approx 10 feet from the very end of the anchor line...so I know that when I see this tie come up through the anchor locker I need to STOP letting out line and tie off to the cleat because if I let out all the line the bracket probably will not hold the boat in any kind of seas now that it is so corroded.

Thanks for posting, but when trying to print out the drawing you posted it is very blurry and faint...practically illegible...but I see on the other post below that you do have a clear printout with legible measurements (under the new bracket).

Can you please re-post a clear pic of your printout or the original attachment Grady sent you?
Thanks!

The file Grady White sent me will not post to this site, most likely needs to be converted or something. I took close ups of the sections and hope that helps.
 

Attachments

  • 20180627_083613.jpg
    20180627_083613.jpg
    54.2 KB · Views: 266

SirGrady226

Well-Known Member
Joined
Nov 7, 2017
Messages
229
Reaction score
95
Points
28
Next section detail
 

Attachments

  • 20180627_083629.jpg
    20180627_083629.jpg
    52 KB · Views: 257

DennisG01

GreatGrady Captain
Joined
Sep 1, 2013
Messages
6,846
Reaction score
1,216
Points
113
Location
Allentown, PA & Friendship, ME
Model
Offshore
Got mine back today - looks pretty much the same as yours. For anyone else reading this, it's not like you have to copy this design exactly. And you don't even have to measure for all three holes at the same time. Drill the holes for the bow eye first, temporarily install it, then drop the threaded rod assembly down and mark where to drill. It's a 5/8" rod, but you can drill the hole to 3/4" to give you a little wiggle room. The nut is plenty big enough to account for the extra 1/8" - but you could use a washer, as well.

B2AF01CF-8C36-4B69-B79C-422767C038AA.jpg


C8F77B19-12D6-4358-BDD9-8A431162F9D3.jpg


And, just for fun, what was original...

A1C8C490-BCBA-46E2-AB83-20686FEC3FC6.jpg


74B24582-216E-4277-977D-714BF9A4C38F.jpg
 

SirGrady226

Well-Known Member
Joined
Nov 7, 2017
Messages
229
Reaction score
95
Points
28
DennisG01 said:
Got mine back today - looks pretty much the same as yours. For anyone else reading this, it's not like you have to copy this design exactly. And you don't even have to measure for all three holes at the same time. Drill the holes for the bow eye first, temporarily install it, then drop the threaded rod assembly down and mark where to drill. It's a 5/8" rod, but you can drill the hole to 3/4" to give you a little wiggle room. The nut is plenty big enough to account for the extra 1/8" - but you could use a washer, as well.

B2AF01CF-8C36-4B69-B79C-422767C038AA.jpg


C8F77B19-12D6-4358-BDD9-8A431162F9D3.jpg


And, just for fun, what was original...

A1C8C490-BCBA-46E2-AB83-20686FEC3FC6.jpg


74B24582-216E-4277-977D-714BF9A4C38F.jpg


So you had yours made from aluminum?
 

DennisG01

GreatGrady Captain
Joined
Sep 1, 2013
Messages
6,846
Reaction score
1,216
Points
113
Location
Allentown, PA & Friendship, ME
Model
Offshore
SirGrady226 said:
So you had yours made from aluminum?

No, it's still stainless. But they did a light sand blast on it to smooth out the appearance. I didn't ask them specifically to do it - it was a surprise!
 

SirGrady226

Well-Known Member
Joined
Nov 7, 2017
Messages
229
Reaction score
95
Points
28
Here is the attachment Grady White sent me for the 226 bow lifting bracket.
 

Attachments

  • bow lifting bracket 10-196 .pdf
    1 MB · Views: 29

Seadogger

New Member
Joined
Aug 3, 2021
Messages
3
Reaction score
0
Points
1
Age
64
Model
Seafarer
Got mine back today - looks pretty much the same as yours. For anyone else reading this, it's not like you have to copy this design exactly. And you don't even have to measure for all three holes at the same time. Drill the holes for the bow eye first, temporarily install it, then drop the threaded rod assembly down and mark where to drill. It's a 5/8" rod, but you can drill the hole to 3/4" to give you a little wiggle room. The nut is plenty big enough to account for the extra 1/8" - but you could use a washer, as well.

B2AF01CF-8C36-4B69-B79C-422767C038AA.jpg


C8F77B19-12D6-4358-BDD9-8A431162F9D3.jpg


And, just for fun, what was original...

A1C8C490-BCBA-46E2-AB83-20686FEC3FC6.jpg


74B24582-216E-4277-977D-714BF9A4C38F.jpg
How thick and wide is your stainless ??