GemLux Deluxe Outrigger Bases

Hookup1

GreatGrady Captain
Joined
Oct 16, 2007
Messages
2,652
Reaction score
724
Points
113
Age
69
Location
Cape May, NJ
Model
Islander
I have 200 storage units (all full), no garage or trees. 500' x 500' lot. No place to get cover or shade.

I'm going to repaint the helm bubble before putting the aluminum and hardtop back on. Any other topside work I do won't require removing the hardtop. I will reinstall the hardtop per your experience.

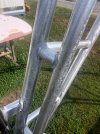
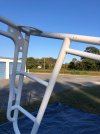
The aluminum is being primed with AwlGrip Wash Primer. It's a chromate-free product that will etch the aluminum and create a strong chemical bond. I was able to hand sand the pitting smooth. The blasting created a nice mechanical profile for the primer to stick to. I'll top with AwlGrip 545 primer, light sand and more primer to get a smooth surface before paint.

Stamoid is good stuff. It can't be that bad. Costa uses it on all the new Vikings as do most custom builders. They use it because its easier to build an "engineered" enclosure. They have tools to slit fabric and can heat bond some seams. They still do sew for a traditional look. Also using lifetime threads. Just be sure to keep any bleach products off it or it will yellow.

With my Sailrite sewing machine I have done a few repairs for friends. Replacing vinyl glass or polycarbonate, re-stitching sun damaged polyester, mods, etc. Base material is deteriorated too and tears. At some point it's easier to just make a new panel. Repair work on a old enclosure is like working on a house. You have to do the demolition and then the repair. Double work.
 
Last edited:

Hookup1

GreatGrady Captain
Joined
Oct 16, 2007
Messages
2,652
Reaction score
724
Points
113
Age
69
Location
Cape May, NJ
Model
Islander
It's been a busy summer for projects on "Evil Princess" (named after my daughter). Things are coming together over the next few weeks.

Today I painted the console "bubble" on the 268 Islander walk around. AwlCraft 2000 Off-white Revisited. I would call it "Faded Grady Off-White 1997". Three coats. It is a close match that will look good as the project progresses. I'm only doing the console this year so that when the tower aluminum goes back on it won't have to be removed when the remainder of the topside is refinished next year.

Undecided what to do with the diamond non-skid - for now it's masked off from paint. It may be left alone, ground out and re-sanded or SeaDeck like product next year.

Next year the rail and rub rail come off and topside will be refinished. New rub rail - white with contrasting insert. Fix all the crazed gelcoat. Re-paint gunnels, interior side and cockpit. Bottom paint will remain black.

Hardtop is ready for paint. Aluminum tower is ready for paint. Same white as topside. Underside of hardtop is same blue as hull.

Hull ready for paint. AwlCraft 2000 F5833 custom blue. Priming and painting this week weather permitting.

Boat is a complete wreck right now so no photos at the moment. I'll post them as things come together.

I'm going to start a new thread on the 3M PPS 2.0 paint system. It is an awesome and inexpensive for anyone that wants to paint. Only problem is compressor requirements.
 
Last edited:
  • Like
Reactions: SkunkBoat

Hookup1

GreatGrady Captain
Joined
Oct 16, 2007
Messages
2,652
Reaction score
724
Points
113
Age
69
Location
Cape May, NJ
Model
Islander
Console bubble painted. Looks good. Two front windows eliminated. Painted down to the diamond non-skid. May save the non-skid - it looks pretty good. Color match to faded Grady gelcoat is very good. No picture for now.

Hull primed. Sanding out and painting tomorrow. My friends say it looks like a PT boat! All side thru hulls removed. New GemLux stainless are going in. AwlCraft 2000 paint. After spraying it will be wet sanded and buffed out. Same with hardtop underside.
Prime 1.jpeg Prime 2.jpeg F5833 Pantone 2985C Light Blue.png
 
  • Like
Reactions: SkunkBoat

Hookup1

GreatGrady Captain
Joined
Oct 16, 2007
Messages
2,652
Reaction score
724
Points
113
Age
69
Location
Cape May, NJ
Model
Islander
Painted port side in 20 mph NE. Looks terrific. 6 coats. Next week the starboard side.

68616522391__F619B375-94CA-435D-A451-39ABC4BA3481.HEIC.jpeg imagejpeg_0.jpg
 
  • Like
Reactions: SkunkBoat

Hookup1

GreatGrady Captain
Joined
Oct 16, 2007
Messages
2,652
Reaction score
724
Points
113
Age
69
Location
Cape May, NJ
Model
Islander
OK so here's the teaser! For this FL winter it stays this way. But in the Spring we start again. What do you think? Leave bottom black or go white? Swap rub rail for white with dark insert? No striping or GW logo?

Console bubble has been painted but gunnels have not (Spring 2023).
IMG_2531.jpeg
 
Last edited:
  • Love
Reactions: SkunkBoat

SkunkBoat

Well-Known Member
Joined
Oct 12, 2017
Messages
4,272
Reaction score
1,482
Points
113
Location
Manasquan Inlet NJ
Website
www.youtube.com
Model
Express 265
white bottom will just look green & brown in no time. IMO Stay black or go blue..maybe that vertigis green?
I am partial to a thick dark rubrail that actually does something vs a stainless ornament that has to be babied.
I know thats old fashioned and contrary to the trend.
Old Grady rubrail is dark blue. I think dark outlines the transition from blue hull to white top better than white. Maybe use a thin pinstripe in the shadow of the hull line to match rubrail.
You could break the grady rules and add a bootstripe...
 

Hookup1

GreatGrady Captain
Joined
Oct 16, 2007
Messages
2,652
Reaction score
724
Points
113
Age
69
Location
Cape May, NJ
Model
Islander
After a marathon starting last night when the rain stopped I prepped the primer and today got 5 coats on the Starboard side. Port side has 6. Over 2 1/2 quarts of topcoat + converter + reducer + accelerator for each side. A few defects but that's the beauty of AwlCraft 2000 - repairable finish. All the auto paint guys will tell you there is no such thing as a perfect paint job. They all need to be touched up. Paint went on beautifully. Painting outside a Royal pain.

For now I'm going to stay with black bottom Paint.

The pinstripe was a PITA to remove. Hacked gelcoat and had to spend hours repairing. I don't think it adds much so for now simple is better.

All the new small boats are skipping the boot stripe. I like the clean look better. If I do a blue bottom I would do a boot stripe.
 
Last edited:

Hookup1

GreatGrady Captain
Joined
Oct 16, 2007
Messages
2,652
Reaction score
724
Points
113
Age
69
Location
Cape May, NJ
Model
Islander
Got the tower painted. AwlGrip. One coat aluminum primer, 2 coats 545 primer, 3 coats of AwlCraft 2000. Did an awesome job bringing back the pitted aluminum.

Photos: Pitted corner of tower sanded out, after sandblasting, after paint.

Tower Sanded 1.jpegBlasted 1.jpeg Tower Paint 1.jpeg
 

Attachments

  • Tower Sanded 2.jpeg
    Tower Sanded 2.jpeg
    2.2 MB · Views: 22
  • Tower Paint 2.jpeg
    Tower Paint 2.jpeg
    2 MB · Views: 21
  • Like
Reactions: SkunkBoat

Hookup1

GreatGrady Captain
Joined
Oct 16, 2007
Messages
2,652
Reaction score
724
Points
113
Age
69
Location
Cape May, NJ
Model
Islander
Shot the hardtop yesterday. AwlGrip coarse non-skid. Couldn't spray it - too large for my gun. Salt shaker method. Didn't like it at all. Clumps up, poor distribution.

Sanded off this morning. Re-shot it using Interlux non-skid. Smaller granules - able to spray it. Much better. I didn't want an aggressive non-skid - just a little texture. I think it looks awesome!

Hardtop top 1.jpeg Hardtop top 2.jpeg
 
  • Like
Reactions: SkunkBoat

Hookup1

GreatGrady Captain
Joined
Oct 16, 2007
Messages
2,652
Reaction score
724
Points
113
Age
69
Location
Cape May, NJ
Model
Islander
Looks great!

but IMO the texture just makes it hold dirt and moss and bird shit.
I know but I didn't work the finish on top as much as I did underneath. I wanted a little texture to hide small imperfections. I can't roll or brush AwlCraft 2000 - spray only - so no stippling paint. I had to finish the top Thursday. If I put it off I'll be into next week. Running out of weather and time.
 

Hookup1

GreatGrady Captain
Joined
Oct 16, 2007
Messages
2,652
Reaction score
724
Points
113
Age
69
Location
Cape May, NJ
Model
Islander
Underside of the hardtop finished today. 3M Perfect-It finish (sanded out, with Trizak 800/1500/3000/5000/8000 and polished with Perfect-It One Step polish - no compounding). Two coats of Awlgrip AwlCare sealer - hand applied. No wax on AwlCraft finishes - only sealer.

So the question is what color for the electronics box? White or blue?

Hardtop underside.jpeg
Also got the misc aluminum painted.
Misc aluminum.jpeg
Almost ready to put the boat back together!
 
Last edited:

SkunkBoat

Well-Known Member
Joined
Oct 12, 2017
Messages
4,272
Reaction score
1,482
Points
113
Location
Manasquan Inlet NJ
Website
www.youtube.com
Model
Express 265
If you make it blue, the line from the silicone (white or grey) will stand out.
I would go with the white color on the box and match the silicone.

If you go with blue maybe black silicone would look good?
 

Hookup1

GreatGrady Captain
Joined
Oct 16, 2007
Messages
2,652
Reaction score
724
Points
113
Age
69
Location
Cape May, NJ
Model
Islander
If you make it blue, the line from the silicone (white or grey) will stand out.
I would go with the white color on the box and match the silicone.

If you go with blue maybe black silicone would look good?
Agreed - the seam will stand out. I'm trying something today. I protected the hardtop and bolted the electronics box in. I then filled the gap with fairing compound. When I take it apart and clean the edge up I should have a fine edge to mate with the hardtop. If the edge is crisp I may go "blue" and use a tiny bit of clear silicone caulk. Flip side is I think it will look good in white as well.

As always thanks for the feedback.
 
Last edited:

Hookup1

GreatGrady Captain
Joined
Oct 16, 2007
Messages
2,652
Reaction score
724
Points
113
Age
69
Location
Cape May, NJ
Model
Islander
Seamless edge on electronics box but I still went white. No time to wet sand out to match the underside of the hardtop (super smooth and high gloss).
 
Last edited:

Hookup1

GreatGrady Captain
Joined
Oct 16, 2007
Messages
2,652
Reaction score
724
Points
113
Age
69
Location
Cape May, NJ
Model
Islander
Aluminum tower up on boat today. Tomorrow - I have to shampoo the headliner before bolting back in. Size all new 316 hardware. New trim and gasket for forward hatch. Size bolts. Caulk, bolt down and cleanup. Run wires back in tower leg.

Rivets coming tomorrow. Going to paint them and then install upper enclosure track (already painted).

Progress pictures coming.
 

Hookup1

GreatGrady Captain
Joined
Oct 16, 2007
Messages
2,652
Reaction score
724
Points
113
Age
69
Location
Cape May, NJ
Model
Islander
Tower caulked and bolted down in place. Console "bubble" was painted earlier. Starting to look like a boat!

Back together.jpeg Back together 2.jpeg
 

Ky Grady

GreatGrady Captain
Staff member
Joined
Mar 1, 2006
Messages
2,944
Reaction score
1,279
Points
113
Location
Berea, KY/Cross, SC
Model
Seafarer
You've got a world of work in her,,, she'll be looking good when you hit the water next year. Nice job.