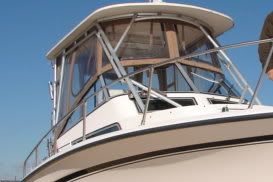
Rewiring horn circuit 1999 268 Islander

tjb22

Member
Joined
Feb 28, 2007
Messages
19
Reaction score
0
Points
1
Hello all,
Went down to the boat this past weekend with the wife and kids. This usually results in me working on some minor repair, cleaning up, reorganizing the cabin for the next fishing venture etc while they work on their tans. This trip I was going to tackle the factory horn replacement with a stainless steel unit. 2 screws, 2 wire splices and some 3m 4200 adhesive, how hard can it be....Next day I am down there with a truck full of tools and instruments of destruction trying to complete the job. The wires from the old horn either corroded or failed due to abrasion and I cannot run a fish tape up the side of the cabin to the breaker panel. I imagine that the wiper motor wiring follows the same path. Has anyone replaced this wiring and can offer some tips to complete this job. I don't believe there is a rigging tube from this area but I have contacted Grady White to inquire about the wire path. The horn has not worked for a few years and I have gone with the portable airhorn and whistle route for meeting the CG requirements but knowing that the horn does not work bothers me for some reason.
 

SC Adventure 208

Well-Known Member
Joined
Jan 4, 2011
Messages
63
Reaction score
0
Points
6
Assuming you checked the fuse first. If you have a wire at the horn is there any way you can attach a new wire to it and pull it through?
 

tjb22

Member
Joined
Feb 28, 2007
Messages
19
Reaction score
0
Points
1
Wires at the horn were corroded thru and could not be used to pull from the horn side. The horn was also corroded solid. Stuck with trying to fish tape a new wire up to the circuit panel.
 

1st grady

GreatGrady Captain
Joined
Jan 31, 2005
Messages
537
Reaction score
3
Points
18
I have a 95 and when I worked on the horns last they ran the wires inside the carpet of the headliner of the cabin, then it was a straight shot through the front deck. I believe they were then run inside the head compartment ceiling and through the helm bulkhead. My horns are located above the forward starboard cabin window centered in the photo. If you remove the access panel behind the head, you will be able to hand the wire up to the helm area. (which is where my fuse panel is)
gradyislanderVGA001-1.jpg
 

Caribbean 40

New Member
Joined
Jun 7, 2011
Messages
3
Reaction score
0
Points
0
I had same problem ,but followed wath just 1 grady said and function, but be advise to have some spray glue for carpet becouse it will be kind of bulk on the area of the bolts when u thingend them back.
 

Caribbean 40

New Member
Joined
Jun 7, 2011
Messages
3
Reaction score
0
Points
0
Caribbean 40 said:
I had same problem ,but followed wath just 1 grady said and function, but be advise to have some spray glue for carpet becouse it will be kind of bulk on the area of the bolts when u thingend them back.[Have a Great Caribbean Grady life]
 

tjb22

Member
Joined
Feb 28, 2007
Messages
19
Reaction score
0
Points
1
Thanks for the suggestions. The access panel in the head compartment on this model opens up to the Gauge cluster, and there are no other wires in that area other than the light and shore power circuits. The electrical panel is below and to the right of the helm. I removed the electrical panel and the wiring all run towards the starboard side of the cabin and then into various conduits. Can't tell where the horn circuit wires run as the wire from the switch runs to a group wiring plug with maybe 11 other wires and I just didn't want to tackle it. I was thinking about removing the wiper motor covers and trying to follow those wires but ran out of time. I did look at the headliner in the cabin but was hesitant to remove it and I could not feel and wires thru it so I don't know where the actual wire path is. Starting to look like a winter project. I contacted GW but have not heard back from them yet.
 

tjb22

Member
Joined
Feb 28, 2007
Messages
19
Reaction score
0
Points
1
The final solution;
GW customer service recommended that I cut a 1.5" hole in the cabin headliner and access the wires there. They sent me a plug to use to fill the hole after the repair which is the same plug that they use for hardtop installations. Drilled the hole in the liner (1/8" thick plastic) in a flat area behind the horn mounting area using a hole saw with the center pin removed (was concerned about the drill penetrating the fiberglass - that whole "drilling holes in a boat phobia" thing was in my mind) spliced in new wires with heat shrink butt splices, buttoned it all up and installed the plug. Horn works, install looks good and one less item on the boat to do list. Thanks to Grady White customer service and for the suggestions from everyone.