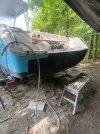
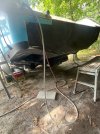
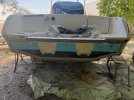
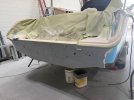
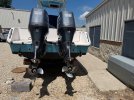
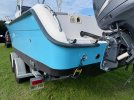
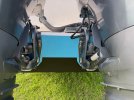
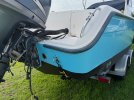
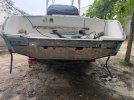
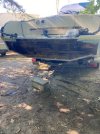
1997 Islander 268 Transom Rebuild Project

Thanks for brining us along. Gives me some confidence if/when my 2007 gets there.

What is 'petrified plywood'?

Tx, Rob
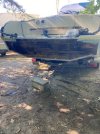
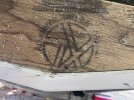
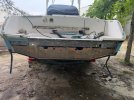
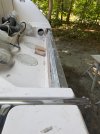
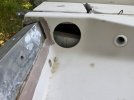
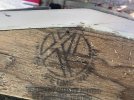
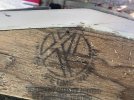
The section of the transom below the aluminum bracket are where the stringers are attached. The transom was 2 pieces of 3/4" marine plywood. The wet resin soaks into the plywood and several layers of fiberglass material are overlaid. When they opened the transom up the two layers of 3/4" plywood was wet, had turned black and practically fell out. That resin preserved a thin layer of the plywood that still has a healthy wood color to it.

That layer of fiberglass and the aluminum will be cleaned up and re-used.
 
Last edited:
  • Like
Reactions: wahoo33417
I'm disappointed with Grady White with their transom design at least on the pre-2000 boats. Euro transom in particular but all plywood transoms are fair game. Everyone blames the "bang cap" and thinks that if it's caulked and not corroded life is good! The fiberglass cover for lack of a better term in front of the transom in the splash well has numerous screws in it. You may be able to keep the splash well waterproof for 30 years. But the transom top extends out to both sides under the top/bottom half of the boat at the rub rail. The crap they fill with is brittle and doesn't adhere well. It's impossible to prevent the top/bottom half of the boat and the rub rail dry underneath.

After reviewing my transom here is what I found. The 1 1/2" Plywood in my transom was wet and delaminated. The aluminum bracket was secured properly to the stringers. The bracket saved my boat - top Motor bolts went into aluminum bracket. This would prevent the motors from tearing out at the vertical edges (hopefully!).

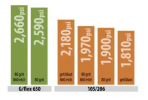
For the re-build the aluminum bracket is a big concern. Bonding to aluminum is a big problem. Oxidation. Aluminum etch is recommended to prep. West Systems has a special epoxy - G\Flex - that is the right stuff at least to attach the Coosa board.

Screenshot 2026-07-15 at 10.16.09 PM.pngG/flex® 650 is a toughened, versatile, liquid epoxy for permanent waterproof bonding of fiberglass, ceramics, metals, plastics, and damp and difficult-to-bond woods. It is a bit more flexible than standard epoxies and polyester but much stiffer than adhesive sealants. This gives it the ability to make structural bonds that can absorb the stress of expansion, contraction, shock, and vibration. It is ideal for bonding dissimilar materials.
 
Last edited:
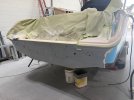
Transom is back together. Next is the finish work.

The transom is three pieces of Coosa board 3/4”, 1/2” and 1/2” laminated with glass and resin. Laminated to 3/8” x 2" x 8" aluminum L-bracket with West System G/Flex epoxy and glass.

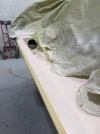
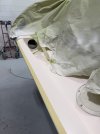
Old splashwell trim and bang cap will be eliminated. Glassed over for seamless finish.


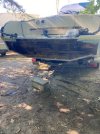
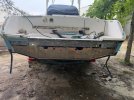
Rotted Wood.jpeg Rotted Wood 2.jpeg Cleaned out.jpeg Coosa 3.jpeg Coosa 2.jpeg

Reinstalled.jpeg Bang CAP.jpeg Splashwell.jpeg No more bang cap.jpeg Skin back on.jpeg
 
Last edited:
Transom moving along. Full Coosa Board Bluewater 26 transom. 3/4"+1/2"+1/2" laminate. West System G/Flex epoxy laminate to aluminum. Eliminated "bang cap". Will be finished up this week. Done by Signature Fiberglass in Ocean View, NJ. They know their stuff and will work with you to get you what you want!

No more bang cap.jpeg Skin back on.jpeg
 
Project finished! I'll add a photo of the splashwell when the motor harness is hooked up. AwlCraft 2000 paint is amazing! That finish is out of the spray gun - not sanded or buffed. Hasn’t been sealed yet either.

Final 1.jpeg Final 2.jpeg Final 3.jpeg Final 4.jpeg
 
Last edited:
looks good. what was the total cost?
$12,000 plus sales tax and couple hundred in materials. The number was a little higher because of the glass work to eliminate the "bang cap" and gelcoat refinishing of splash well.
 
$12,000 plus sales tax and couple hundred in materials. The number was a little higher because of the glass work to eliminate the "bang cap" and gelcoat refinishing of splash well.
While transom fixes suck, it's way cheaper than a new boat. Looks fantastic.
On another note, are engines on that model typically that low, or are you chasing a performance problem?
 
While transom fixes suck, it's way cheaper than a new boat. Looks fantastic.
On another note, are engines on that model typically that low, or are you chasing a performance problem?
This is a EuroTransom. It functions like a bracket (only it fiberglass) getting the engines further back from the running surface. I haven't changed anything about the boat that was 10 years old when I bought it. Except moving to 4-blade props which were a game changer.
 
Hookup,

Your original post peeked my curiosity so I began some exploratory investigation on my '98 248 Voyager. I pulled the motors, removed the aluminum angle channel, the vinyl / plastic piece that covers the internal bracket, and cleaned out as much of the white, factory filler / binder as I could. After through inspection I did not find any indication of blistering, bulging or cracking on the transom exterior.

There is certainly a desire to look no further and just get to rebuilding the transom cap using G/flex, Coosa and fabric glass. However, based on this post and others, should I keep investigating? I can't have the only late 90s Grady without a transom issue, right? The fact that the bracket may compensate for structural wood rot does not provide much confidence, especially if offshore.

I do not put much stock in moisture meters. Do you have other moisture testing methods to recommend?

Thanks in advance for your advice.
 
I agree...moisture meters are just one piece of information. Movement is the biggest give away. Look inside the hull at the engine bolts for swelling/cracking. Look at bang cap for swelling. Look at tie down u-bolts for swelling. If you are going to do all this work take a 2" hole saw and check the transom at some 1/4 off the bottom spots. Your are going to be repairing the transom skin anyway.

My opinion is "If you are going to go as far as your are to fix the exterior cosmetic stuff be sure you know what's underneath!". Your half way there anyway.

All that loose factory filler and separation from the aluminum bracket (if your model has one), the bang cap, the rub rail, etc. are ways to "fill the vase" with water. There is nowhere for it to go except down. Note the "Lifetime Warranty on the Greenwood XL logo!

I'm not an expert and not in the fiberglass business but I have been watching every post I can find on GW transom's for at least 10 years.

So much depends on how long you plan to own the boat and if you plan to sell it. My situation is I don't plan to sell the boat anytime soon so why not fix it and enjoy it.

Rotted Wood 2.jpeg Rotted Wood.jpeg Cleaned out.jpeg

I have done some fiberglass work. I did a bow thruster a few years ago. Never did a transom. I researched it thouroghly. Inside or outside replacement? Epoxy or vinyl ester? I'm really busy with my elderly Mom so I sent it out. I found a great shop to do the work. I discussed all the tradeoffs and materials with him. He was great in that he took some of my suggestions and I took his experience into the decision. Most shops won't talk to the "dumb" customer - we do it our way! I must have said something right - he offered me a job three times!
 
Last edited:
Hookup,

Your original post peeked my curiosity so I began some exploratory investigation on my '98 248 Voyager. I pulled the motors, removed the aluminum angle channel, the vinyl / plastic piece that covers the internal bracket, and cleaned out as much of the white, factory filler / binder as I could. After through inspection I did not find any indication of blistering, bulging or cracking on the transom exterior.

There is certainly a desire to look no further and just get to rebuilding the transom cap using G/flex, Coosa and fabric glass. However, based on this post and others, should I keep investigating? I can't have the only late 90s Grady without a transom issue, right? The fact that the bracket may compensate for structural wood rot does not provide much confidence, especially if offshore.

I do not put much stock in moisture meters. Do you have other moisture testing methods to recommend?

Thanks in advance for your advice.


Forget the moisture meter. A 20 yo boat is "wet".
You want to know if the wood is separated from the glass, if the plys are separating from each other, or if the wood is mush.

The best way to see that is at holes in the boat...scuppers and motor mount bolt holes. (or bracket mounting holes)
Remove them and look at the wood. Scrape in the hole and see what comes out.
The "bang cap" is obvious but the lower motor holes are always underwater. They are the most likely place to find mush.

You can also drill some holes from the inside (without going through)

We are all struggling with the fear of a rotten transom and the fear of starting a transom project only to find out there wasn't a good reason for it.
I have done a transom on a past boat and found it very difficult to remove the good wood...
yes there were some ugly wet areas but it wasn't going anywhere anytime soon. But I did the job and I felt really good about it. And that's worth a lot.
If I had paid someone else I might not have felt that good...

My 265 has a sketchy transom top ("band cap") I would really like to clean it up but then there is the dilemma of whether to go all the way.
In past I have had motors off and scuppers out and the wood in the holes looked great.
Nothing flexes. I added 1/4" aluminim plates across lower motor bolts (inside), just for shitz n giggles.

 
"They are all sinking. Only difference is how fast!". If you are opening up a transom for a partial repair just do it right and do it once. If you are lucky (and most likely will be) the stringers are not involved. Do transom from the outside with a knowledgeable contractor. If stringers are mush (most likely ok) then an inside job is more appropriate.

There are numerous sources of water intrusion into the transom. The bang cap get all the blame but it's not to true. Bang cap is a crap design - it's how GW attached to top half of the boat to the bottom half of the boat without glass work. Eliminate it! How many of you are going to lift the top half of your boat off anymore?

Most likely everyone's transom is "wet" to some extent. Greenwood XL is crap. Mine was wet and mushy but probably wasn't going to fall off. But best of luck trying to sell the boat! Mine is done now - not to sell it but to use it with my kids...

Big source of transom problem is the aluminum angle bracket the GW installs on some models. Crap materials used separate from the bracket that the Greenwood attached to. That separation captured water and compromised your transom.

If you ever plan to sell your GW you should address the issue now (enjoy it) not when you plan to sell it. Enjoy that GW transom "smile"!

Cleaned out.jpeg
 
Last edited:
I have done a transom on a past boat and found it very difficult to remove the good wood...
When I spoke to Young's Fiberglass in Marmora, NJ a few years back they said the same thing. We don't want to do a transom too early...it's easier when the wood is wet and coming apart. That wasn't a problem for my fiberglass guys. They told me all the wood was wet. They scraped it out with a putty knife.

The other thing you have to consider is that plywood transoms are not vacuum bagged. The plywood is installed dry. The "protection" is the glass cloth wrap on the surface. This seal when compromised doesn't let the water out. Greenwood XL uses a better grade of glue to keep the wood layers together but the water travels. The wood doesn't rot but the wood swells, delaminates and the glue/fiberglass bonds fail. In the winter the freeze thaw cycles expand the wet wood and open up the inside layers.

Rotted Wood.jpeg Rotted Wood 2.jpeg

When I did my fuel tanks I took a wet bulkhead separator out between the two tanks. Really heavy and full of water. Plywood layers were not rotted but had delaminated. Strength came from the fiberglass skin.