Engine and Grady Bracket removal

Ryhlick

GreatGrady Captain
Joined
Jul 15, 2016
Messages
197
Reaction score
64
Points
28
Yours looks the same as my 1999 228. Here is a picture to confirm. Good luck with the removal, curious how it goes, I have been thinking about doing it as well.
 

Attachments

  • 1999 grady white seafarer 228  Gill Bracket.jpeg
    1999 grady white seafarer 228 Gill Bracket.jpeg
    440.4 KB · Views: 3

Zeebr00k

Well-Known Member
Joined
Mar 17, 2019
Messages
51
Reaction score
9
Points
8
Location
Seabrook, Texas
Model
Seafarer
Thanks for your response Leeccoll and Ryhlick, Im thinking of taking a torch to one of the bolts on the transom side to see if that will budge it a little, I need to get the bolts out first before tackling getting the bracket unstuck from the sealant.
 

Zeebr00k

Well-Known Member
Joined
Mar 17, 2019
Messages
51
Reaction score
9
Points
8
Location
Seabrook, Texas
Model
Seafarer
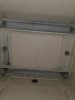
I contacted Grady White, I was told that these brackets were made by Gil, when the boat was manuafactured the bracket had the threaded rods screwed into the bracket and a bolt put on then 5200 was applied to the bracket and rods then the bracket and the rods were installed into the transom as one piece, then the bolts were tightened on the transom side. For those of you thinking of trying to take this bracket off I would highly advise against it. Even after applying heat to the rods and using an air hammer I could not get them to budge. I will get the bracket painted while on the boat and apply 5200 around the edges of the bracket. I wanted to do the job right and make sure the bracket is re-sealed correctly but its an incredibly difficult job to do.
 

Zeebr00k

Well-Known Member
Joined
Mar 17, 2019
Messages
51
Reaction score
9
Points
8
Location
Seabrook, Texas
Model
Seafarer
Clear lake marine center in Seabrook tx did the painting of the bracket at a very reasonable price. The powder coat was stripped by me using a grinder no chemicals were available to do the job. They acid etched the metal then put 3 coats of aluminum primer and 3 coats of awl grip.
 

Zeebr00k

Well-Known Member
Joined
Mar 17, 2019
Messages
51
Reaction score
9
Points
8
Location
Seabrook, Texas
Model
Seafarer
Grady white suggested I run a bead of 5200 between the bracket and transom. I'll use tape to make it neat.
 

Blaugrana

Well-Known Member
Joined
Sep 16, 2019
Messages
703
Reaction score
107
Points
43
Age
40
Location
Bayville, New Jersey
Model
Seafarer
Grady white suggested I run a bead of 5200 between the bracket and transom. I'll use tape to make it neat.

Where did they recommend doing that? On the gap where the two meet?

I was surprised there was nothing on my 2000 but assumed it was in between the transom and the bracket where you can’t see it
 

Zeebr00k

Well-Known Member
Joined
Mar 17, 2019
Messages
51
Reaction score
9
Points
8
Location
Seabrook, Texas
Model
Seafarer
I was able to put a thin blade down 3 inches at the top of the bracket where it meets the transom, the other sides were fine that's why they suggested putting a bead of 5200 on there all the way around.
 

leeccoll

GreatGrady Captain
Joined
May 18, 2019
Messages
1,052
Reaction score
416
Points
83
Age
60
Location
Reno NV
Model
Seafarer
That looks incredibly nice!

I would be adding a healthy bead of 5200 around the perimeter as well.

Well done.

Lee
 

Zeebr00k

Well-Known Member
Joined
Mar 17, 2019
Messages
51
Reaction score
9
Points
8
Location
Seabrook, Texas
Model
Seafarer
I used rubber gasket between the bracket and engine from the hardware store, it worked out pretty good. I also used 4200 on the drain plug below as well as the inspection plate.
 

seasick

Well-Known Member
Joined
Aug 19, 2008
Messages
9,149
Reaction score
1,313
Points
113
Location
NYC
I am surprised that Grady would recommend 5200 or even 4200 for the seam. Those are adhesives and intended to have some mechanical force applied. I would have used a sealant like Life Caulk instead. The 5200 will probably be ok, just keep an eye on it. Since it doesn't flex like caulk, if there is a lot of mechanical vibration or movement, it may fracture separate.
 

leeccoll

GreatGrady Captain
Joined
May 18, 2019
Messages
1,052
Reaction score
416
Points
83
Age
60
Location
Reno NV
Model
Seafarer
Bravo!!!

Grady advised you well to use 5200 since you are just beading the perimeter and it has a nice "grip".

For whatever it's worth my use of 4200 between the bracket and transom is holding up watertight on the 5th year.

I wish mine turned out half as nice as yours did ZeebrOOk.

Lee
 

mhff34

Well-Known Member
Joined
May 17, 2009
Messages
82
Reaction score
3
Points
8
Location
boston
Nice job! How hard was taking the swim platform off? Thinking about resealing my bracket while leaving motor on and removing swim platform

Thanks
 

Zeebr00k

Well-Known Member
Joined
Mar 17, 2019
Messages
51
Reaction score
9
Points
8
Location
Seabrook, Texas
Model
Seafarer
Thanks leeccoll for all yours and everyone else's input you guys are a great help
 

Zeebr00k

Well-Known Member
Joined
Mar 17, 2019
Messages
51
Reaction score
9
Points
8
Location
Seabrook, Texas
Model
Seafarer
Hi mhff34, the swim platform was easy to take off and put back on. It was held on with sealant, and 4 bolts. Underneath the platform the paint was chipping off, I used a heat gun to take the remaining paint off and repainted with topside paint.
 
  • Like
Reactions: mhff34

Ryhlick

GreatGrady Captain
Joined
Jul 15, 2016
Messages
197
Reaction score
64
Points
28
Looks great! Any chance you would share how much it cost to have it refinished? Thanks
 

Zeebr00k

Well-Known Member
Joined
Mar 17, 2019
Messages
51
Reaction score
9
Points
8
Location
Seabrook, Texas
Model
Seafarer
Looks great! Any chance you would share how much it cost to have it refinished? Thanks
Since I did all of the labor removing the engine and removed the existing powder coat on the bracket I was charged $350 for the paint job on the bracket. The boatyard also filled the pit Mark's from the corrosion so that took some extra time too
 
Last edited: