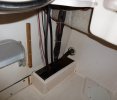
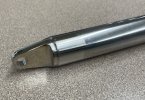
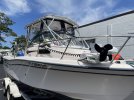
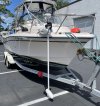
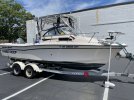
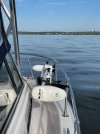
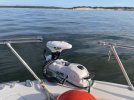
Hi Koz,Roy, would you happen to have a photo of the Rhodan in the stored position without the cover? I'm curious on how intrusive it is into the walk way, and how you mounted the TM stabilizer.
You are most welcome
")
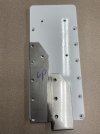
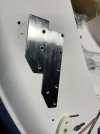
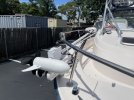
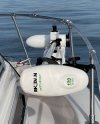
items : ram ball handlebar (you may be able to use the one provided by Rhodan), Ram medium claw and a ram long arm bar. All items attached below below.
I have one earlier photo which the ball handlebar was mounted at the top of the bow rail connector with the included Rhodan arm. But I have since changed to a longer arm and shifted the ram handlebar to the bottom of the bow rail.


Last edited:
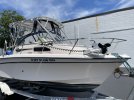
") . I envision physically mounting it almost identically to what you did. I was thinking of mounting on the starboard side. I like it on the port side, but I was concerned about not being able to access that side of the walk around easily. In my slip I use that side to tie up. Your photos look like it is fairly easy to step over. Now I'm rethinking that.
. I envision physically mounting it almost identically to what you did. I was thinking of mounting on the starboard side. I like it on the port side, but I was concerned about not being able to access that side of the walk around easily. In my slip I use that side to tie up. Your photos look like it is fairly easy to step over. Now I'm rethinking that.


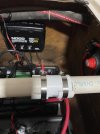
 coupled with a 400w solar panel with 36v mppt charger, my batt has not gone below 39v - as long as the sun is up!