What size brass drain tube for Grady Adventure

imjus4u2nv

Well-Known Member
Joined
Jul 1, 2018
Messages
264
Reaction score
33
Points
28
Location
New York
Model
Adventure
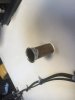
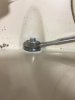
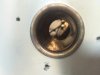
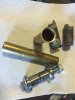
I need to replace one of the brass drain tubes in my 1995 Adventure - anyone know the diameter and length brass pipe I need? I am checked out the varies threads on this repair, and thinking of enlarging the hole and using some epoxy to seal - has anyone gone this route and did you have any issues enlarging hole (looks tough given the clearance between the flange inside the well and the well floor).

Don't have the boat local at the moment and want to order parts to make the repair.

Also looking for a flange tool if someone is looking to sell (also posted in the for sale/wanted section).
 

Fishtales

Well-Known Member
Joined
Jan 31, 2005
Messages
7,490
Reaction score
1,161
Points
113
I'm thinking these are all the same on the GWs. You could measure the ID with a digital vernier/caliper. To get the ID. Assuming you get it out clean, you can measure the OD as well as the hole.
In parallel, shoot GW an email via the Customer Service link on their website. They should be able to provide the part. Another is to talk to your local dealer, they may have the part number (if you want to buy from GW) or potentially have industry part number so you can obtain locally.
 

SkunkBoat

Well-Known Member
Joined
Oct 12, 2017
Messages
4,137
Reaction score
1,435
Points
113
Location
Manasquan Inlet NJ
Website
www.youtube.com
Model
Express 265
If you are going to widen and epoxy the holes, you don't need the brass tubes.
Just color the epoxy or finish it with some paint. Put some scupper flaps on the outside.

They only use the brass tubes to save time....drill hole, hammer in tube, flare end, done... they don't seal very well

Just like the aluminum transom cap...to save production time...
When they connect the cap to the hull, the rub rail hides the seam except at the transom. If they glassed and sanded and tried to match the gelcoat it would take two days...
 

DennisG01

GreatGrady Captain
Joined
Sep 1, 2013
Messages
6,744
Reaction score
1,188
Points
113
Location
Allentown, PA & Friendship, ME
Model
Offshore
I agree. There's is absolutely nothing special to a brass tube and no reason to NOT get rid of it in favor of resin/glass.

The garboard drain on my Grady was actually a brass tube. When I rebuilt the floor I also drilled that brass tube out, glassed the hole and then re-drilled for a proper garboard drain plug (screw in). There was no way I was going to let my boat sit on a mooring with just a silly, expanding rubber plug to keep it from sinking!
 

freddy063

Well-Known Member
Joined
Mar 26, 2007
Messages
566
Reaction score
31
Points
28
Location
Maine
I agree, I would forget the brass tubes and just get fiberglass ones and flair them in
 

Willy-C

Well-Known Member
Joined
Nov 5, 2012
Messages
189
Reaction score
66
Points
28
Age
67
Location
Hooksett, NH
If you are still interested, I can send two sets of brass drain tools (1.00” and 1.25”) for you to use. I used them on my 19’ Grady.
All I ask is to send them back in a reasonable time.
 

Attachments

  • 4AD1F2DA-A895-4638-9679-FFB49E180DE0.jpeg
    4AD1F2DA-A895-4638-9679-FFB49E180DE0.jpeg
    1 MB · Views: 68

Willy-C

Well-Known Member
Joined
Nov 5, 2012
Messages
189
Reaction score
66
Points
28
Age
67
Location
Hooksett, NH
Hey ImJustForYouToEnvy.........you want to use these tools or doing something else?
 

imjus4u2nv

Well-Known Member
Joined
Jul 1, 2018
Messages
264
Reaction score
33
Points
28
Location
New York
Model
Adventure
Hey ImJustForYouToEnvy.........you want to use these tools or doing something else?
I would really appreciate it and really nice offer. I will send you a PM (just moved so been crazy week, sorry delay).
 

Willy-C

Well-Known Member
Joined
Nov 5, 2012
Messages
189
Reaction score
66
Points
28
Age
67
Location
Hooksett, NH
A few pics of my transome reseal
 

Attachments

  • B64E3667-EC47-4997-B3FA-4AAE836595DD.jpeg
    B64E3667-EC47-4997-B3FA-4AAE836595DD.jpeg
    575.5 KB · Views: 67
  • D9C62F72-89EC-4EC2-BA3E-82C8619CD5EB.jpeg
    D9C62F72-89EC-4EC2-BA3E-82C8619CD5EB.jpeg
    520.7 KB · Views: 66
  • 840B2510-9F12-4D7F-B509-CF643B4E77E8.jpeg
    840B2510-9F12-4D7F-B509-CF643B4E77E8.jpeg
    1 MB · Views: 65

Willy-C

Well-Known Member
Joined
Nov 5, 2012
Messages
189
Reaction score
66
Points
28
Age
67
Location
Hooksett, NH
Parts on the way. Forgot to mention in the PM I included some left over brass tubing I used (bought from McMasterCarr).

You may find you’ll end up changing all the brass tubes once you see how easy it is to do.

Good Luck
 

imjus4u2nv

Well-Known Member
Joined
Jul 1, 2018
Messages
264
Reaction score
33
Points
28
Location
New York
Model
Adventure
Willy-c, thanks so much, hoping mine come out as good as yours.
 

Willy-C

Well-Known Member
Joined
Nov 5, 2012
Messages
189
Reaction score
66
Points
28
Age
67
Location
Hooksett, NH
When I did mine a few years ago I went a few steps further. Reading about the dreaded rotten GW transom syndrome I unbolted my 150hp Yammy, lifted up a few inches with a gantry crane, removed and resealed all hardware penetrating the transom, including kicker bracket and swim platform. It was a huge relief everything was dry underneath. Hopefully yours will be too.

IIRC some wet/rotted transom problems could be traced to leaking scupper or splash well drains.
 

imjus4u2nv

Well-Known Member
Joined
Jul 1, 2018
Messages
264
Reaction score
33
Points
28
Location
New York
Model
Adventure
So I gave this a go today - I recieved tools from willy-c (thanks again) including an extra 1 1/4 inch pipe flared on one end. I got the old tube out using a flat head screw driver and hammer - about 10 minutes later and I was seeing a dry core - what a relief. I mocked up the tube and added a 1/4 of an inch (I think this was too much and will redo with 1/8). I cut the pipe with a cutter slowly (did a practice cut first and learned of didnt go slowly the pipe caved in a little and the tool wont fit).
I heated the non flared end of the pipe and cooled in water - I should have heated the pre flared end also, because when I tightened everything the new flare was not perfectly tight to the hull and the old flare split - i think main reason was too much extra pipe and will only cut an extra 1/8th of an inch when new pipe arrives (size 1 1/4" x 3"). Took the new pipe out and cleaned up the 4200. Will post pics of emd product - stay tuned.
 
  • Like
Reactions: Willy-C

Willy-C

Well-Known Member
Joined
Nov 5, 2012
Messages
189
Reaction score
66
Points
28
Age
67
Location
Hooksett, NH
Does the tube need to be heated and cooled? I have read somewhere annealing (heating and allowing tube to cool naturally) helps but quenching the tubing may make the end brittle. I didn’t heat the tubing on my installation but maybe because I used the tubing from McMaster Carr. I may have used a tubing cutter to scribe a faint square line but I did use a hacksaw to cut because of deformation issues.

Edit: I reread your post and didn’t realize it was the preflared side that split.
 
Last edited:

Bayhouse

Well-Known Member
Joined
Oct 21, 2014
Messages
207
Reaction score
28
Points
28
Hey Willy-C, I need to replace those tubes on my 330, would you be willing to let me use the tools after imjus4u2nv?
 

Bayhouse

Well-Known Member
Joined
Oct 21, 2014
Messages
207
Reaction score
28
Points
28
Willy-C or imjus4u2nv, can you let me know what part # you ordered from McMcaster? I know the tubes on my 330 are 1-1/4 x 3-1/2 but i'm not sure about wall thickness. GW customer service gave me the name of the supplier, but their web site is dead.

Thanks!