265x with a bow mount trolling motor?

How did you route your power cable? Is there an easier way to get into the anchor locker than going backwards? The way I see it, I need about 25’. That means I have to go to #2. I don’t want to drill through the anchor locker because I’m afraid I’ll go through the hull!! I appreciate your input
 
How did you route your power cable? Is there an easier way to get into the anchor locker than going backwards? The way I see it, I need about 25’. That means I have to go to #2. I don’t want to drill through the anchor locker because I’m afraid I’ll go through the hull!! I appreciate your input
The cable on the Kraken reached "just " thru the bulkhead to the cabin. (48" i think)
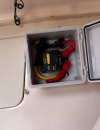
I mounted a weatherproof box in the cabin on that fwd bulkhead.
I ran the 6awg from Refrig space, thru water heater space, into anchor locker, and up to and thru the back of the box.
I mounted a 60A MRCB breaker switch. The Positive power is swicthed. The negatives are on a separate terminal post in the box.
I'll have to post more detail of that. I think I used 5/16 lugs and terminals.

Screenshot 2026-10-06 at 5.59.45 PM.png

So all connections are in the cabin.

You will need a trolling motor plug and socket because you are going to use a quick disconnect mount.
I would assume you put the socket in the anchor locker(safely) and a plug on the 48" cord. Go in thru the hatch to plug in..

You could put the socket on deck but ...salt water.....

 
The cable on the Kraken reached "just " thru the bulkhead to the cabin. (48" i think)
I mounted a weatherproof box in the cabin on that fwd bulkhead.
I ran the 6awg from Refrig space, thru water heater space, into anchor locker, and up to and thru the back of the box.
I mounted a 60A MRCB breaker switch. The Positive power is swicthed. The negatives are on a separate terminal post in the box.
I'll have to post more detail of that. I think I used 5/16 lugs and terminals.

View attachment 40133

So all connections are in the cabin.

You will need a trolling motor plug and socket because you are going to use a quick disconnect mount.
I would assume you put the socket in the anchor locker(safely) and a plug on the 48" cord. Go in thru the hatch to plug in..

You could put the socket on deck but ...salt water.....

Excellent! So you can go through the water heater space to the anchor space. That’s what had me thinking. A lot shorter than from water heater under galley sink via rigging tube to space behind AC panel and then overhead like the nav lights. Long run of big, expensive wire. If your way, I can probably do it with 10’ of #6.
You are correct in that I am putting the receptacle under the anchor rode hatch.
Thanks!!!
 
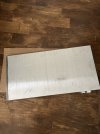
26x13x.75 6061-T651 is here. Gonna dry fit, drill some holes and have it powder coated white.
 

Attachments

  • IMG_7890.jpeg
    IMG_7890.jpeg
    2 MB · Views: 7
How did you handle the cut rail? I found threads with the hinge side. Not much for the other side though. Thanks
 
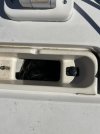
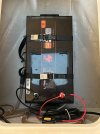
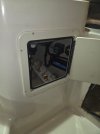
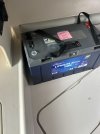
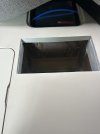
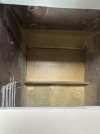
Electrical potion of the project is complete. Receptacle is in the anchor hatch where it will stay dry. I don’t love that it is flat, but I didn’t want the 3” protruding to where the chain and rode could grab it when I use the anchor/windlass. Battery in the water heater location.

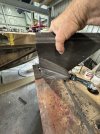
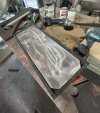
Mounting aluminum plate has been grinded to remove the corners and the edges knocked down. I’ll mock that up on the pulpit with the motor next. Forgot to order an aluminum backing plate so that is on the list too. Both pieces will then be sent for powder coating to a guy around the corner from me. Coming together albeit at a snails pace. Still gotta figure out the cut bow rail. There are parts but they are in Canada and the tariffs are forcing me to buy $200 worth of stuff. I don’t need $200 worth of stuff!
 

Attachments

  • IMG_7892.jpeg
    IMG_7892.jpeg
    2.2 MB · Views: 10
  • IMG_7893.jpeg
    IMG_7893.jpeg
    1.6 MB · Views: 10
Electrical potion of the project is complete. Receptacle is in the anchor hatch where it will stay dry. I don’t love that it is flat, but I didn’t want the 3” protruding to where the chain and rode could grab it when I use the anchor/windlass. Battery in the water heater location.

Mounting aluminum plate has been grinded to remove the corners and the edges knocked down. I’ll mock that up on the pulpit with the motor next. Forgot to order an aluminum backing plate so that is on the list too. Both pieces will then be sent for powder coating to a guy around the corner from me. Coming together albeit at a snails pace. Still gotta figure out the cut bow rail. There are parts but they are in Canada and the tariffs are forcing me to buy $200 worth of stuff. I don’t need $200 worth of stuff!
Thoughts...
That breaker switch in the hatch, under the fwd cushion of the bunk(covered with rods), is going to be a pain.

Not thrilled with the outlet position but it is accessible.

Decide if opening and closing a foot of rail on the pulpit helps you in any way and is it worth the trouble.
 
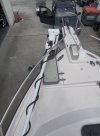
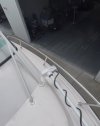
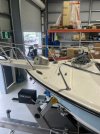
This is my setup. I’m running a 90-inch Kraken as well. I’ve made an external mounting base using 10mm aluminium plate, which is about to be fibreglassed over, faired smooth and painted to blend in with the bow.


The mounting base has four studs that pass through the foredeck and are secured from underneath through the anchor locker. It’ll also be bedded down with marine sealant, making the whole assembly extremely rigid.


I’m using a swivel mount with the Garmin quick-release system, allowing the motor to be stowed lengthways along the gunwale, then swung forward and rotated into position for deployment. The quick-release also means I can remove the Kraken completely when needed.


I’ve modified the bow rail to provide clearance for the motor.


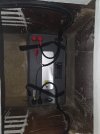
The battery is mounted forward of the fridge, and we’ve also cut in a dedicated access hatch beneath the forward berth mattress. This means I can simply lift the mattress and access the battery and terminals for inspection or maintenance without having to pull anything apart.


The charger, circuit breakers, isolation switches and control gear are all installed beneath the sink, keeping everything neat and easily accessible.


Once it’s all finished and bolted into place, I’ll send through some videos showing how the complete setup works.
 

Attachments

  • IMG_0821.jpeg
    IMG_0821.jpeg
    220.6 KB · Views: 14
  • IMG_0820.jpeg
    IMG_0820.jpeg
    158.4 KB · Views: 14
  • Attachment.jpeg
    Attachment.jpeg
    59 KB · Views: 14
  • 8ed8d5b3-1390-4679-9eca-db0089137b9c.jpeg
    8ed8d5b3-1390-4679-9eca-db0089137b9c.jpeg
    230.1 KB · Views: 13
  • Attachment.jpeg
    Attachment.jpeg
    61.7 KB · Views: 14
  • 3ed84583-611f-432d-a128-3b61f9572483.jpeg
    3ed84583-611f-432d-a128-3b61f9572483.jpeg
    111.7 KB · Views: 13
  • IMG_3319.jpeg
    IMG_3319.jpeg
    1.8 MB · Views: 14
  • IMG_0822.jpeg
    IMG_0822.jpeg
    613.7 KB · Views: 13
  • Like
Reactions: SkunkBoat
Thats some nice engineering!:)

So you still have refrigerator in place? and fit a battery sideways behind it. I know my battery would not fit sideways. What size battery is that?


You are going to love the Kraken. Changed my life!!! I have not anchored all season!

I suppose you moved nav lights to the hardtop? I've been kicking that side project around for a few years.
 
  • Like
Reactions: Aussie_Boss
Very nice work, boss! The bow rail came out really nice.

The plate looks like it sits in a fiberglass form? I'm sure that adds to the rigidity of the plate. Plus, you don't have a whole lot of unsupported plate, either, with the positioning.

Quick suggestion... don't worry about fairing it totally smooth - use non-skid paint, instead - hides and "not-so-smooth" fairing and also blends in better with the deck. Just a thought!
 
  • Like
Reactions: Aussie_Boss
The 100Ah 36V lithium battery sits behind the fridge. There was no way to physically slide it into position, so we had to lower it in from above and fabricate a battery tray at the back of the fridge cavity.


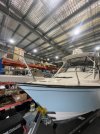
The 265 was pretty much rebuilt from a bare fibreglass shell, with the transom, stringers and knees all rebuilt to accommodate the new engines. I made a lot of changes and added quite a few things along the way, one of which was relocating the navigation lights to the hardtop. The trolling motor mount is receiving the same painted finish as the rest of the boat, then it will be non skidded just like you suggested. All the upper surfaces of the boat, including the hardtop, already have the same non skid finish.
 

Attachments

  • IMG_3361.jpeg
    IMG_3361.jpeg
    1.6 MB · Views: 8
  • IMG_3359.jpeg
    IMG_3359.jpeg
    1.4 MB · Views: 8
  • IMG_3360.jpeg
    IMG_3360.jpeg
    1.6 MB · Views: 8
The 265 was pretty much rebuilt from a bare fibreglass shell, with the transom, stringers and knees all rebuilt to accommodate the new engines. I made a lot of changes and added quite a few things along the way, one of which was relocating the navigation lights to the hardtop. The trolling motor mount is receiving the same painted finish as the rest of the boat, then it will be non skidded just like you suggested. All the upper surfaces of the boat, including the hardtop, already have the same non skid finish.
Ah, gotcha - the boat doesn't have the original gelcoat. Understood. Good deal!
 
The 100Ah 36V lithium battery sits behind the fridge. There was no way to physically slide it into position, so we had to lower it in from above and fabricate a battery tray at the back of the fridge cavity.


The 265 was pretty much rebuilt from a bare fibreglass shell, with the transom, stringers and knees all rebuilt to accommodate the new engines. I made a lot of changes and added quite a few things along the way, one of which was relocating the navigation lights to the hardtop. The trolling motor mount is receiving the same painted finish as the rest of the boat, then it will be non skidded just like you suggested. All the upper surfaces of the boat, including the hardtop, already have the same non skid finish.
Is that an 8D size? I could not turn mine that way. looks like you sealed up the vent holes for the refrigerator? Won't it get hot in there?
 
Is that an 8D size? I could not turn mine that way. looks like you sealed up the vent holes for the refrigerator? Won't it get hot in there?
No, the vent holes are still intact as per factory.

I’m running the BLA Performance Series 36V 100Ah lithium battery. I’d expect around 4–6 hours of continuous use at moderate power.